Online Task
Manage the runtime status, scheduling, and other aspects of approved tasks. Tasks are divided into Streaming Tasks and Batch Tasks. Batch Tasks support scheduling configuration (the streaming/batch task type is specified by the user when submitting the approval task).
Streaming Tasks
Control the start/stop of streaming tasks and view task details and logs here.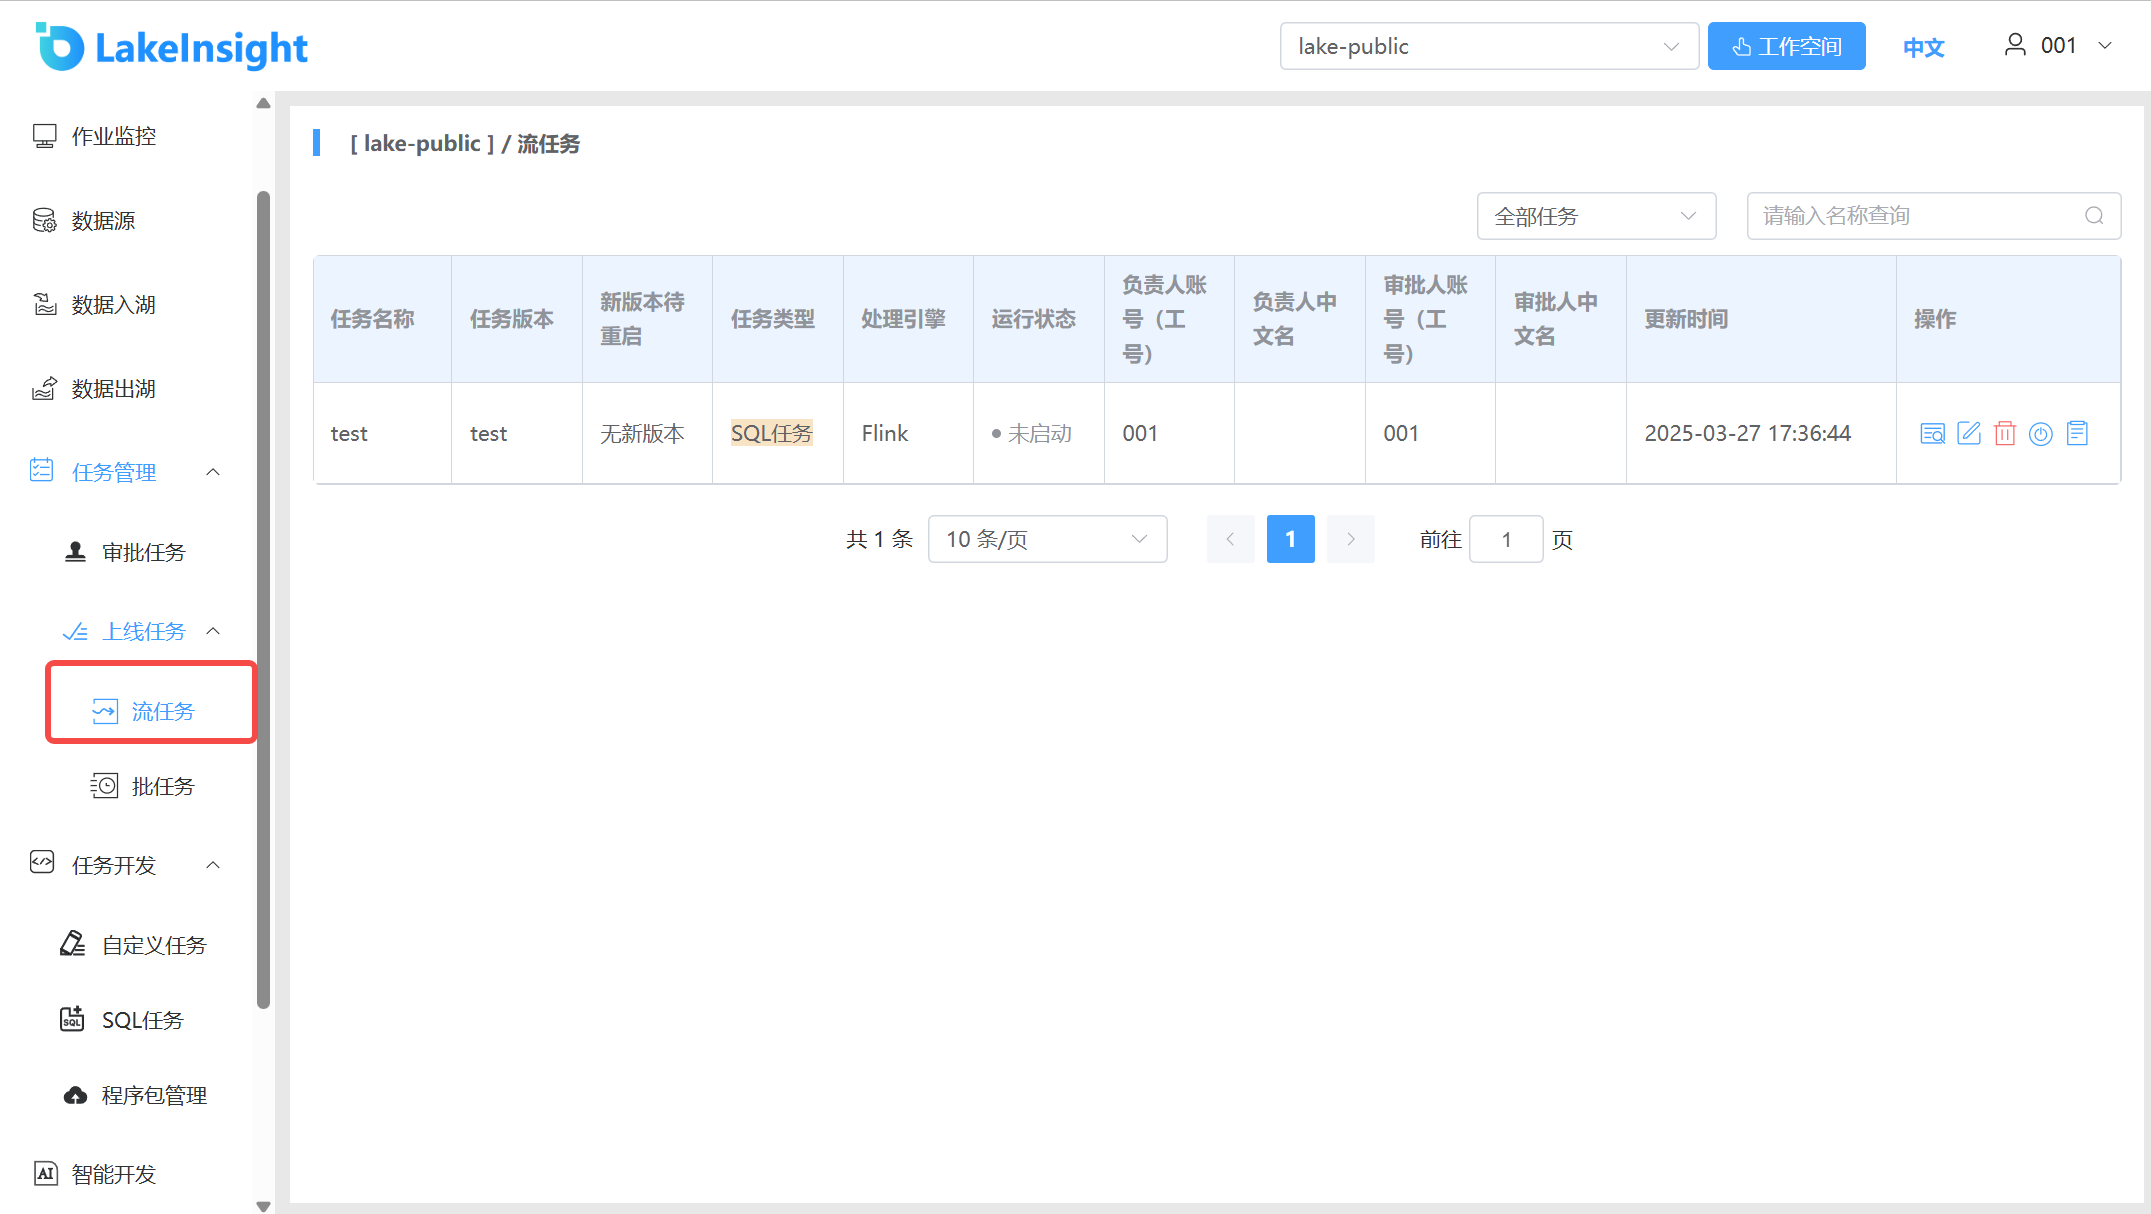
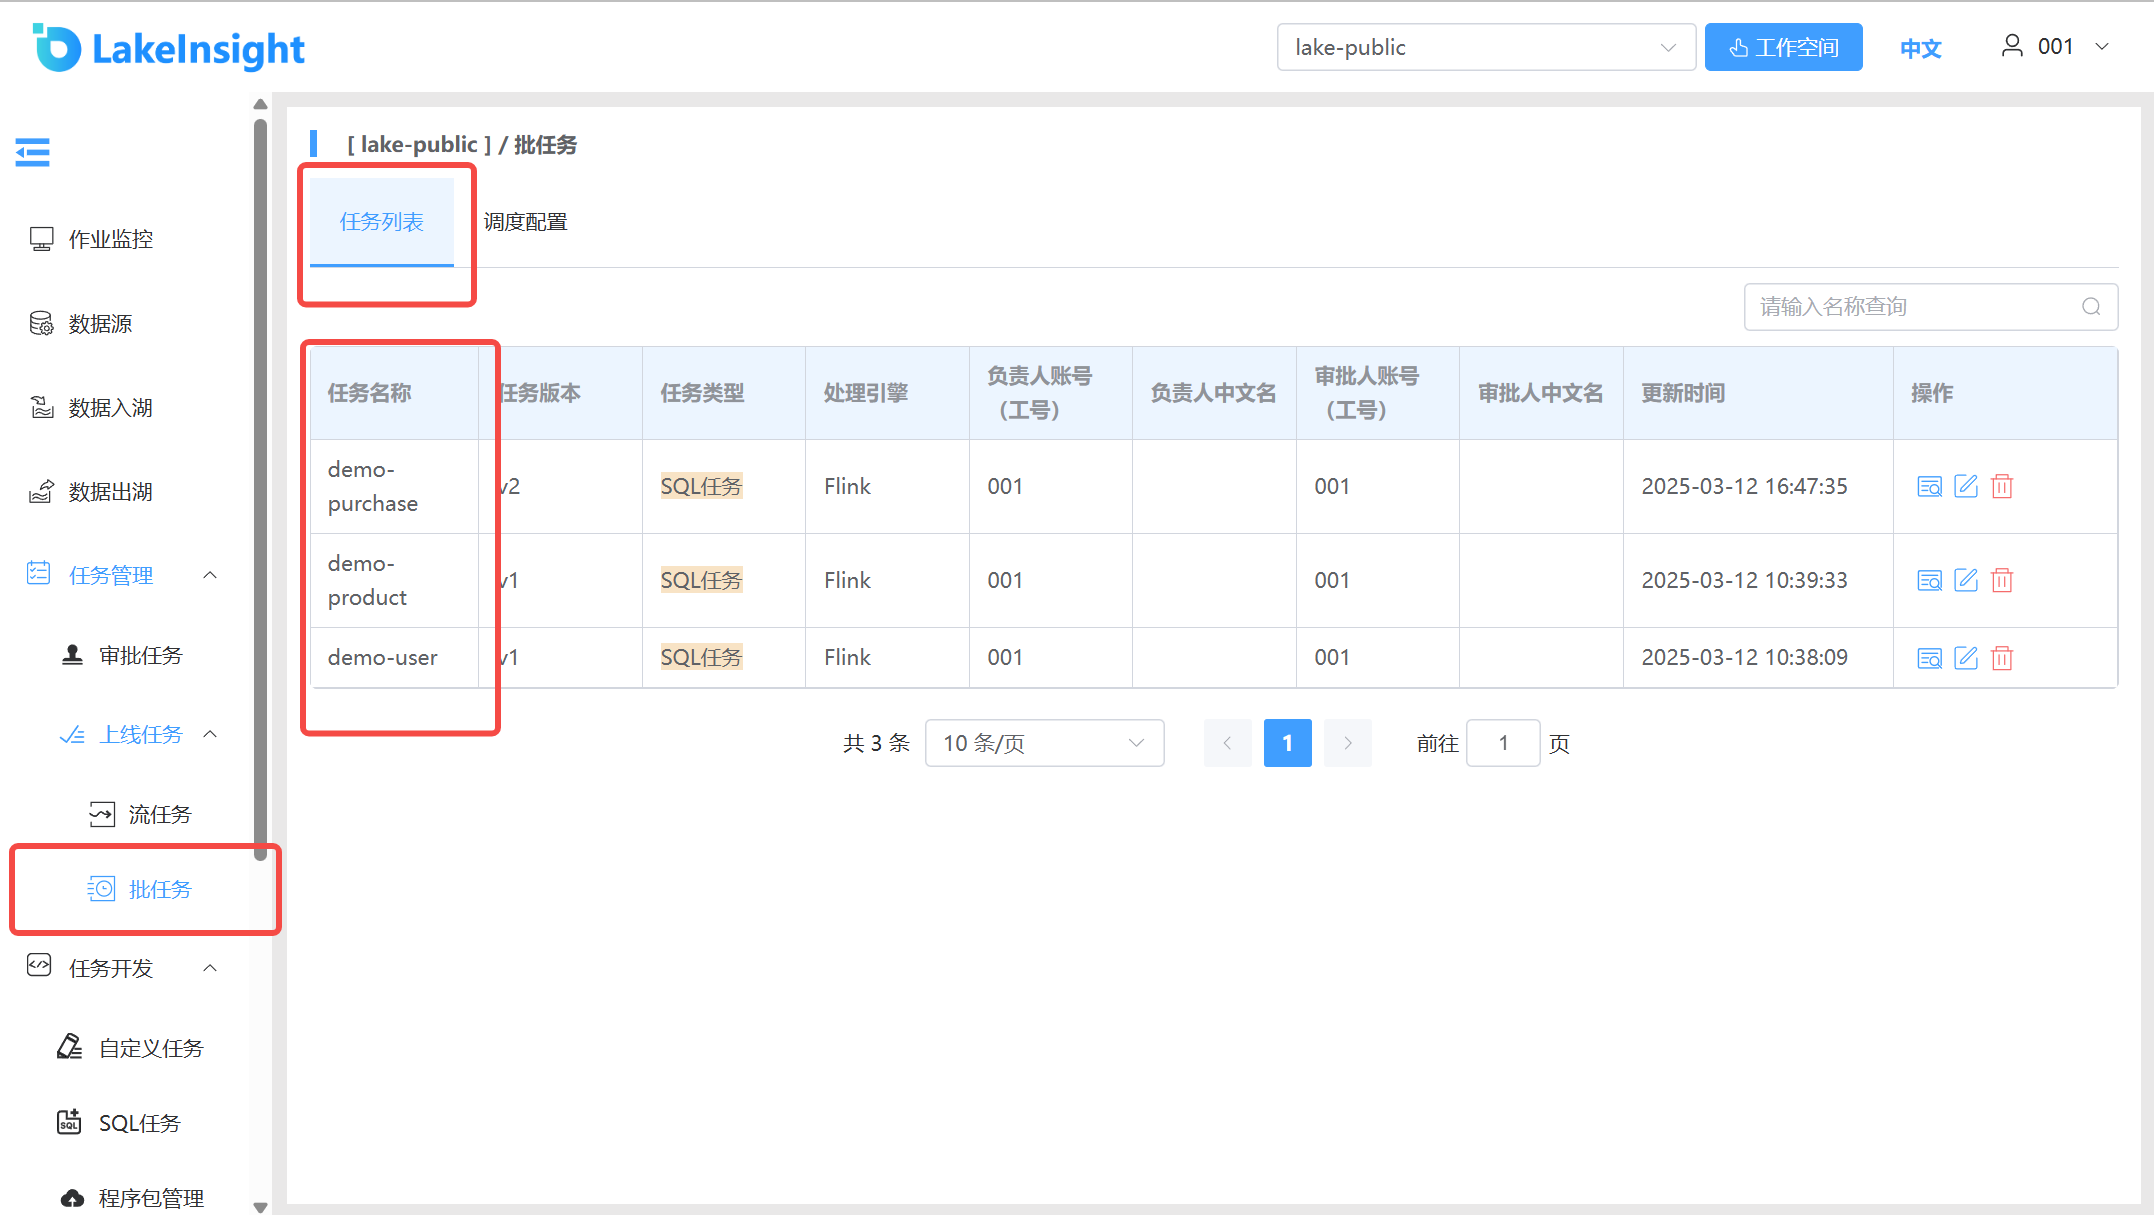
Batch Tasks
Batch tasks have two sub-pages: Task List and Schedule Configuration. The Task List is primarily used to view task configuration details.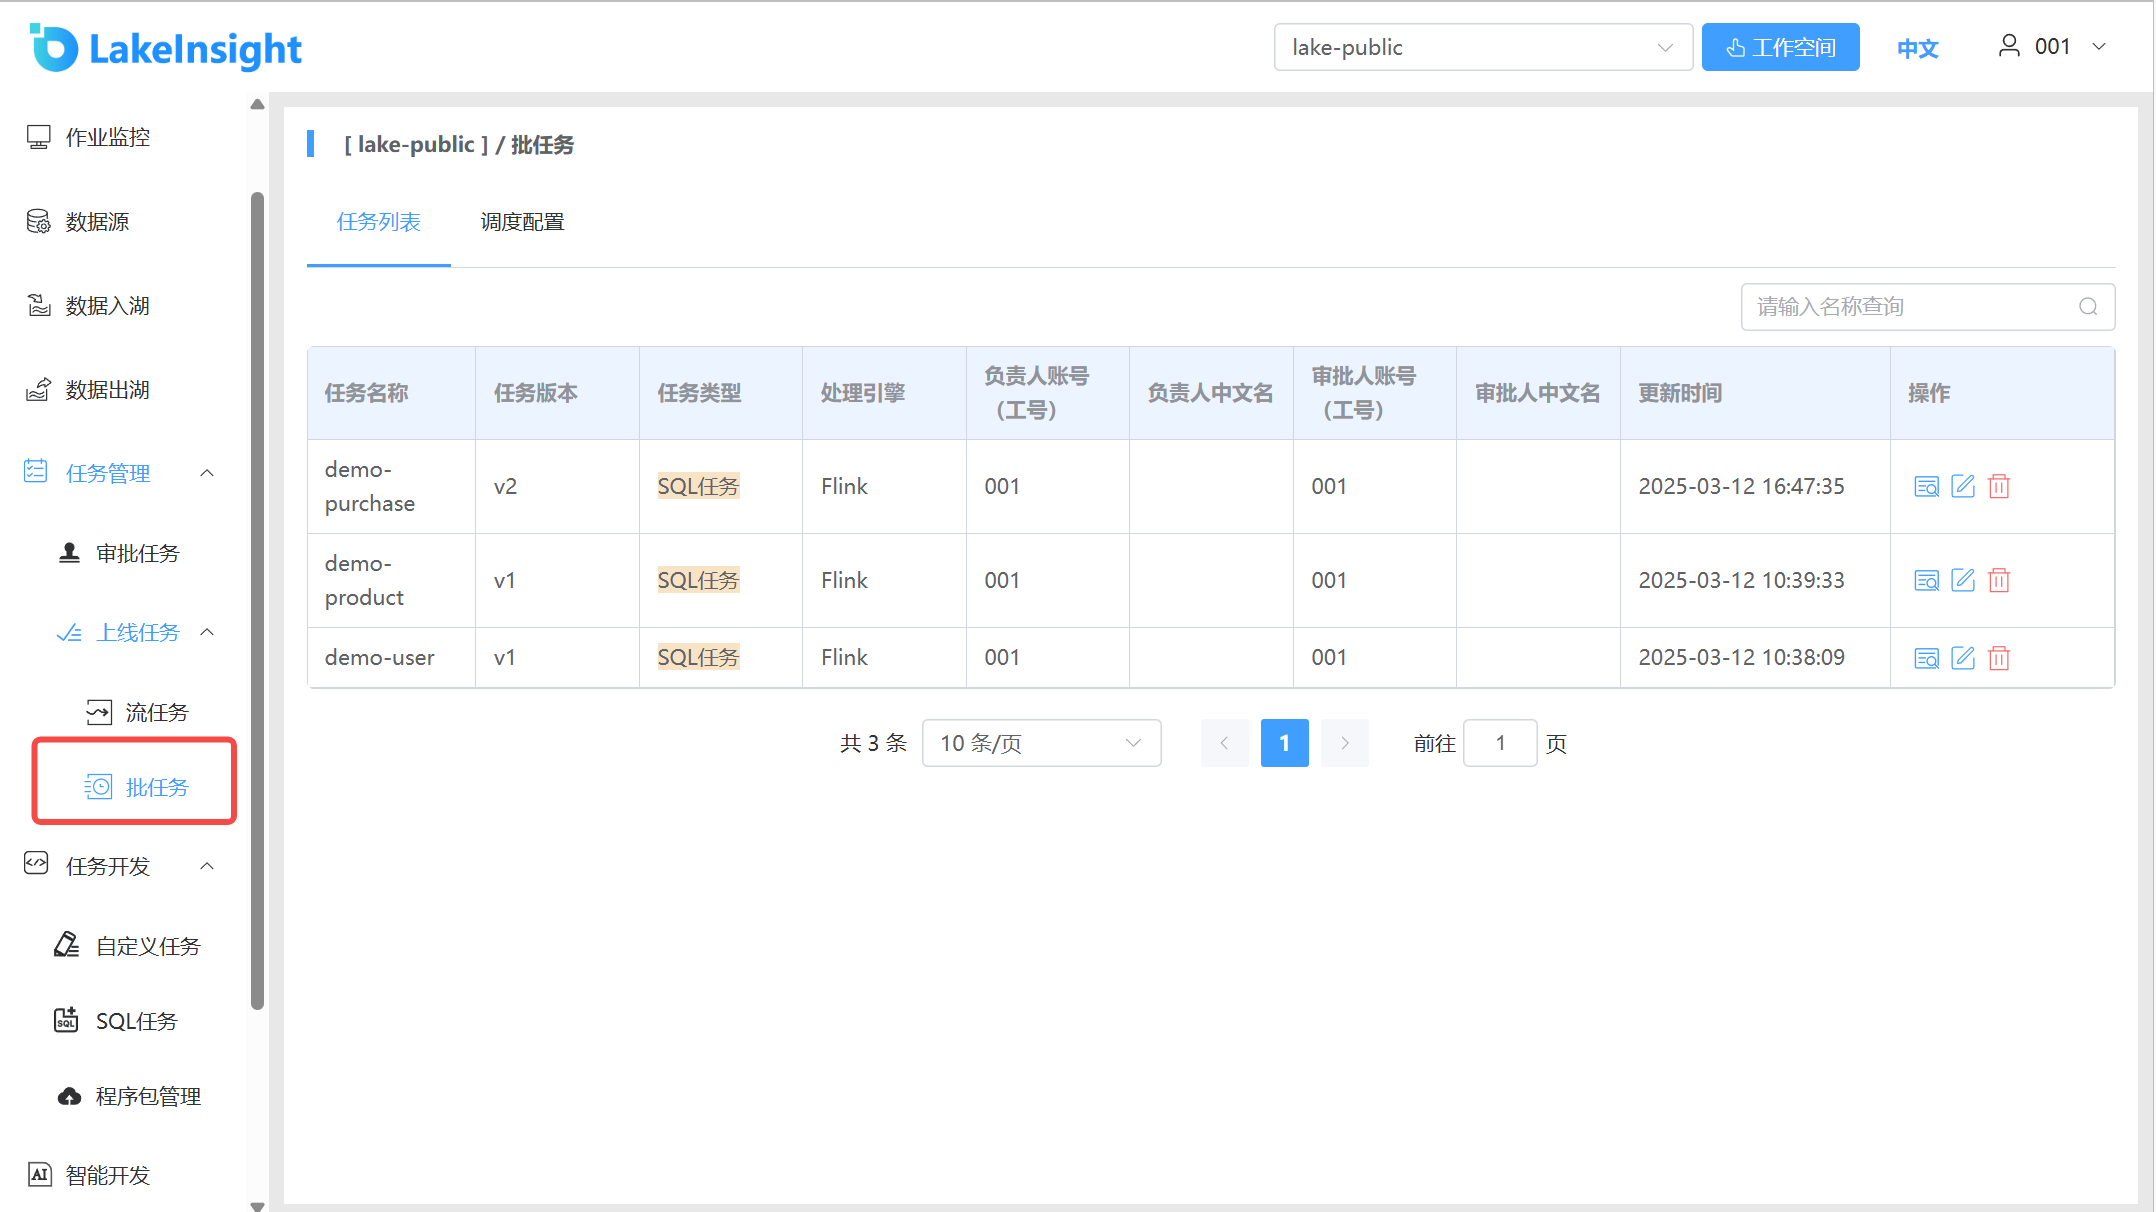
The Schedule Configuration page allows you to start/stop batch tasks, view logs, and configure scheduling times.
Schedule Management
Workflow Definition
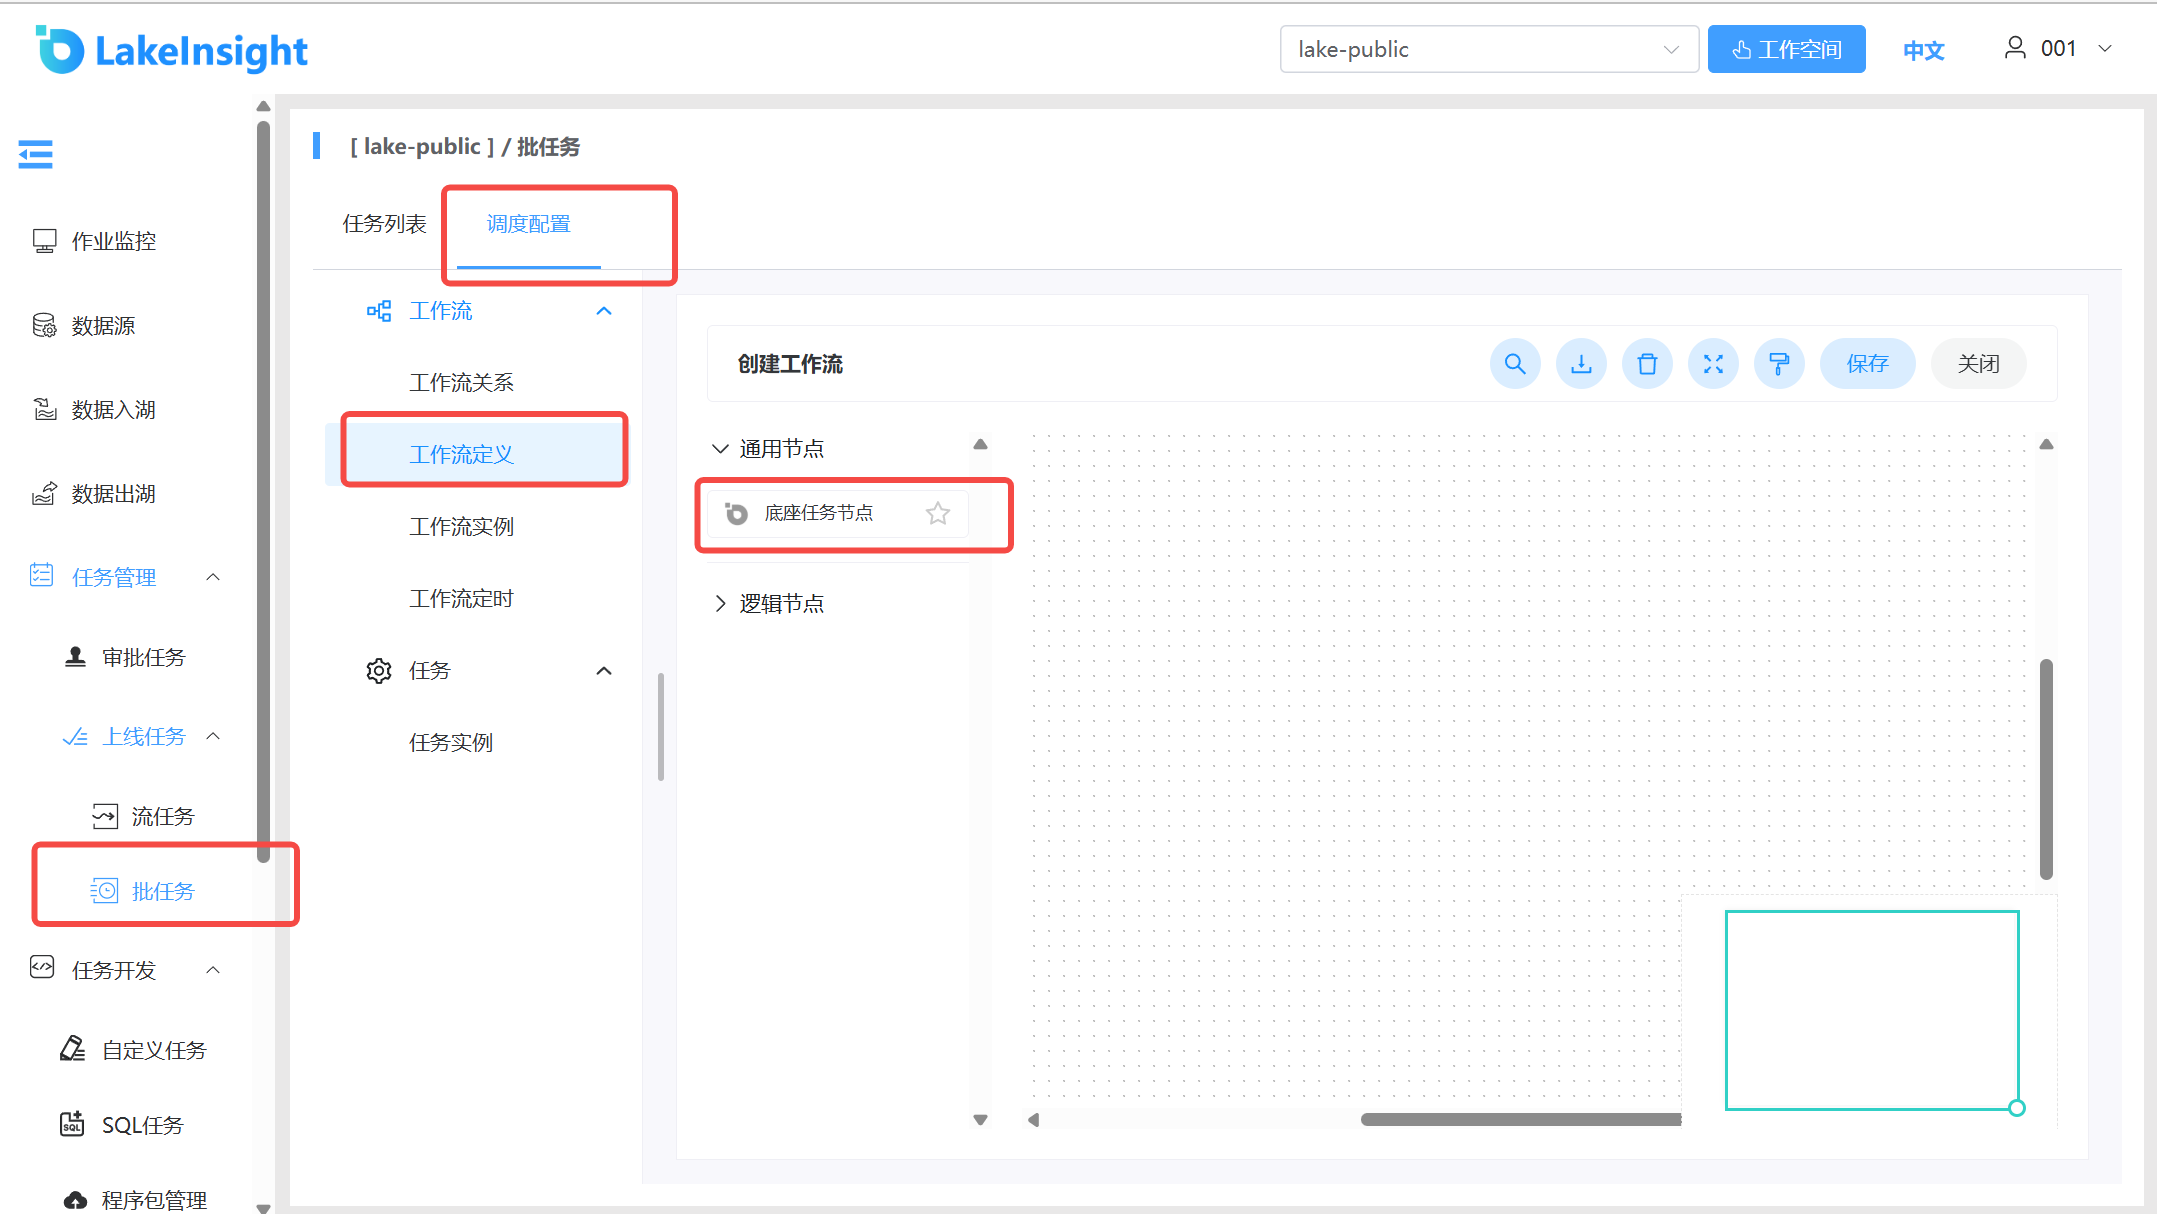
Create Workflow Definition
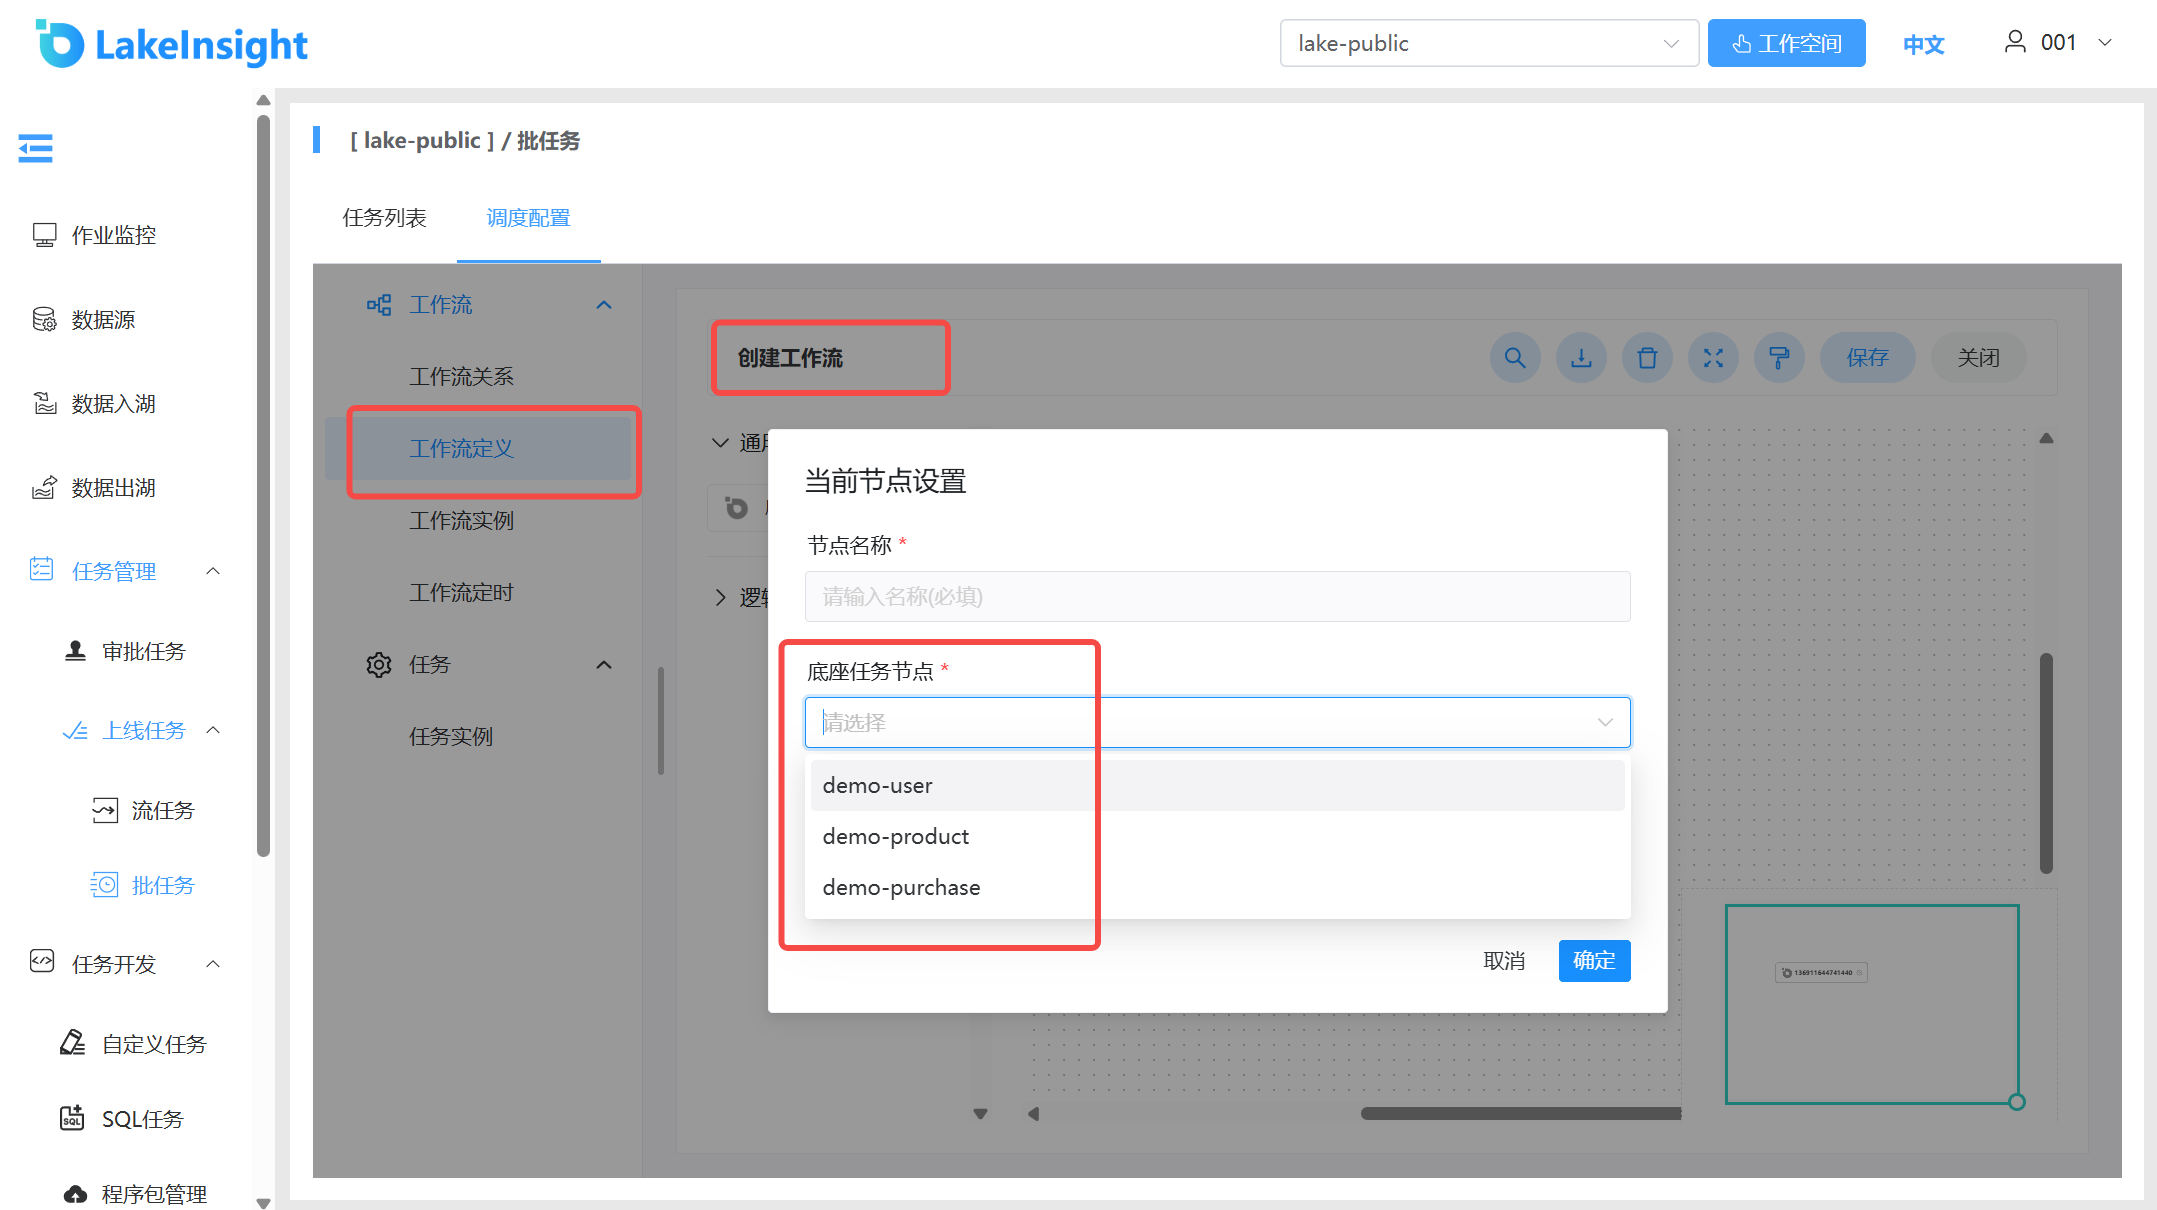
- Click Workflow Definition to enter the workflow definition page, then click Create Workflow to enter the workflow DAG editing page:
- Drag from the left toolbar to the right canvas, e.g., add a Task Node:
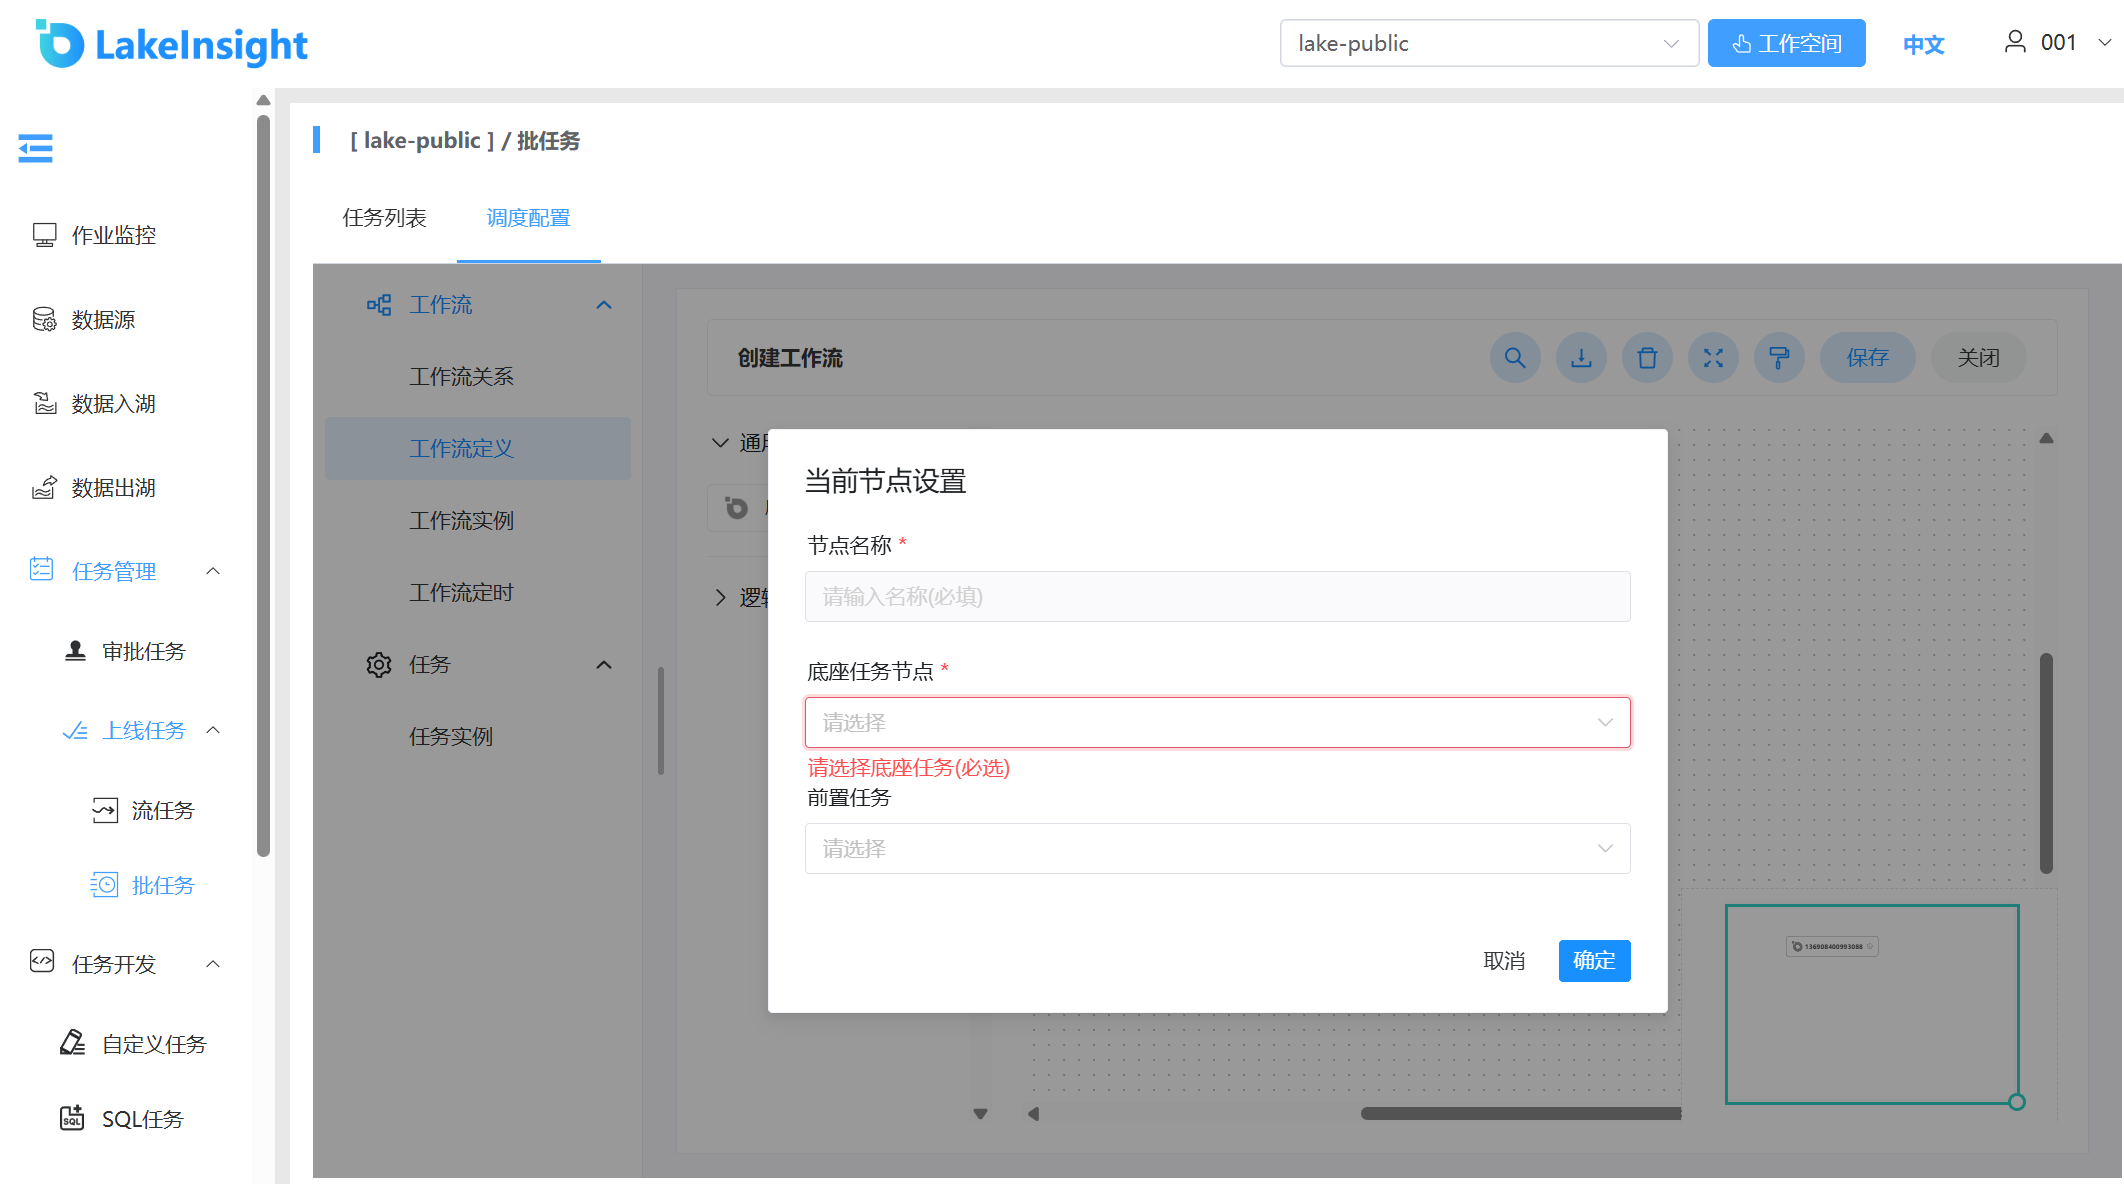
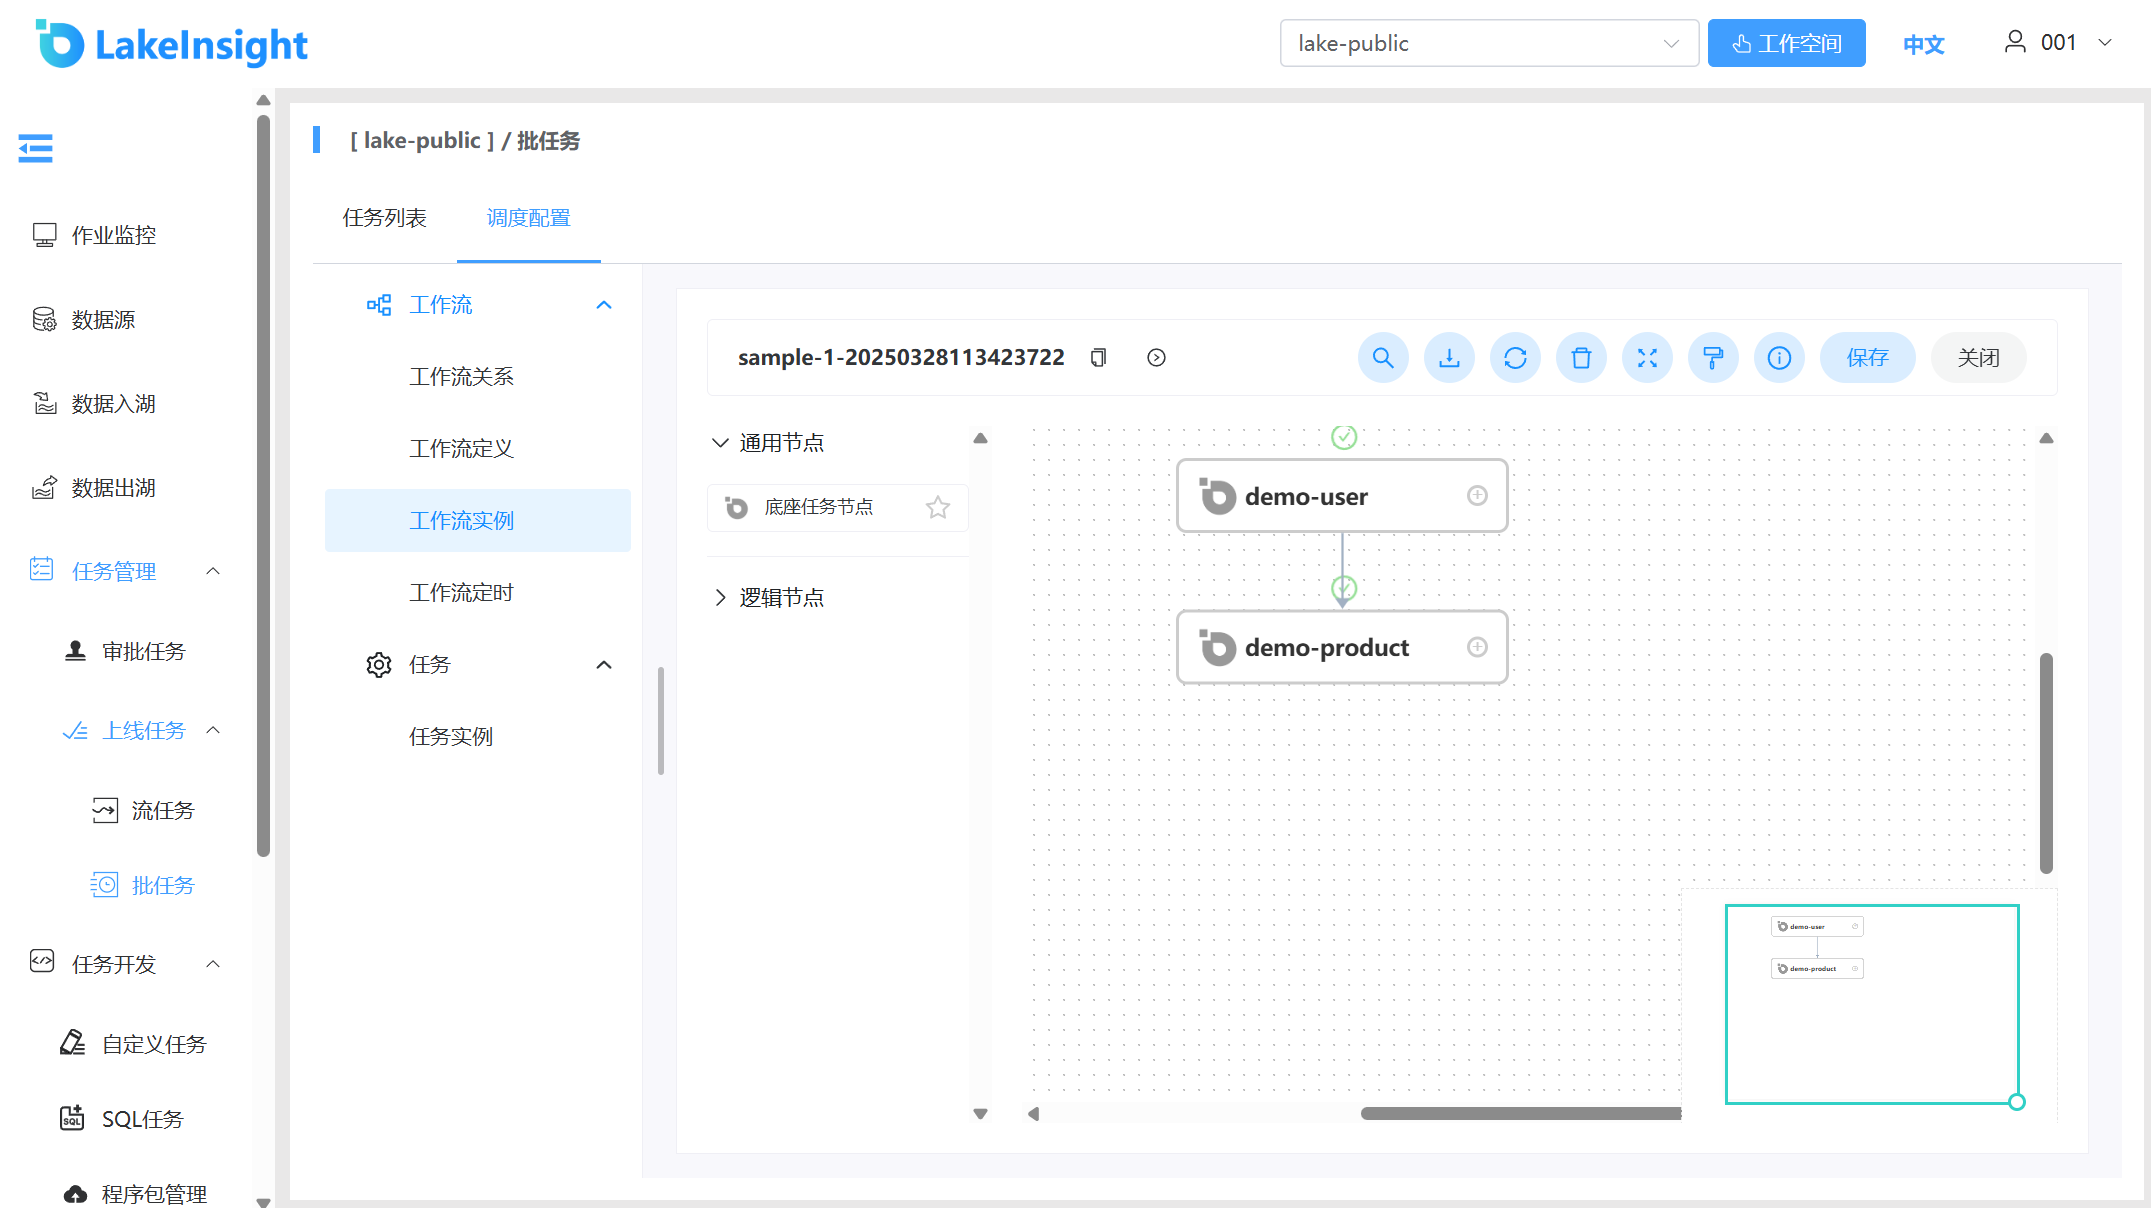
- Configure task dependencies: click the plus sign on the right side of an added node to connect nodes (or add predecessor nodes when creating a node for the same effect). As shown below, the
demo-productnode depends on the successful execution of thedemo-usernode. Ifdemo-usersucceeds,demo-productexecutes; ifdemo-userfails,demo-productis skipped: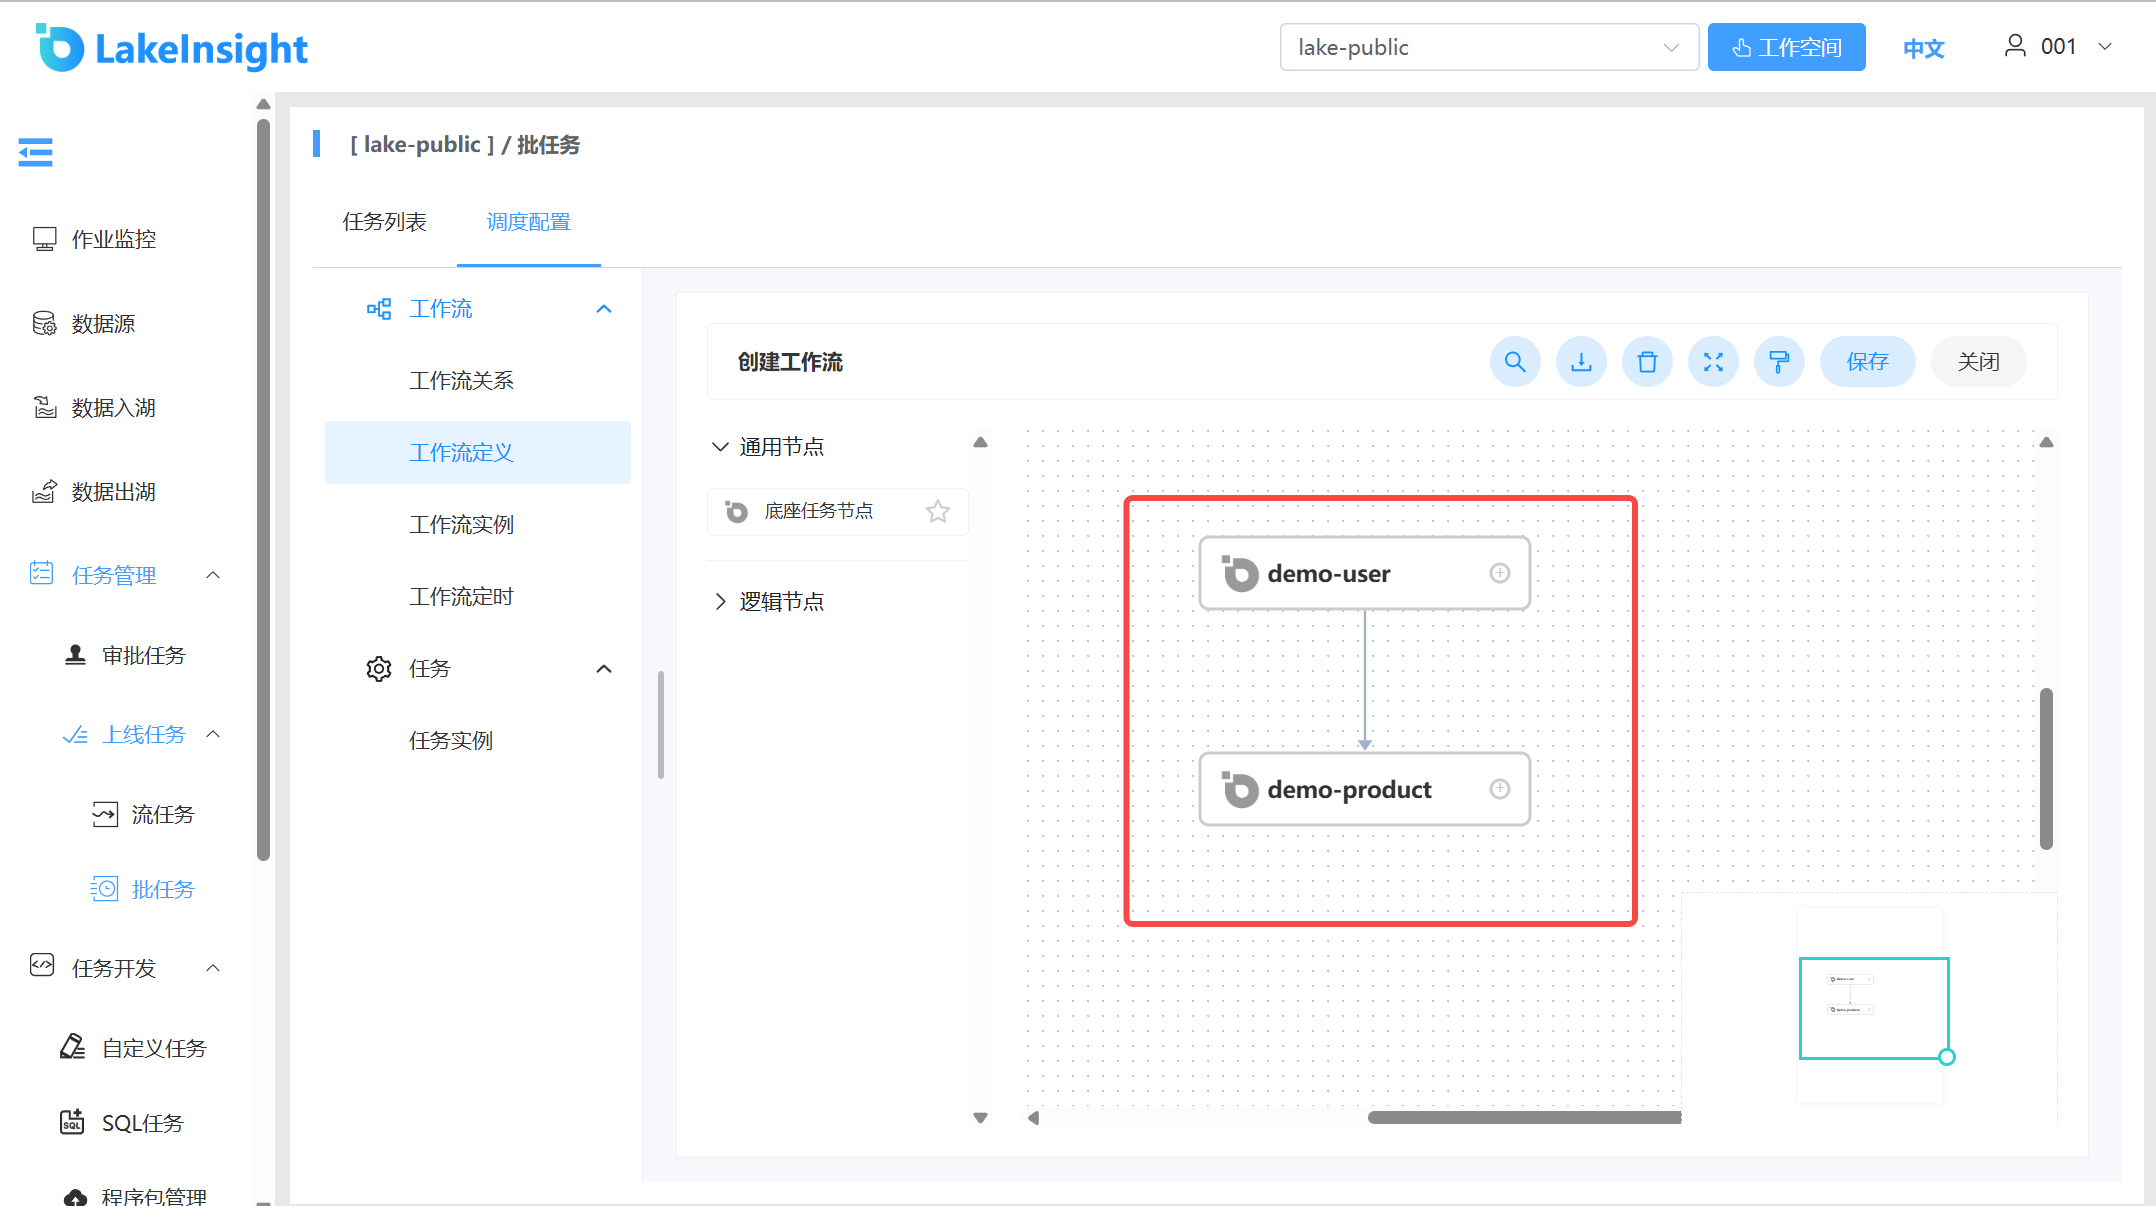
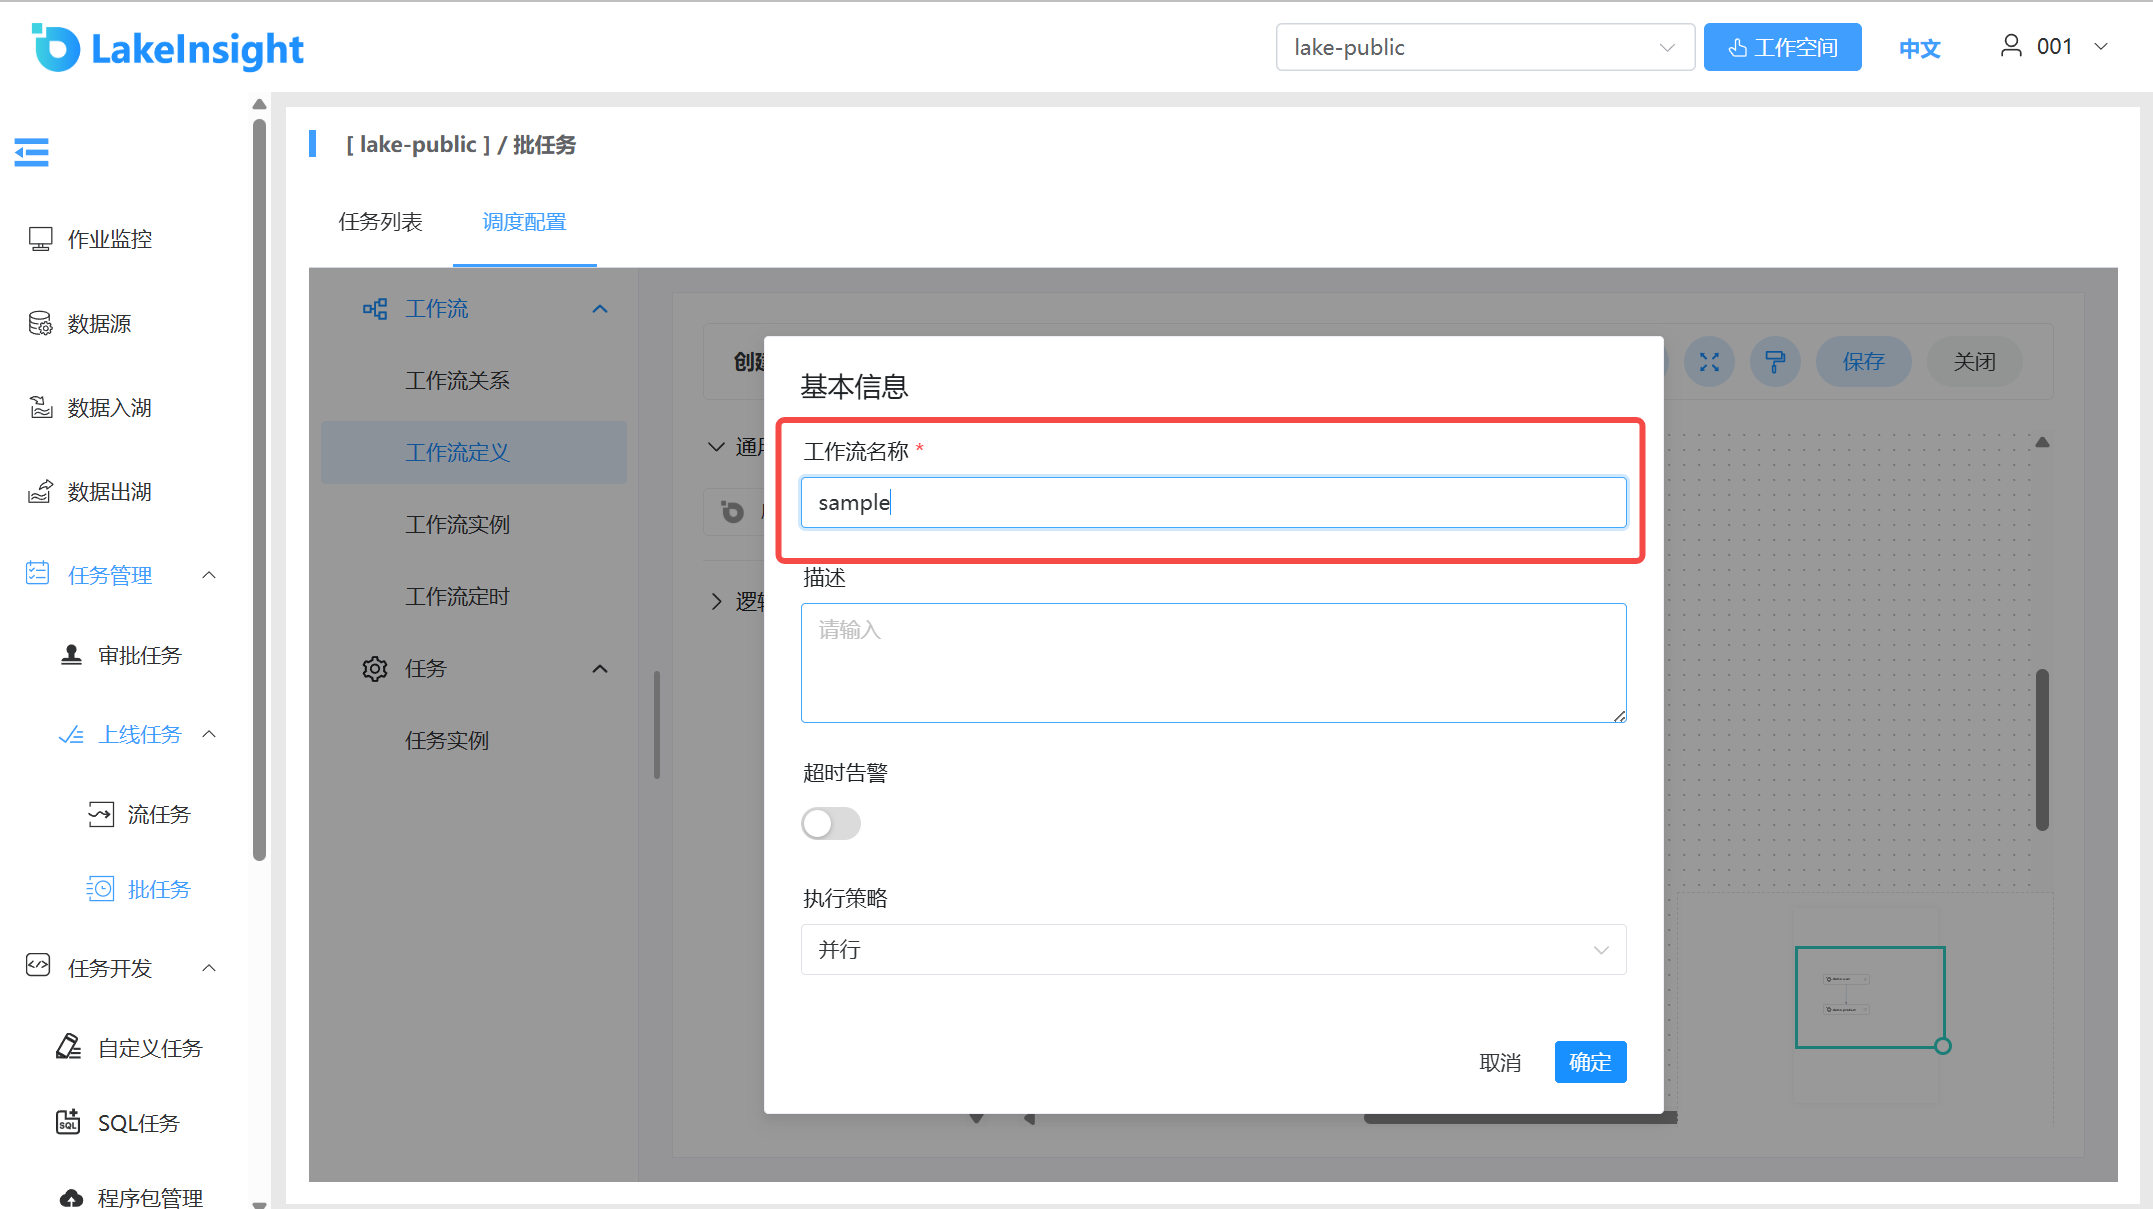
- Save the workflow: click Save, enter the workflow name, and the workflow is successfully created:
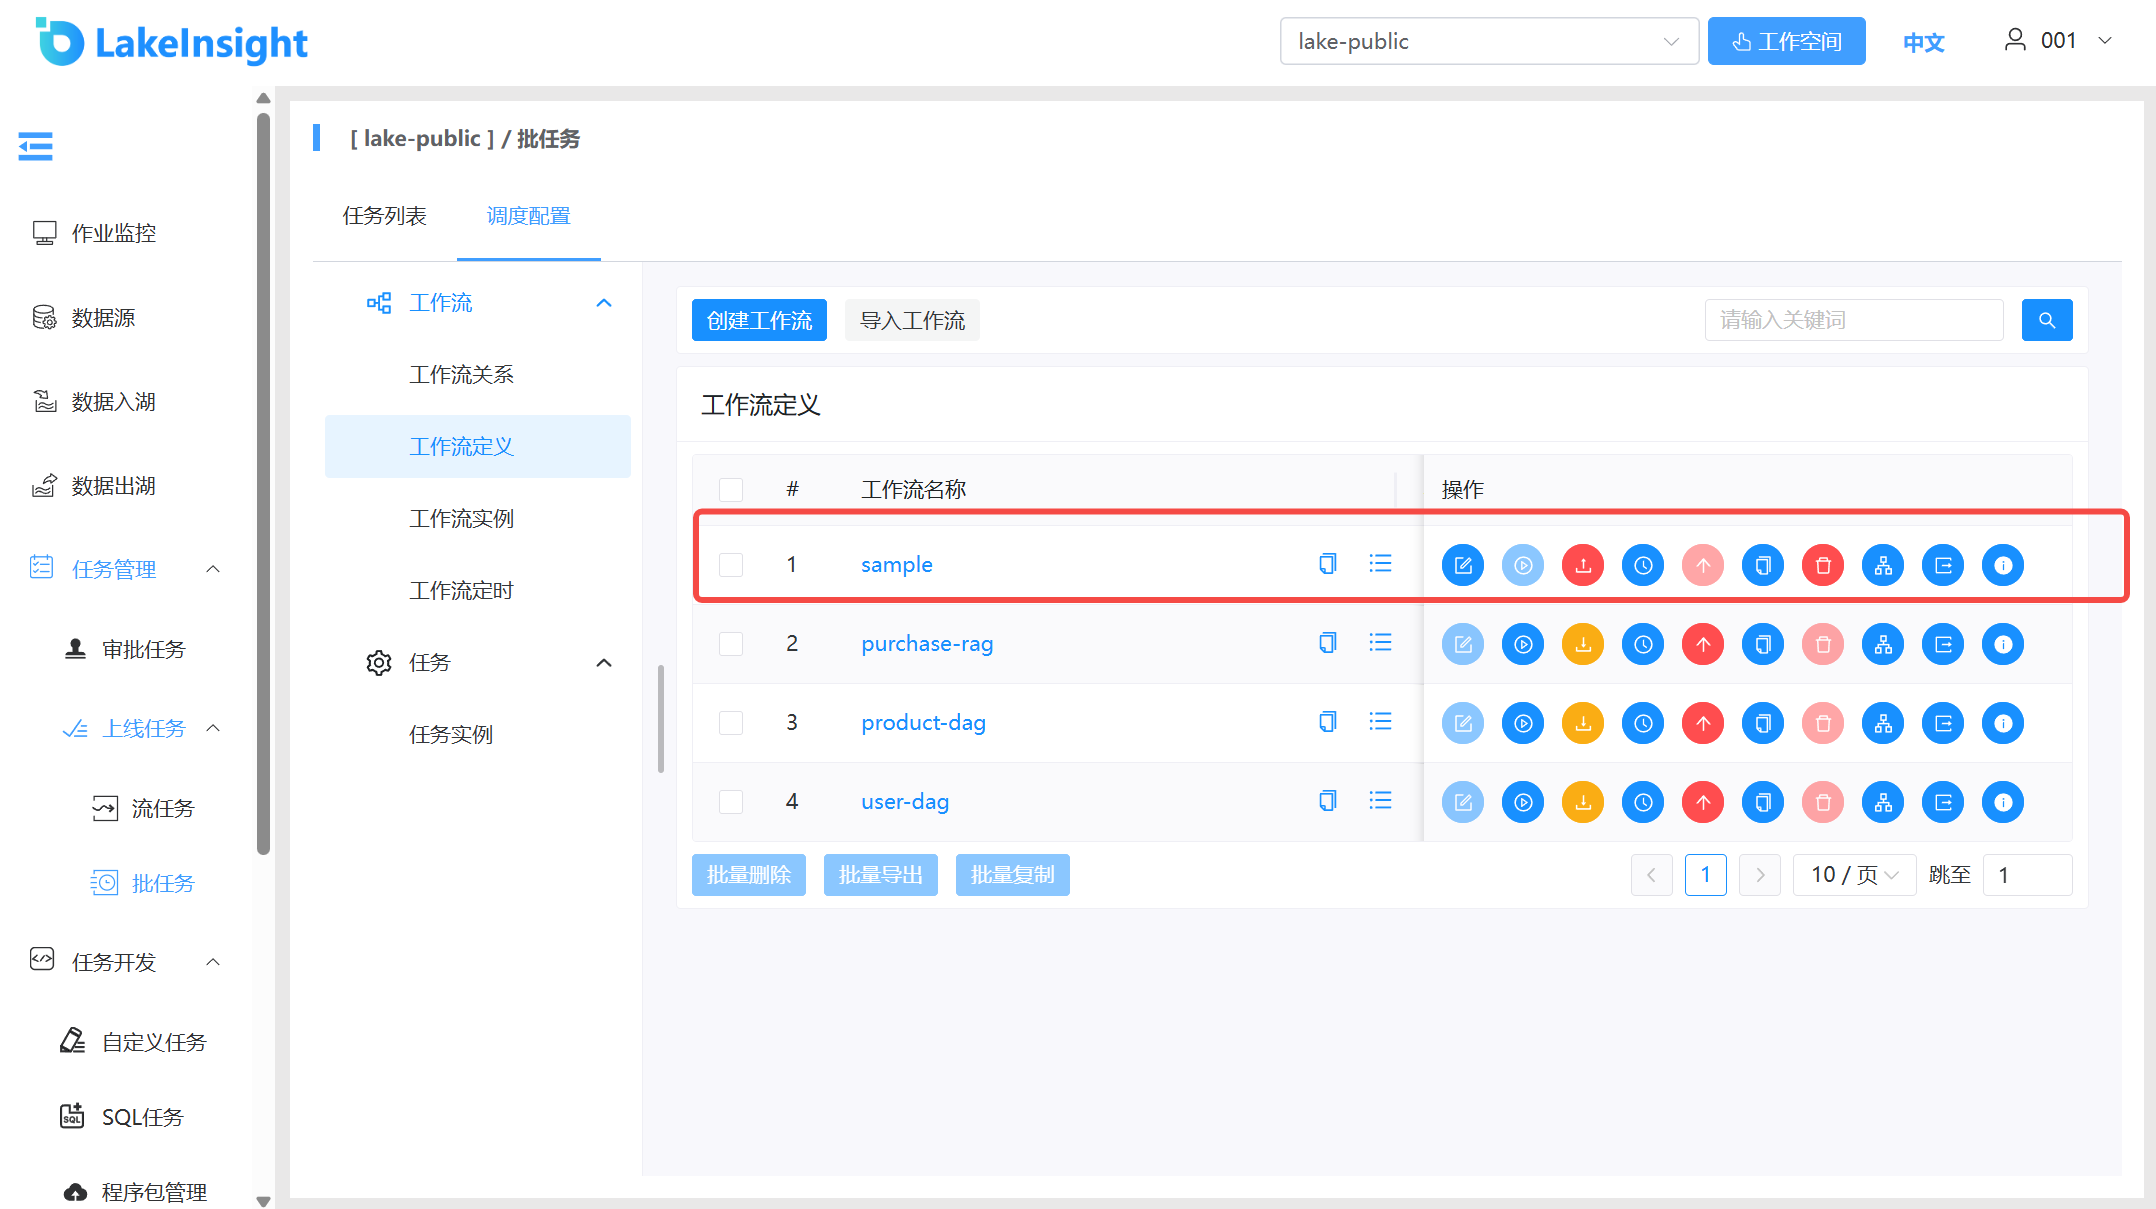
Workflow Definition Operations: Click Workflow Definition to enter the workflow definition page:
- Edit: Only "offline" workflow definitions can be edited. DAG editing is the same as creating a workflow definition.
- Online: When the workflow status is "offline", bring it online. Only "online" workflows can run but cannot be edited.
- Offline: When the workflow status is "online", take it offline. Offline workflows can be edited but cannot run.
- Run: Only online workflows can run. See Running Workflows for operational steps.
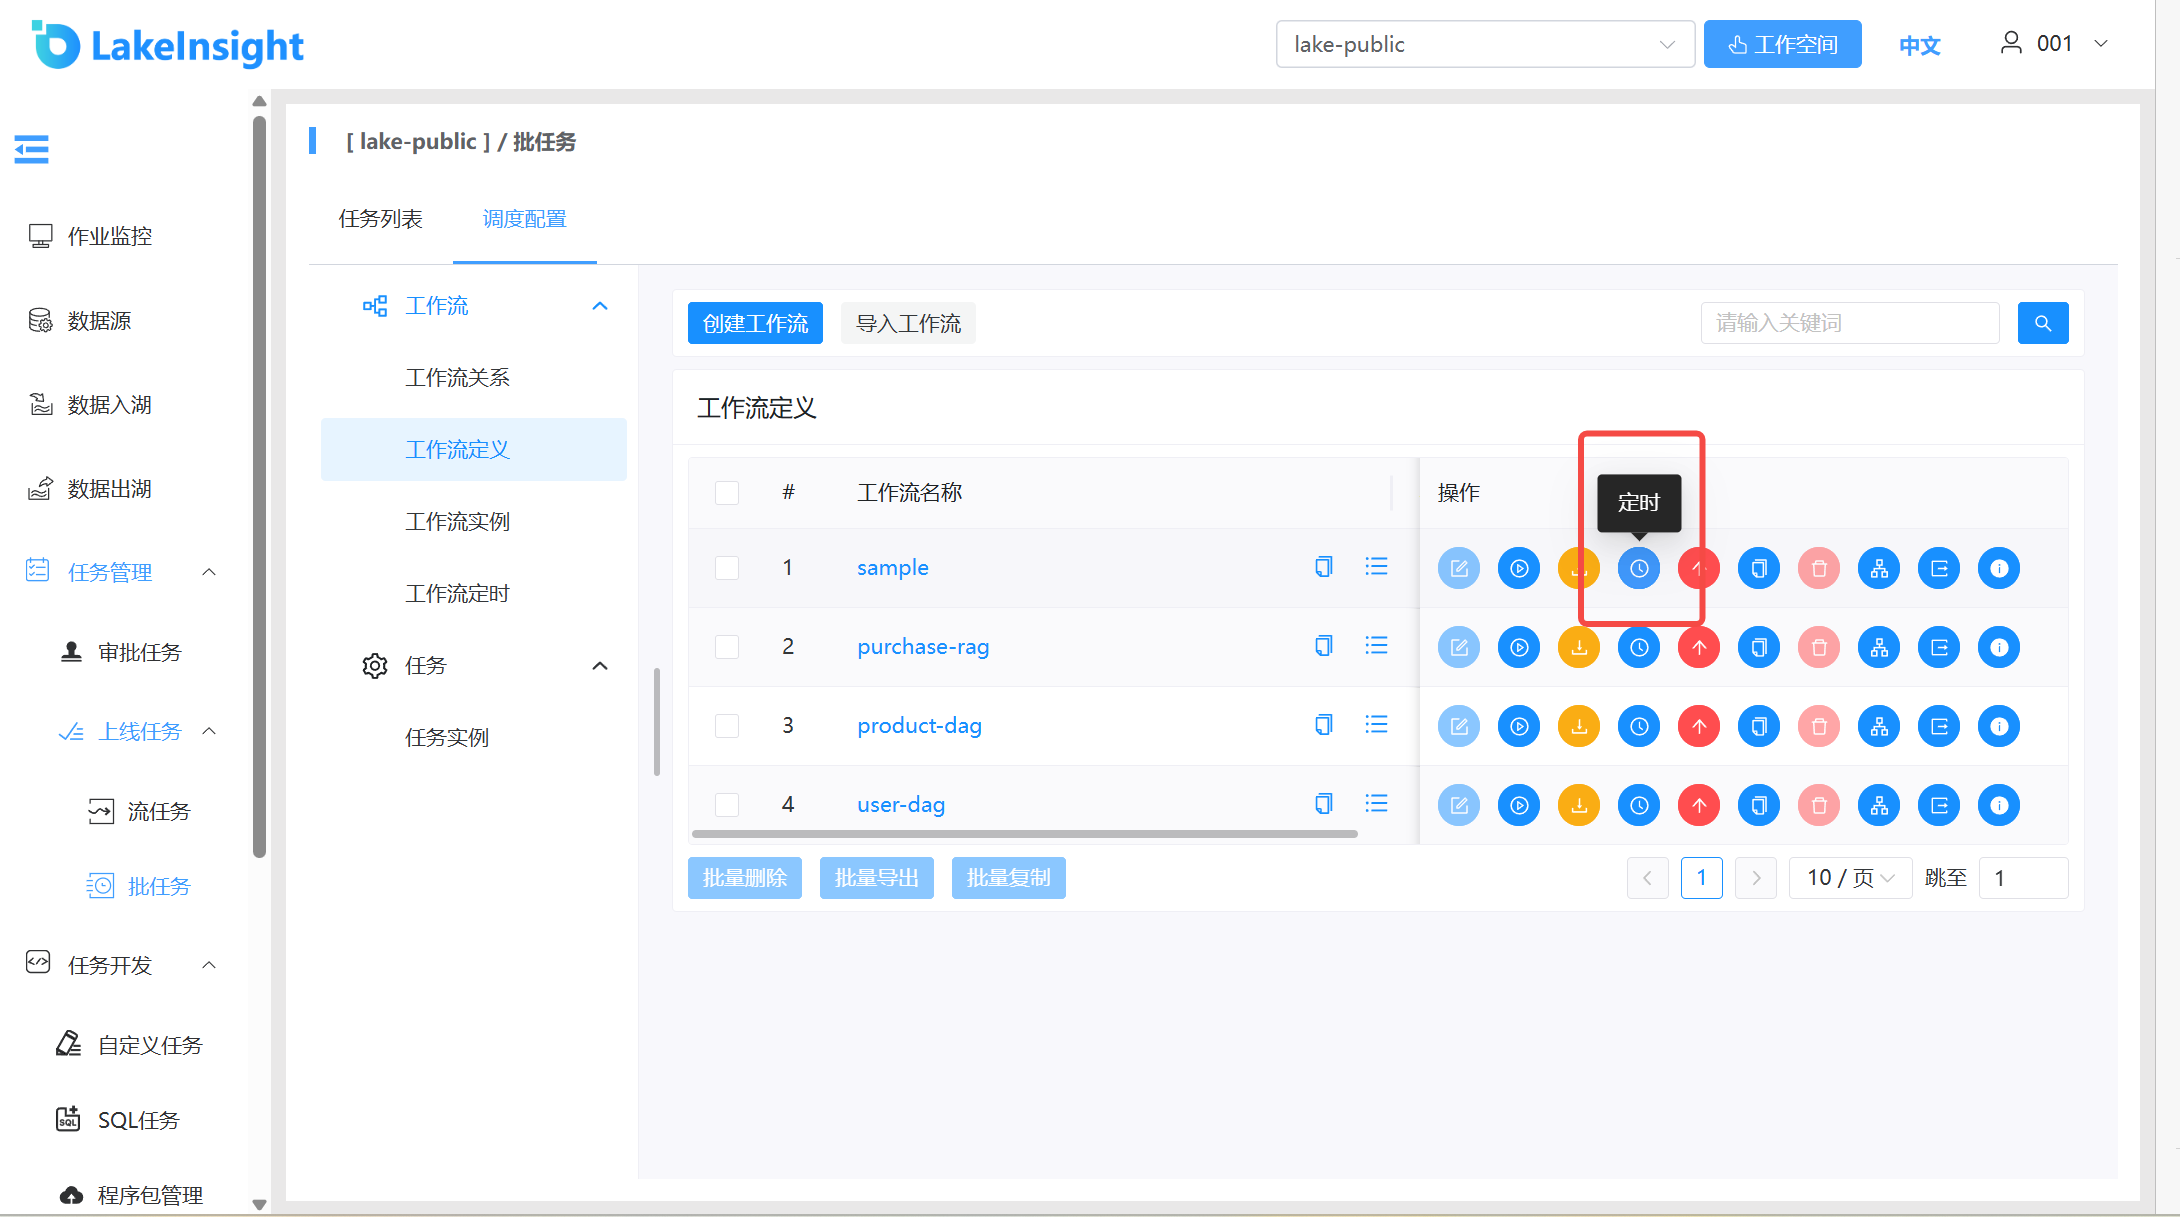
- Schedule: Only online workflows can set schedules, and the system automatically triggers workflow execution on schedule. After creating a schedule, its status is "offline" — it must be brought online to take effect. See Workflow Scheduling for operational steps.
- Schedule Online: Bring schedule online. Only available after schedule creation when the workflow status is "online".
- Schedule Offline: Take schedule offline.
- Delete: Delete the workflow definition.
- Download: Download the workflow definition locally.
- Copy: Duplicate the current workflow within the same project, with the new workflow name suffixed with
copy<date>. - Version Info: View workflow version information and switch between versions in the version list.
- Tree View: Display task node types and statuses in a tree structure.
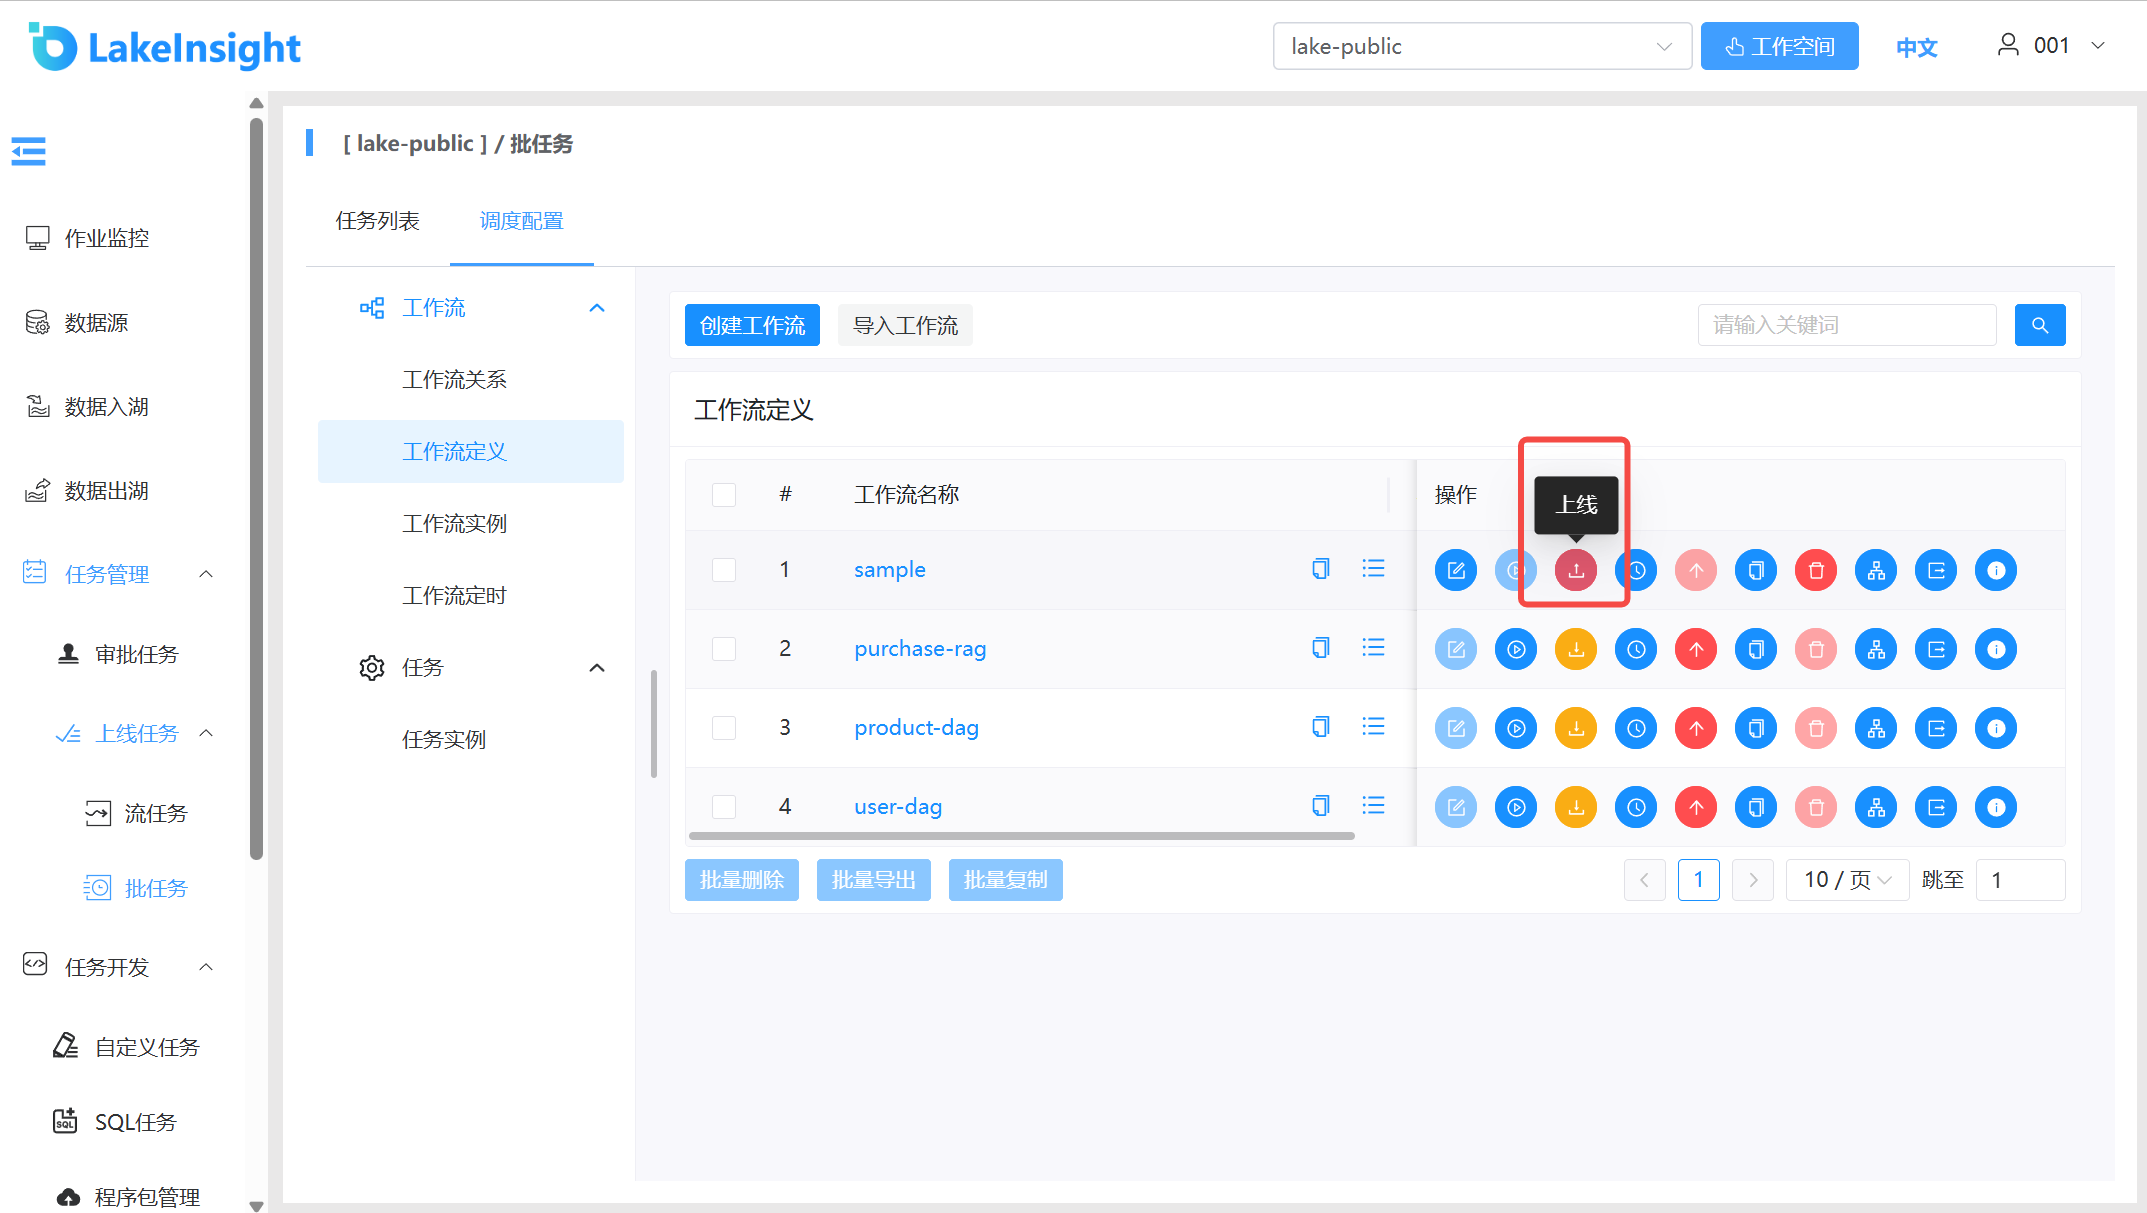
Running Workflows:
Click Workflow Definition to enter the workflow definition page, then click Online to bring the workflow online:
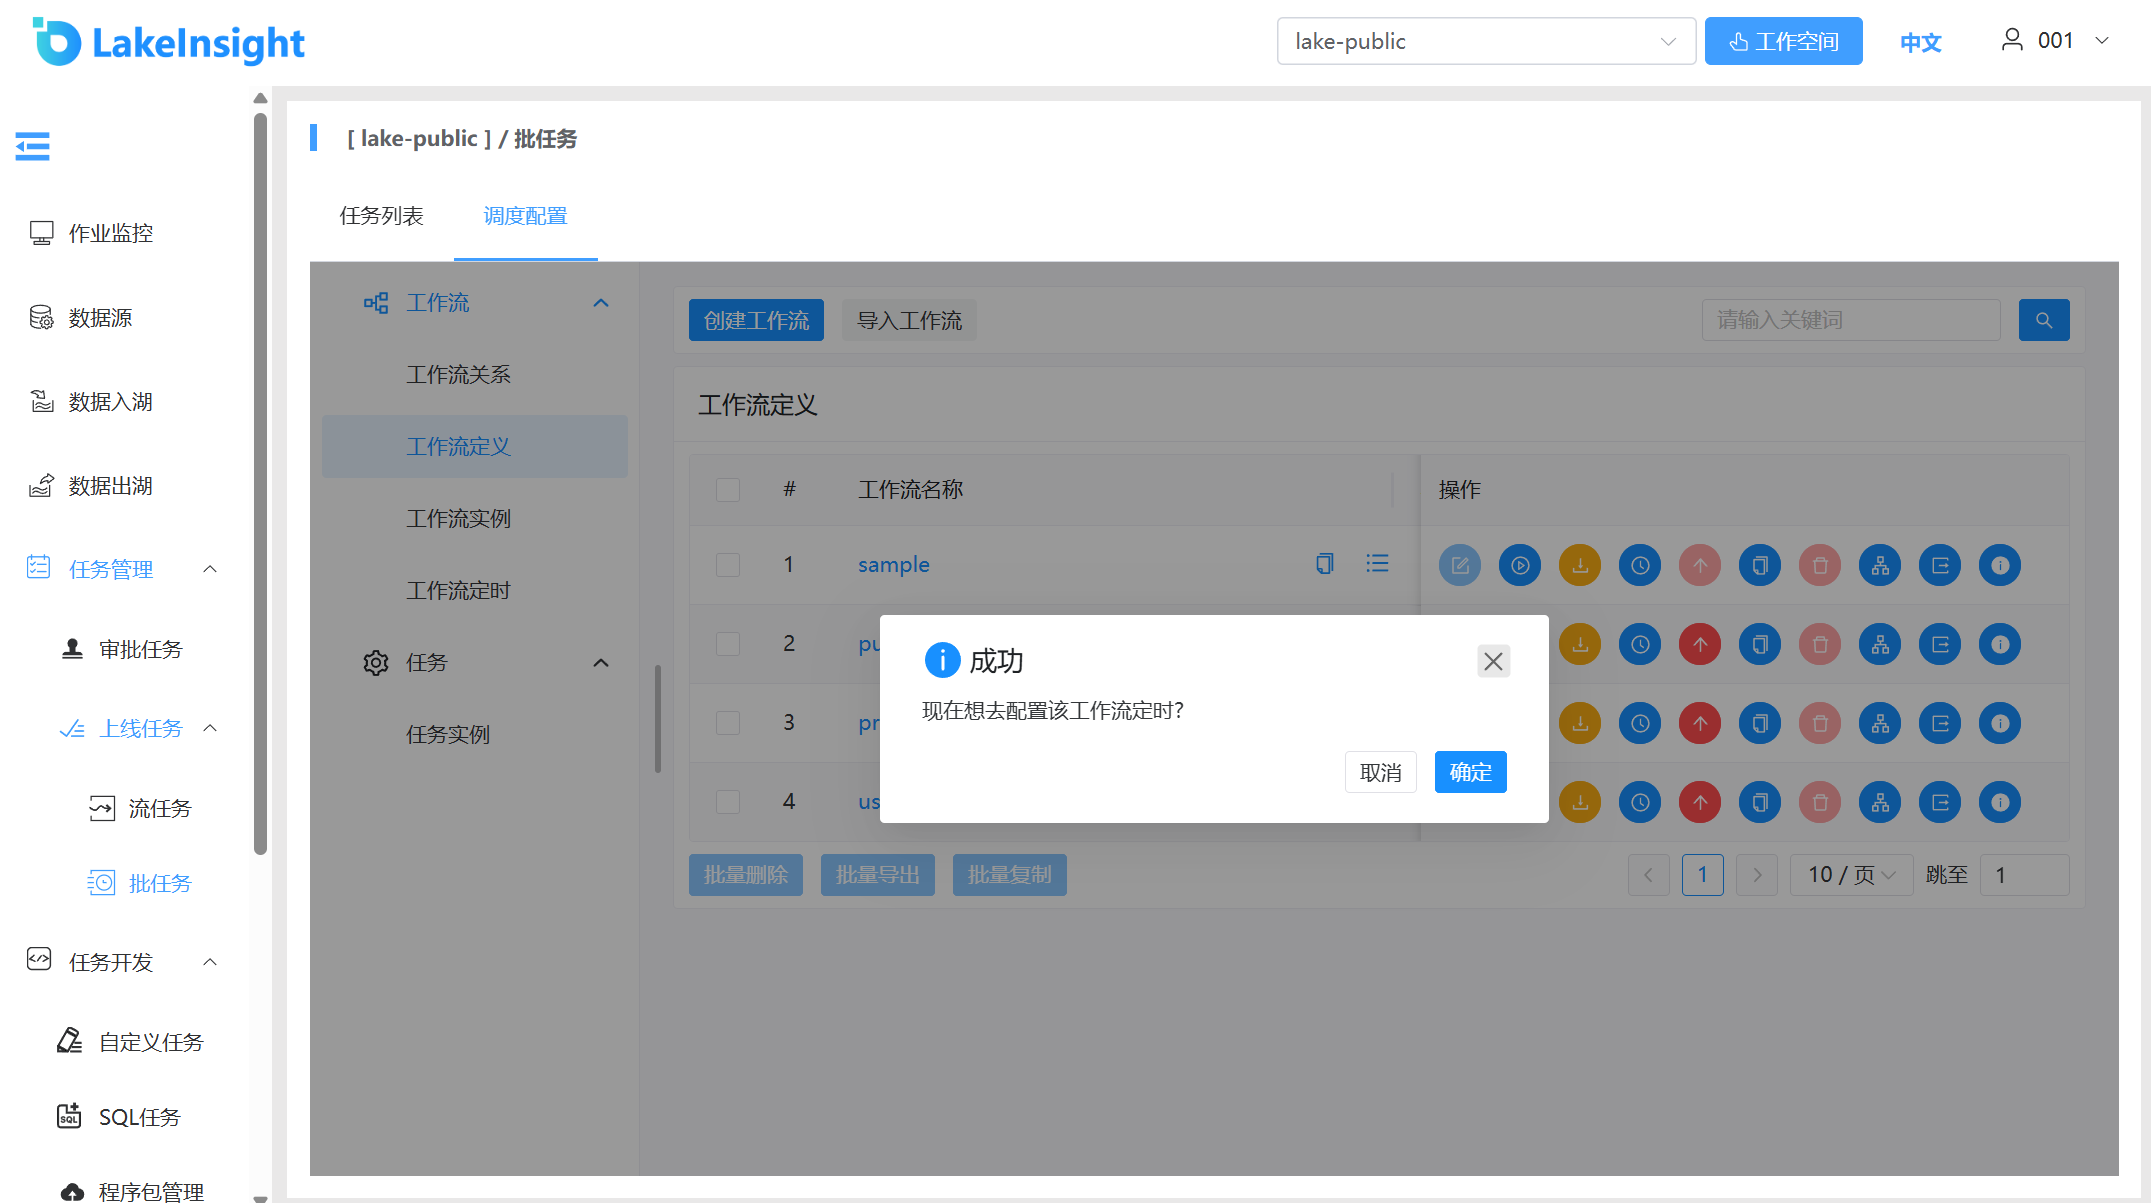
Configure Workflow Scheduling. You can configure it via the post-online prompt or later from the workflow definition list.
 Schedule Example: Add a schedule that runs once daily at 00:00:00 from March 28 to March 31. Click execution time to view the next 5 execution times. Click Create to create the schedule. The schedule must be "Online" to take effect.
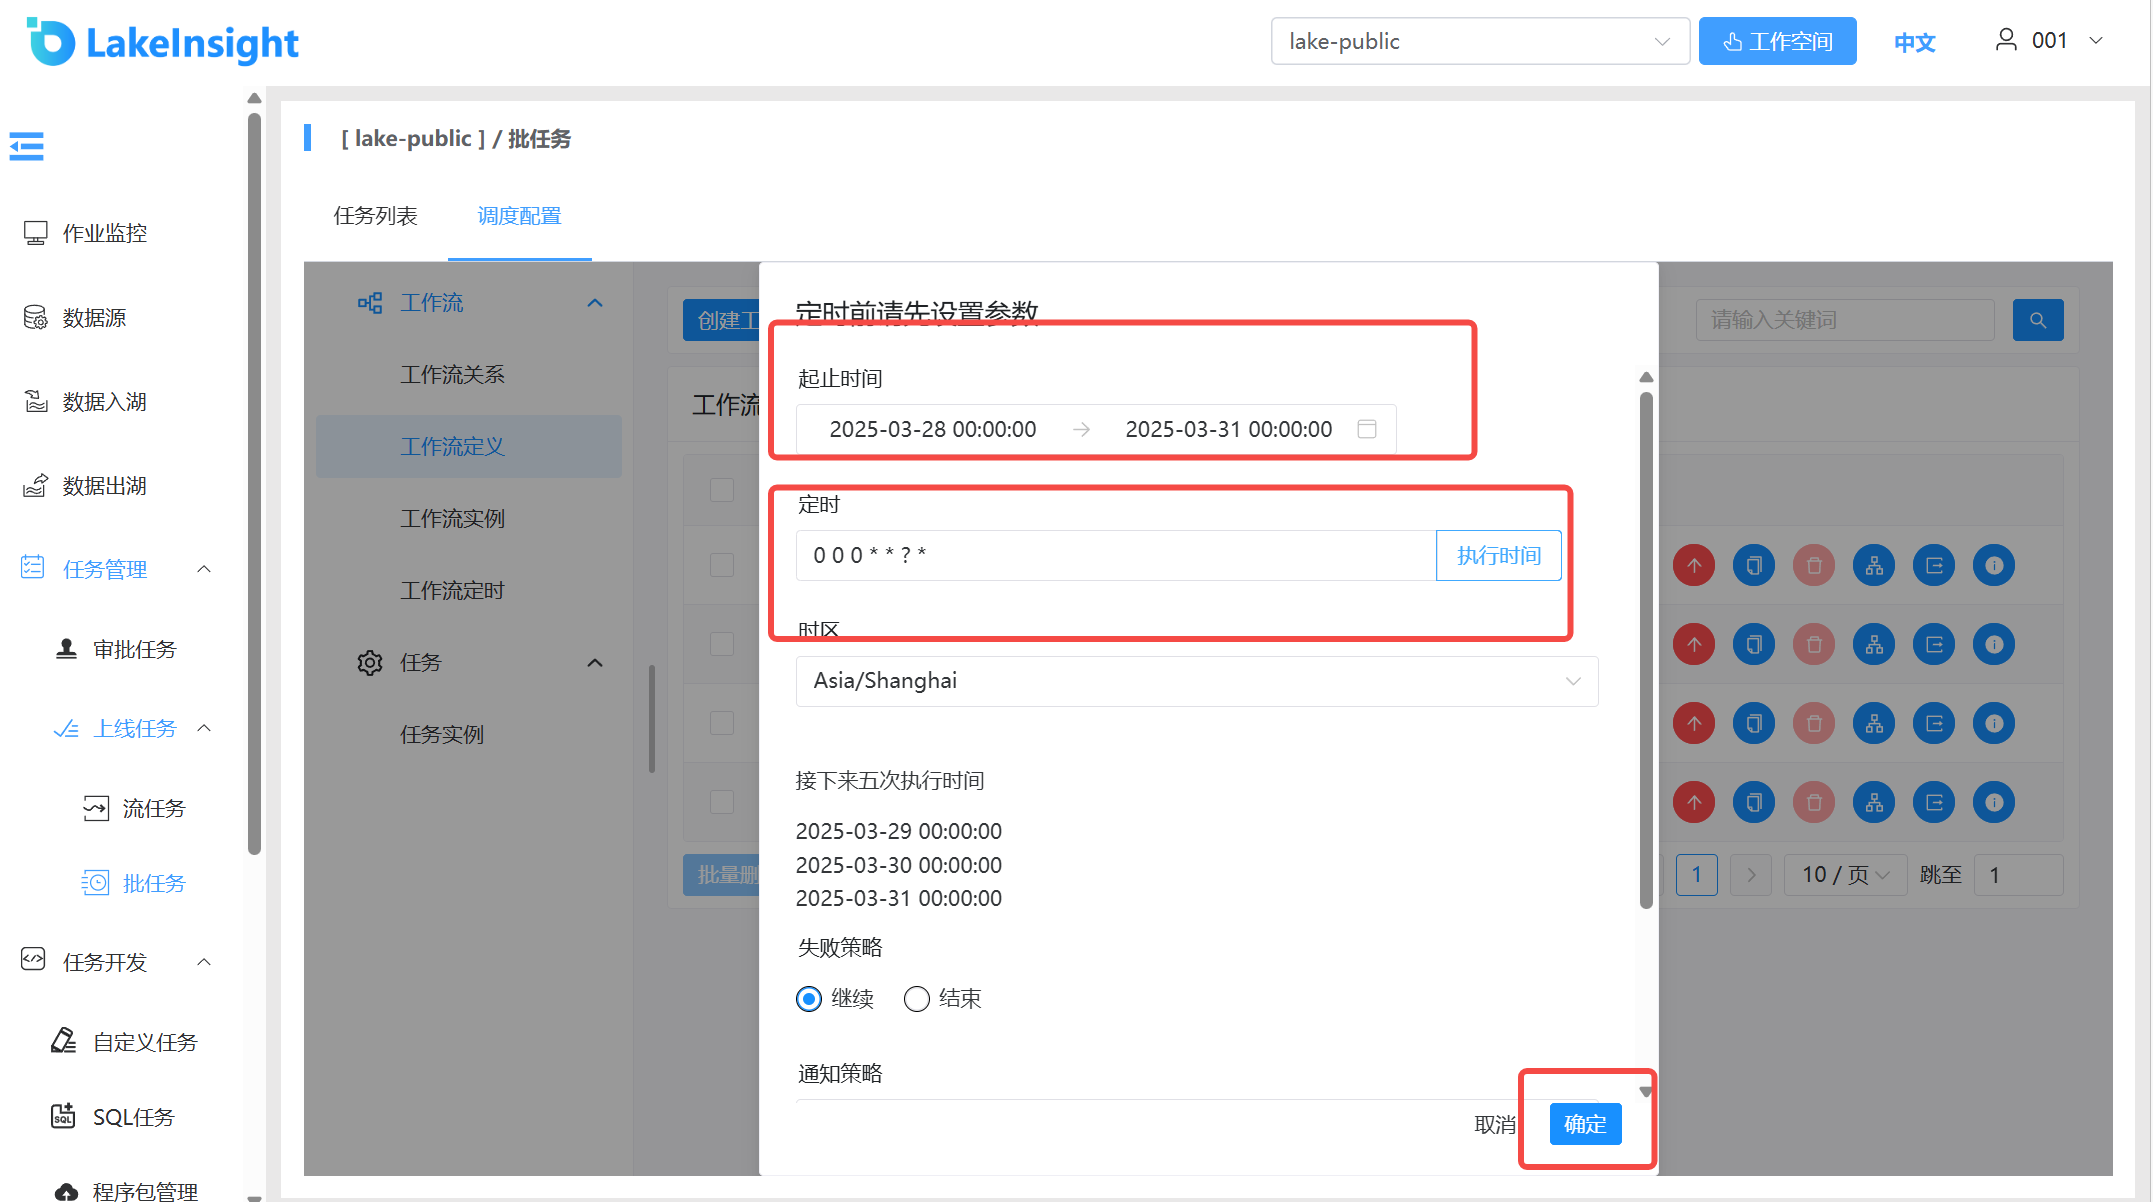
Click Run to open the startup parameters dialog. Set the startup parameters and click Run in the dialog. The workflow begins running, and a workflow instance is generated on the workflow instance page:
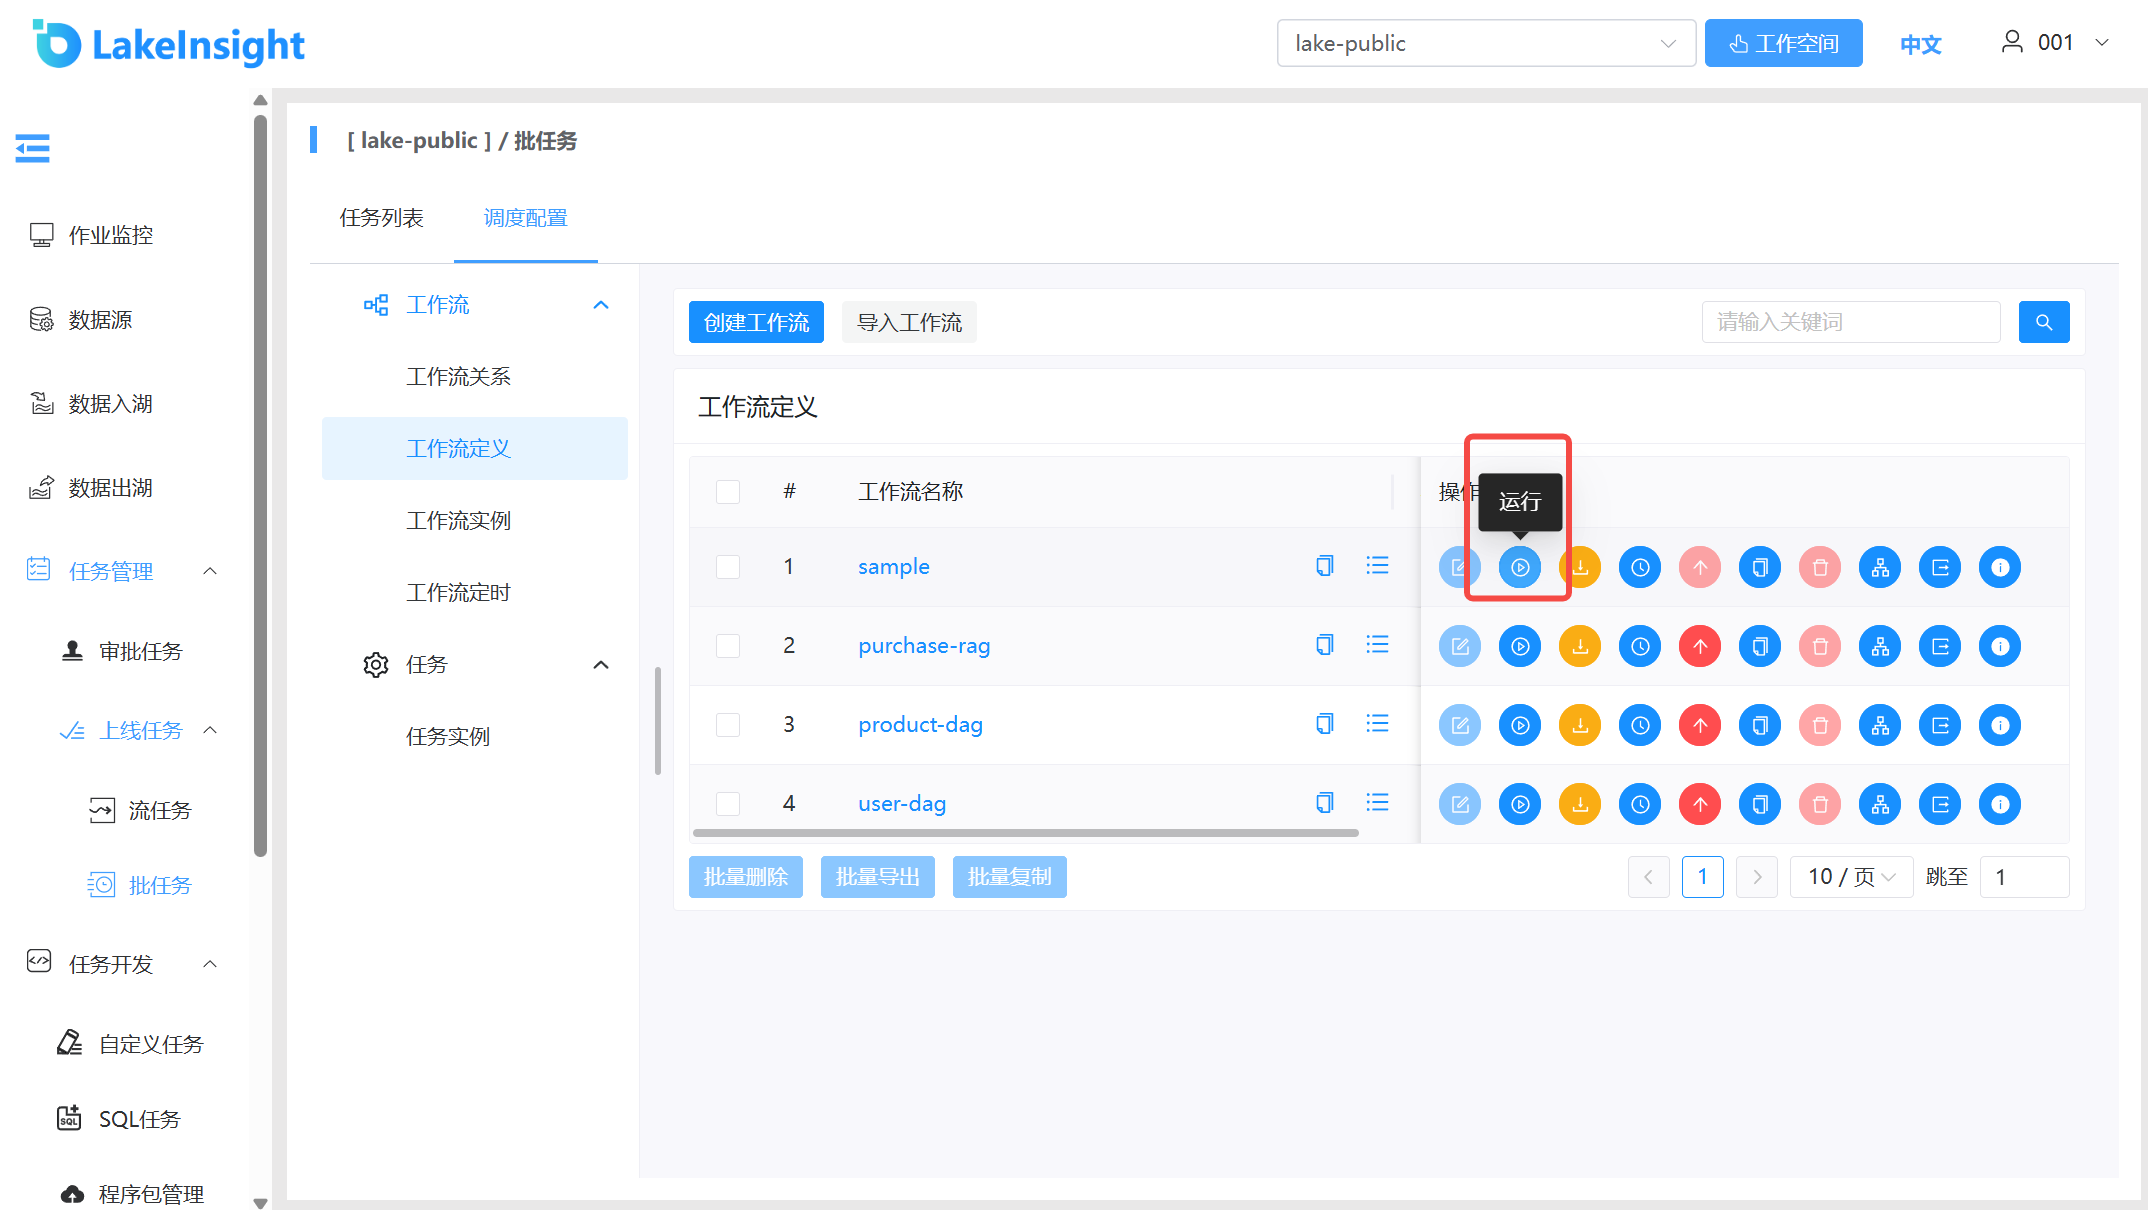
Click Run
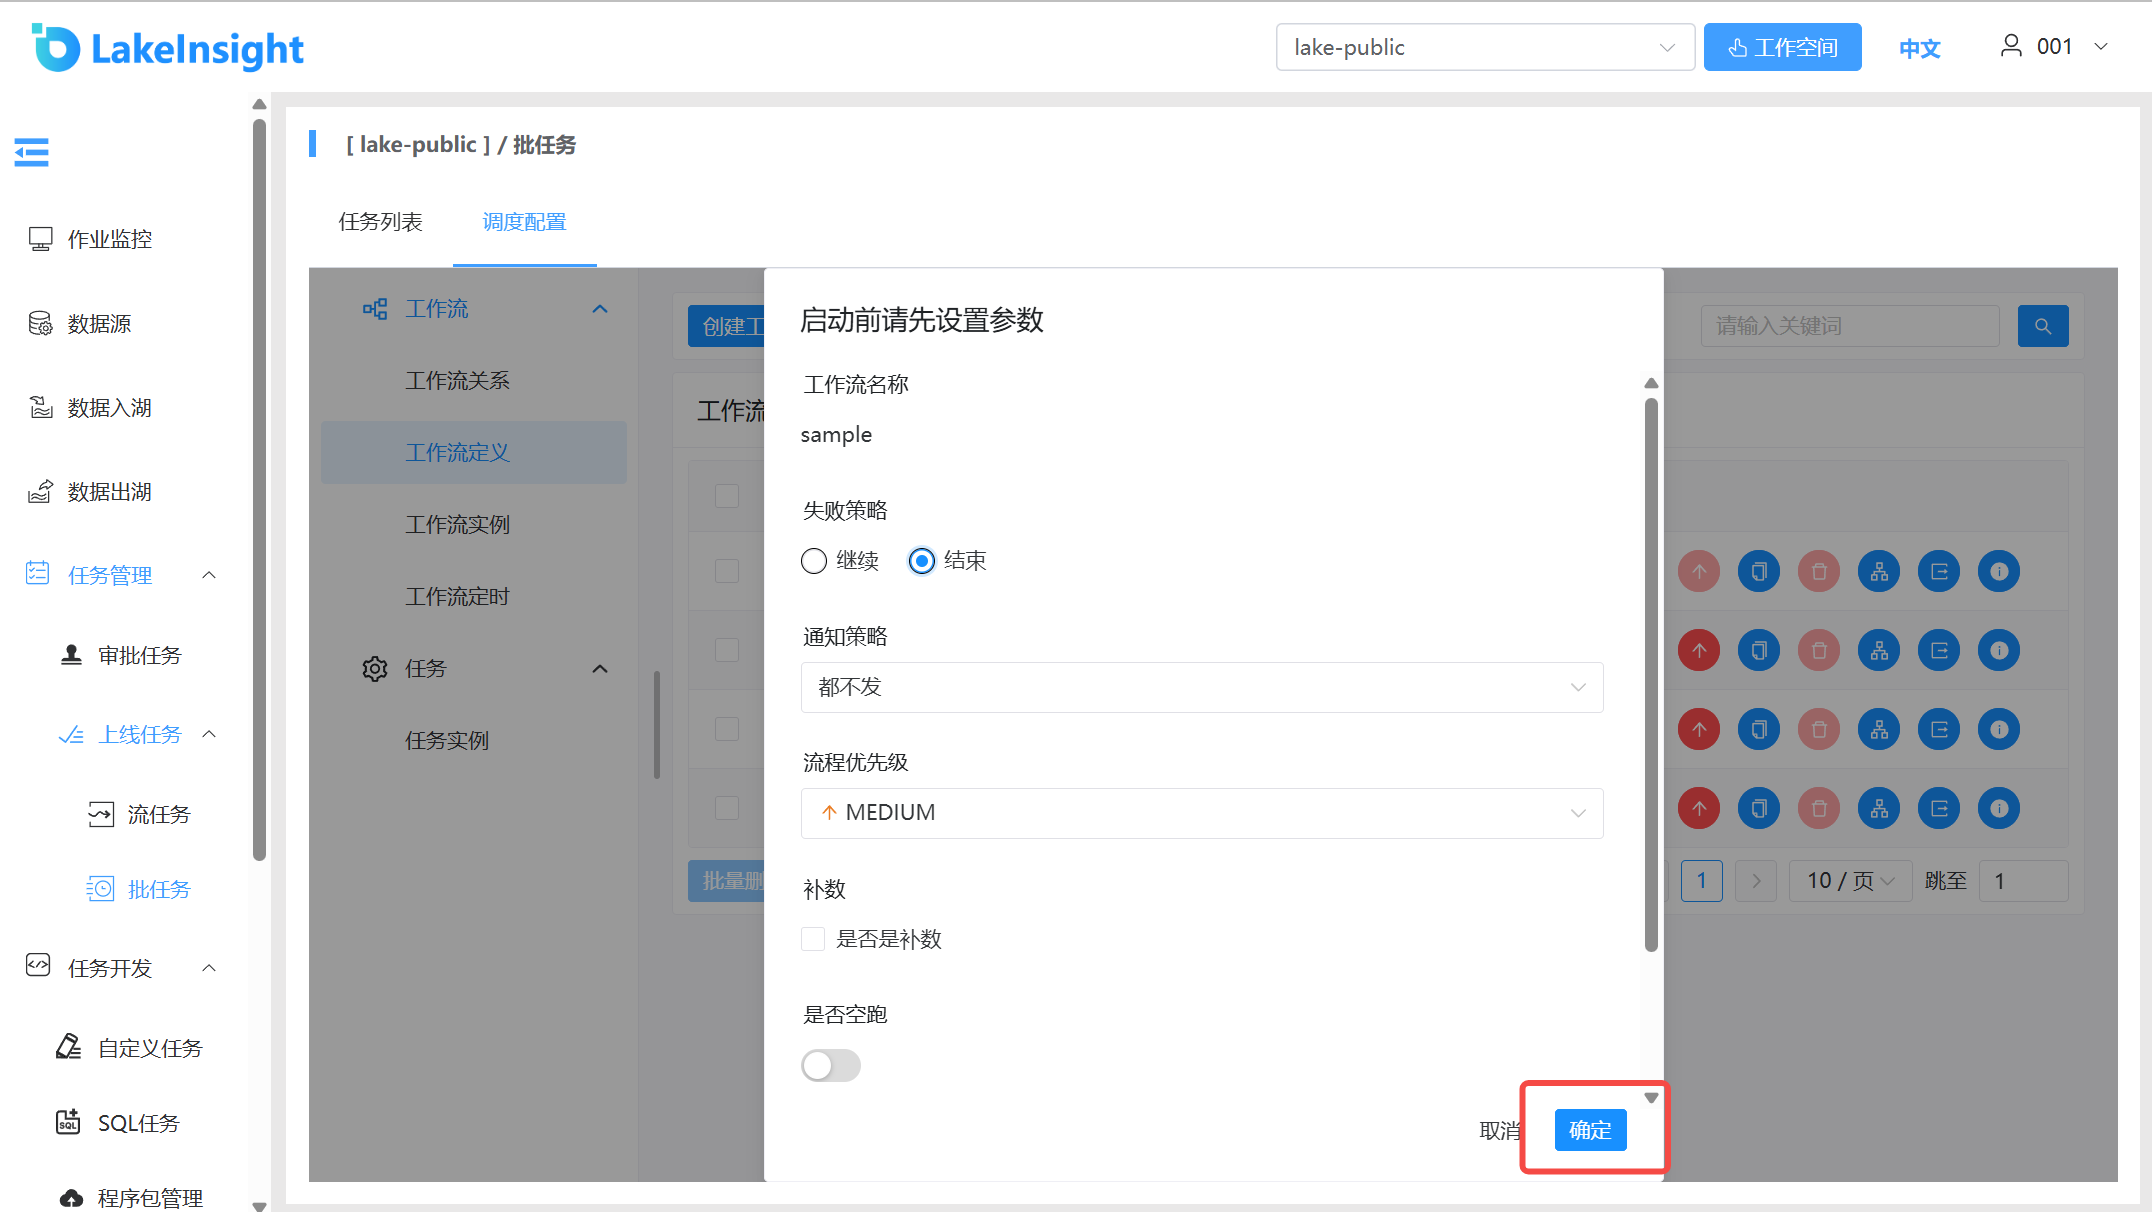
Set startup parameters
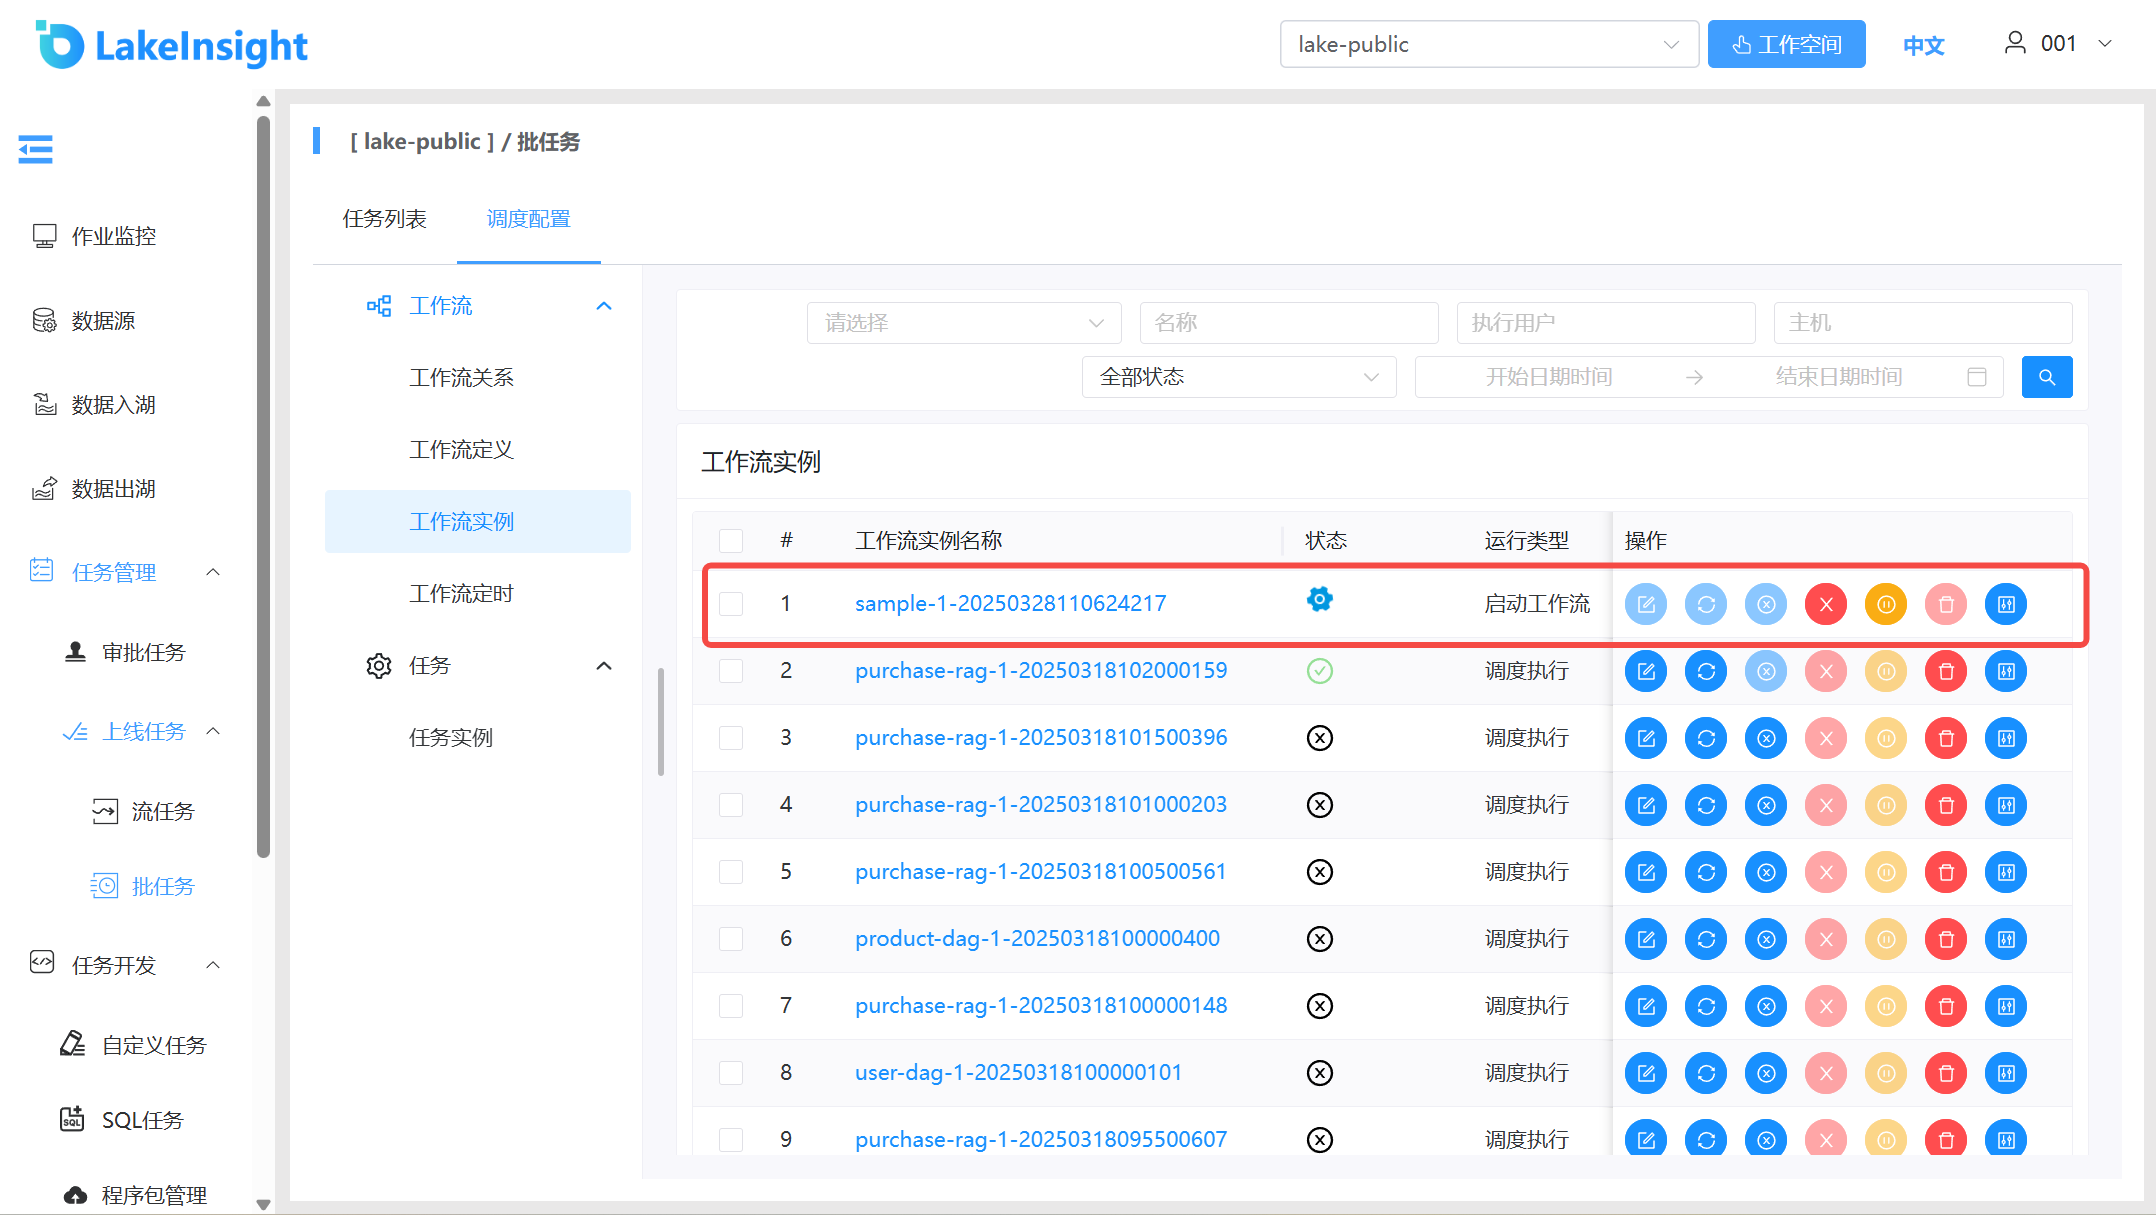
Workflow run instance.
Workflow Run Parameter Description:
Failure Strategy: The strategy for other parallel task nodes when a task node fails. "Continue" means other tasks proceed normally after a failure; "End" means terminate all running tasks and the entire process.
Notification Strategy: Send process execution notification emails based on process status. Options include: never send, send on success, send on failure, or send on both success and failure.
Process Priority: Process execution priority with five levels: HIGHEST, HIGH, MEDIUM, LOW, LOWEST. When master thread capacity is insufficient, higher-priority processes execute first in the queue. Processes with the same priority execute in FIFO order.
Dry Run: A dry run triggers and runs the workflow without actually executing tasks, used to verify that the workflow process runs correctly.
Test Mode: Run the workflow once in test mode without affecting production data.
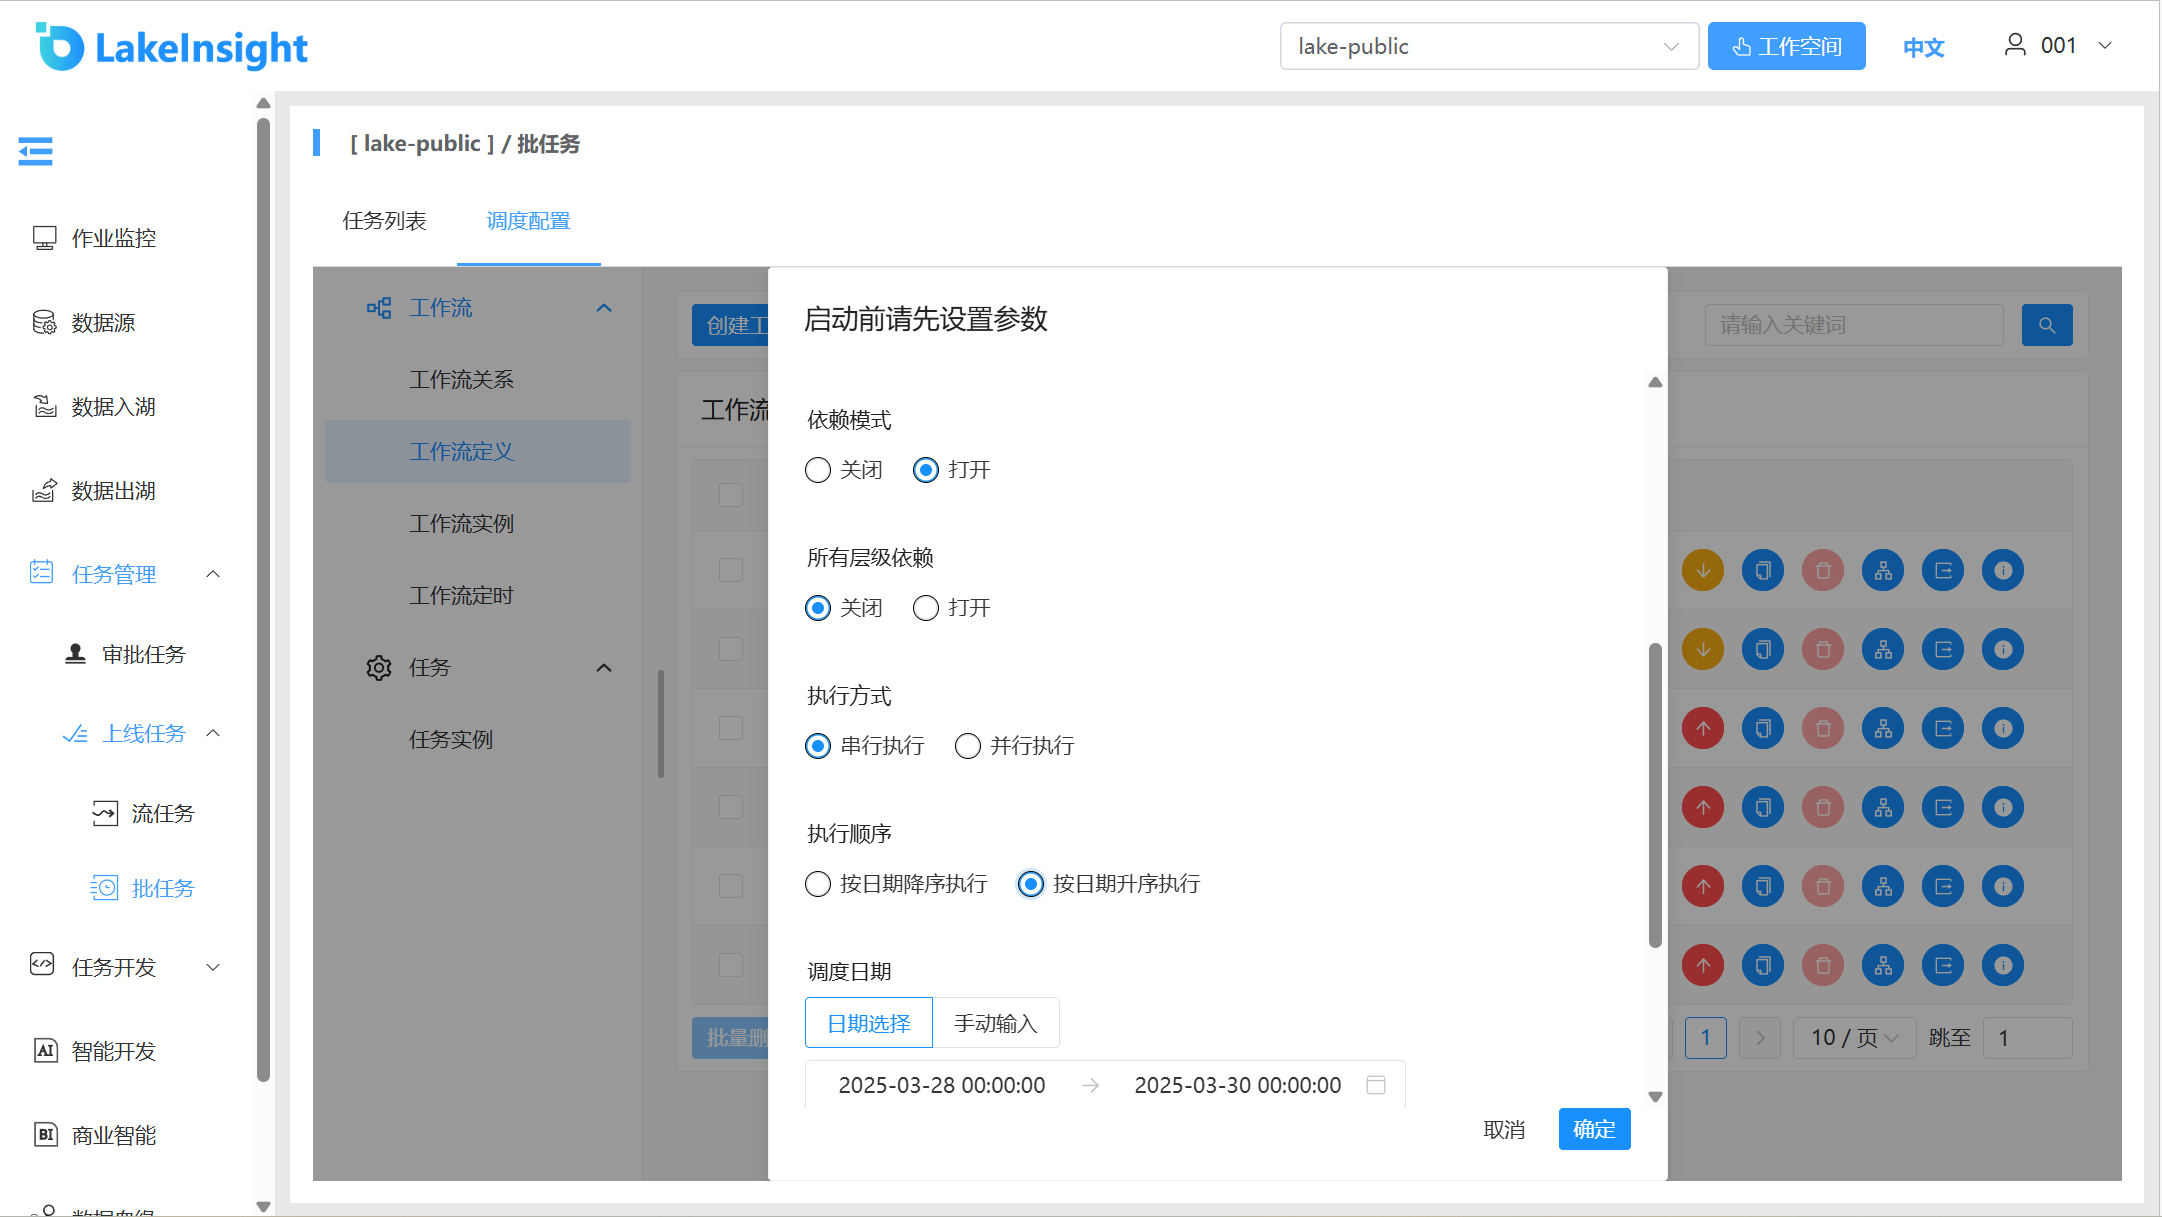
Backfill: Execute workflow definitions within a specified date range, generating corresponding workflow instances based on the backfill strategy. Strategies include Serial Backfill and Parallel Backfill. Dates can be selected from the page or manually entered; the date range is a closed interval (startDate <= N <= endDate).
Serial Backfill: Execute backfill sequentially from the start date to the end date within the specified range, generating multiple process instances in order. Click Run Workflow and select Serial Backfill mode: for example, executing sequentially from March 28 to March 30 generates 3 process instances on the process instance page:
Parallel Backfill: Execute backfill for multiple days concurrently within the specified range, generating multiple process instances simultaneously. Manually enter dates in the format
yyyy-MM-dd HH:mm:ss, separated by commas. Click Run Workflow and select Parallel Backfill mode: for example, executing March 28 to March 30 workflow definitions concurrently generates 3 process instances simultaneously (when the execution strategy is serial, instances follow that strategy):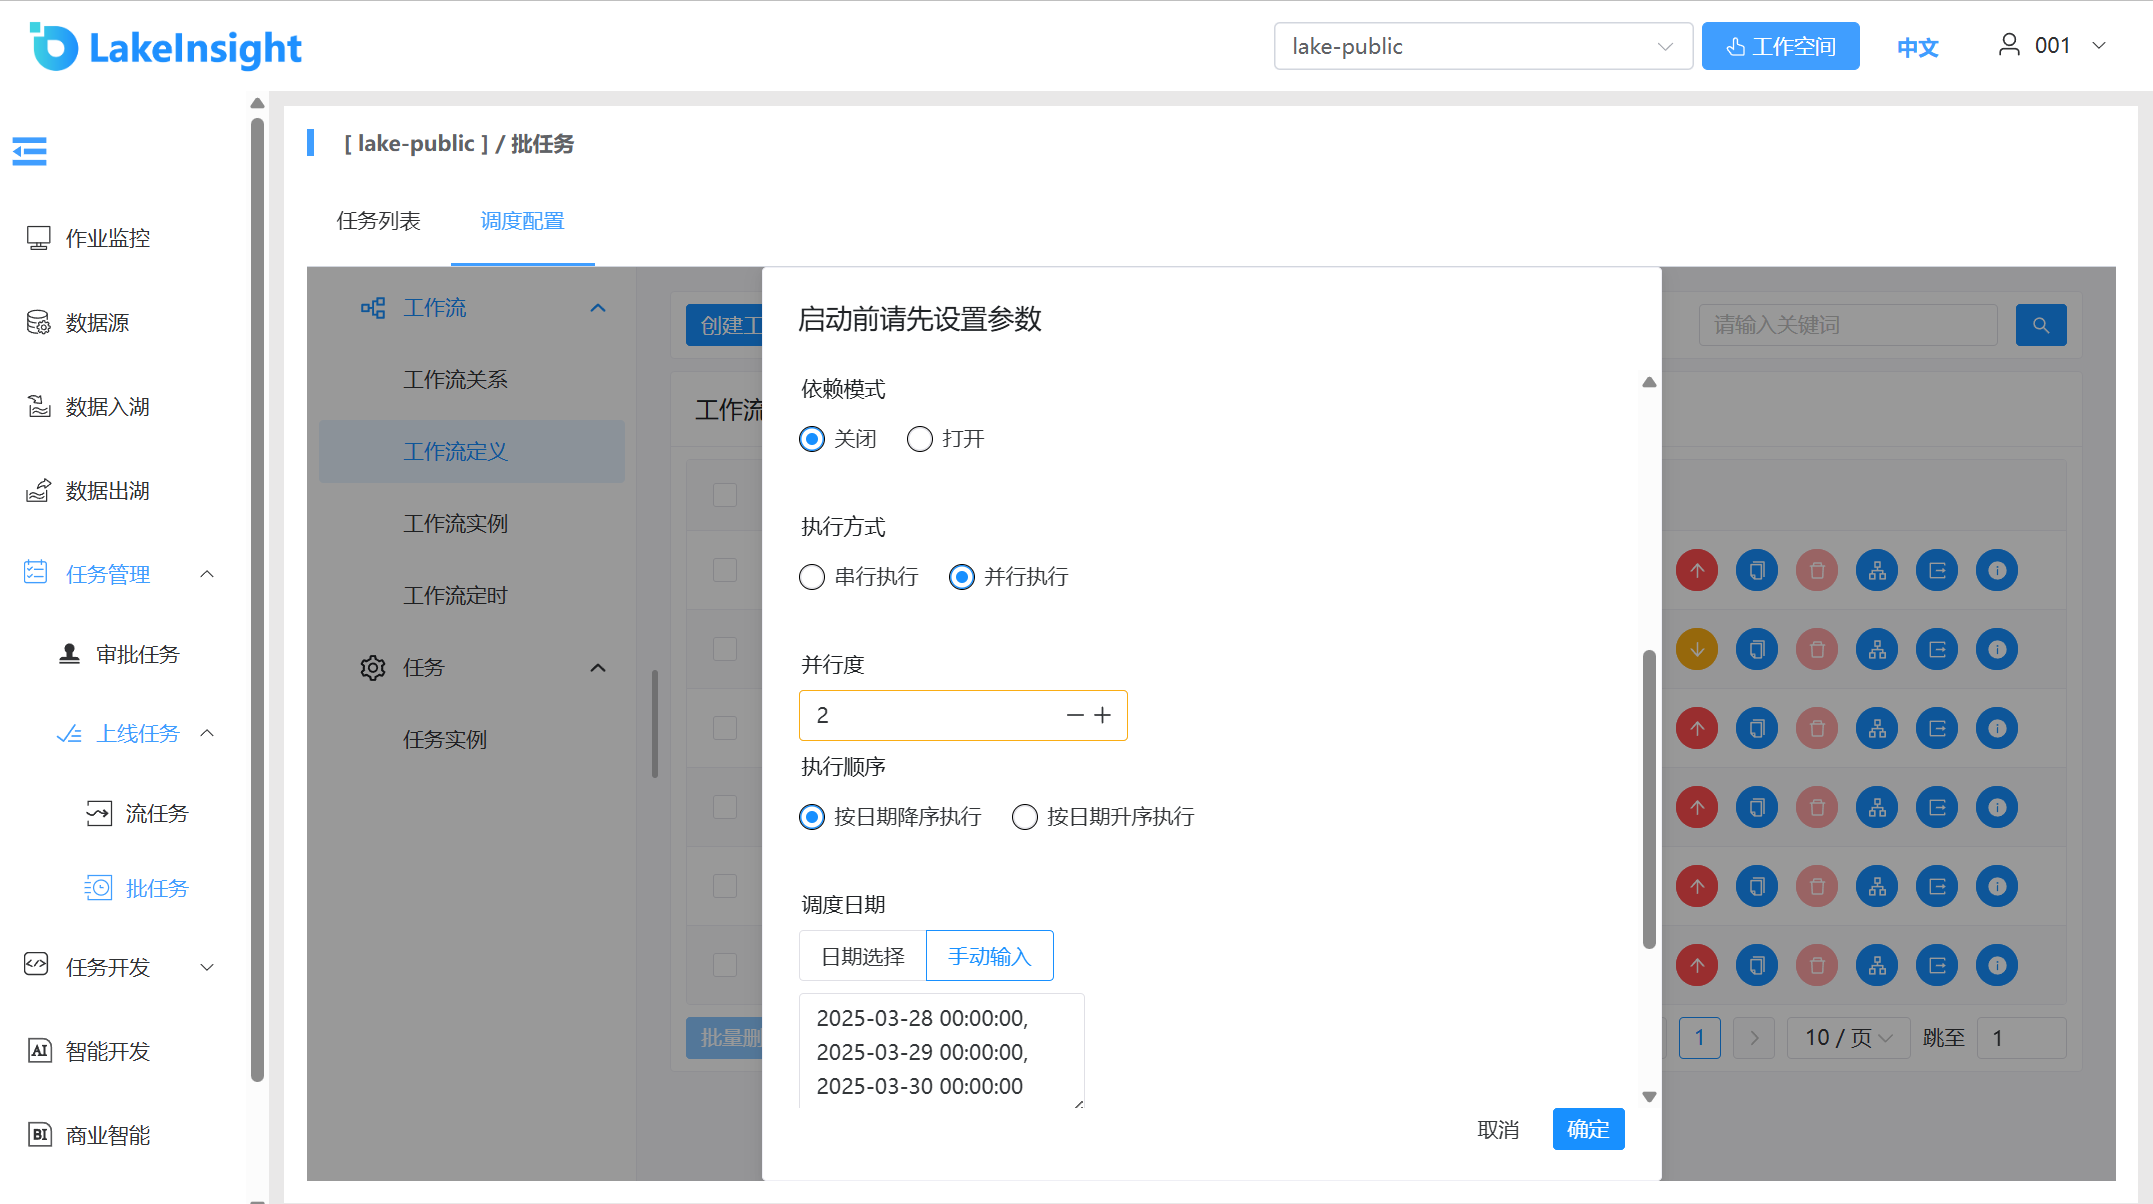
Parallelism: The maximum number of instances executing concurrently in parallel backfill mode.
Backfill & Schedule Configuration Relationship:
No schedule configuredorSchedule configured but offline: backfill uses the selected time range combined with the default schedule configuration (daily at 00:00).Schedule configured and online: backfill uses the selected time range combined with the schedule configuration.
Run Individual Task: Right-click a task and click Run (only online tasks can be run).
The startup parameters dialog appears with the same parameter descriptions as running workflows.
Node Execution Parameter Description:
- Backward Execution: Trace from the selected task to the most upstream task and execute through to the current node.
- Forward Execution: Execute all downstream tasks starting from the selected task.
- Current Node Only: Execute only the selected task node.
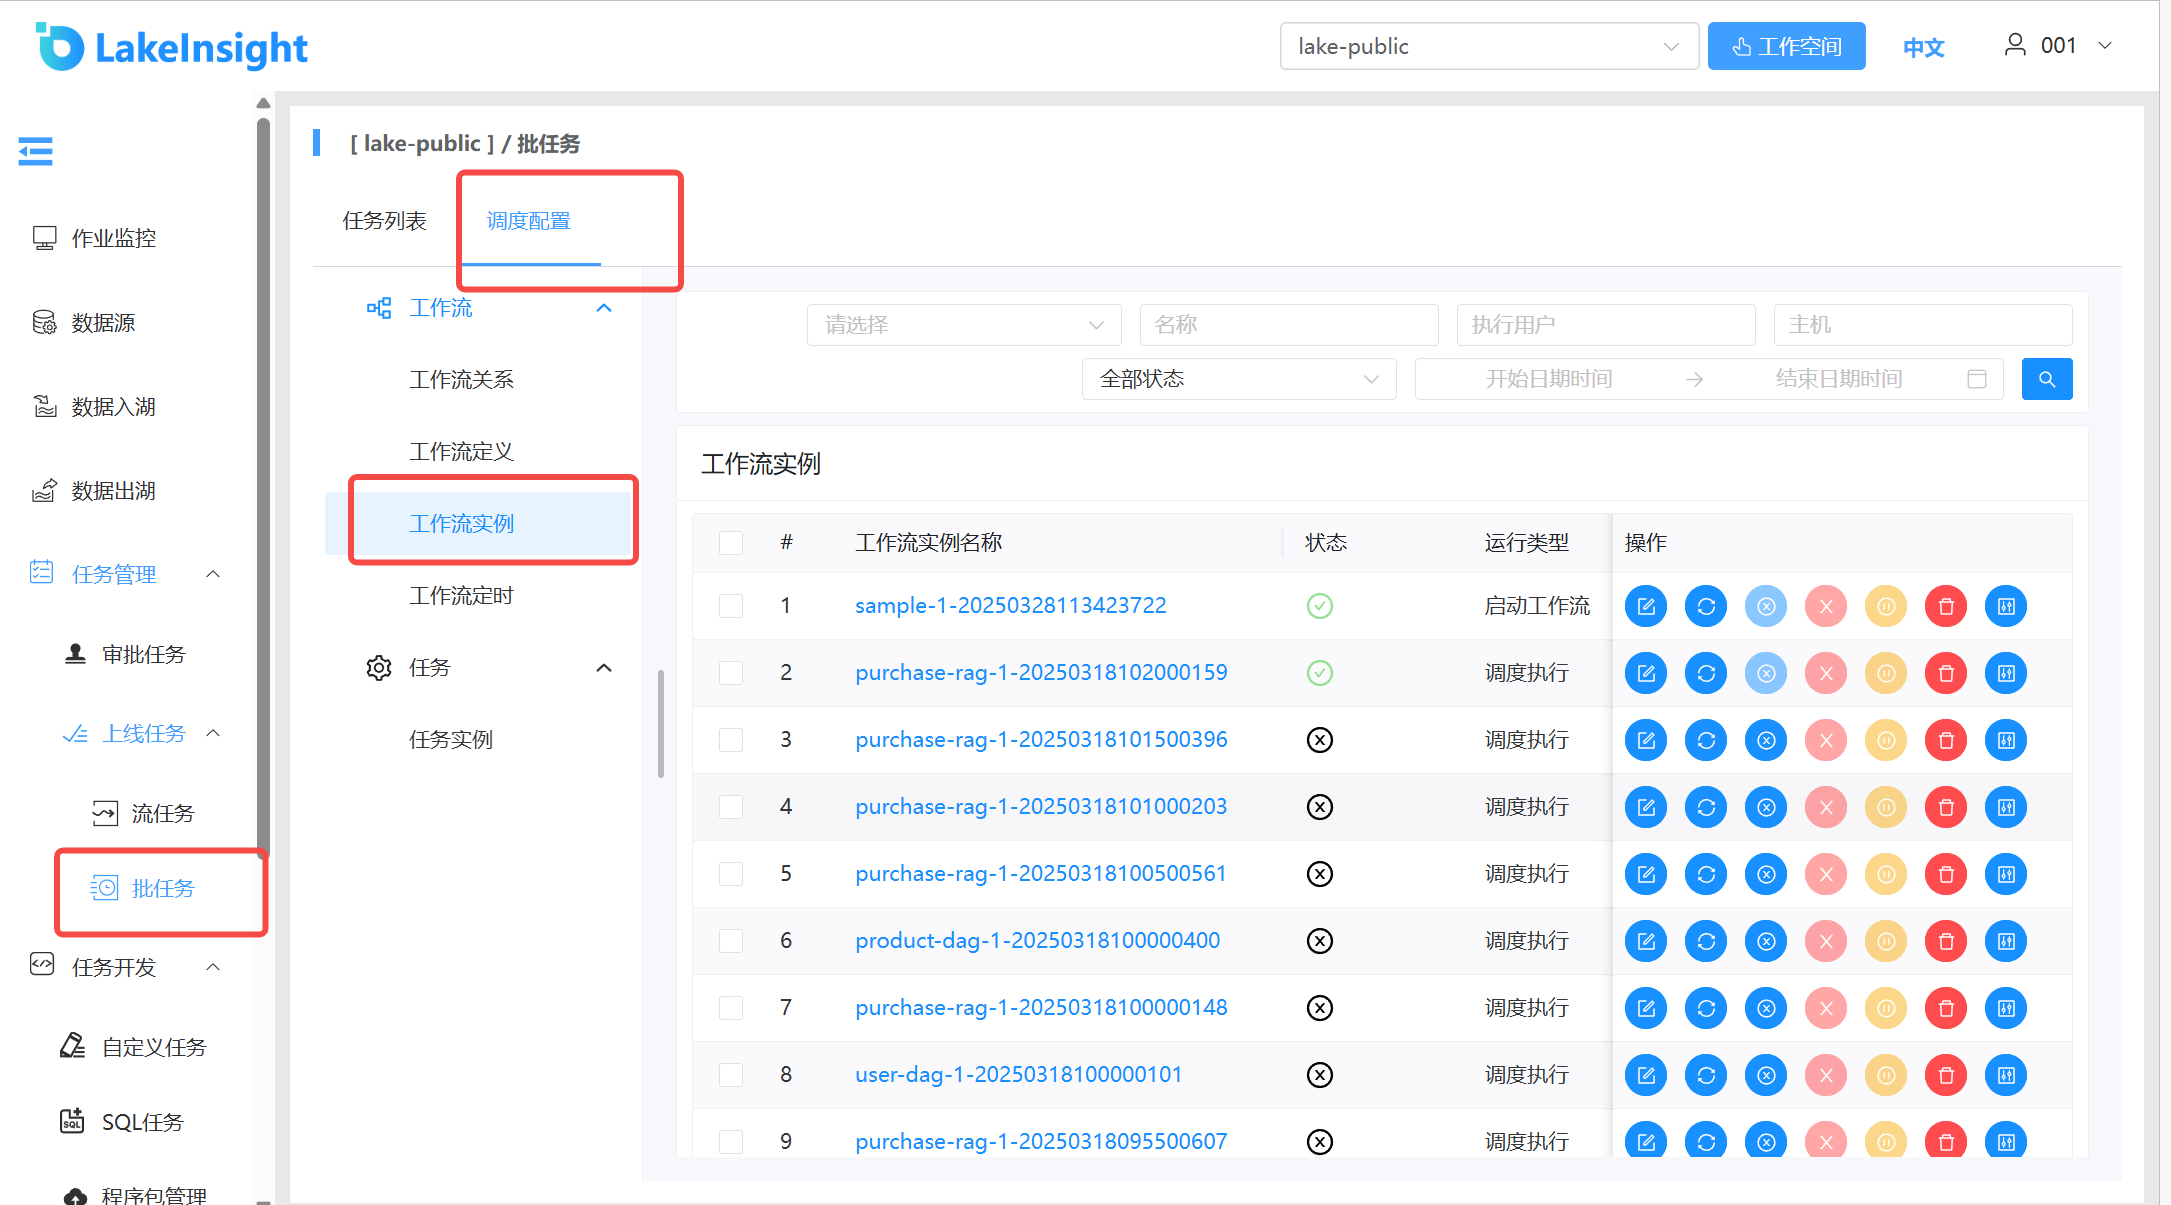
Workflow Instance
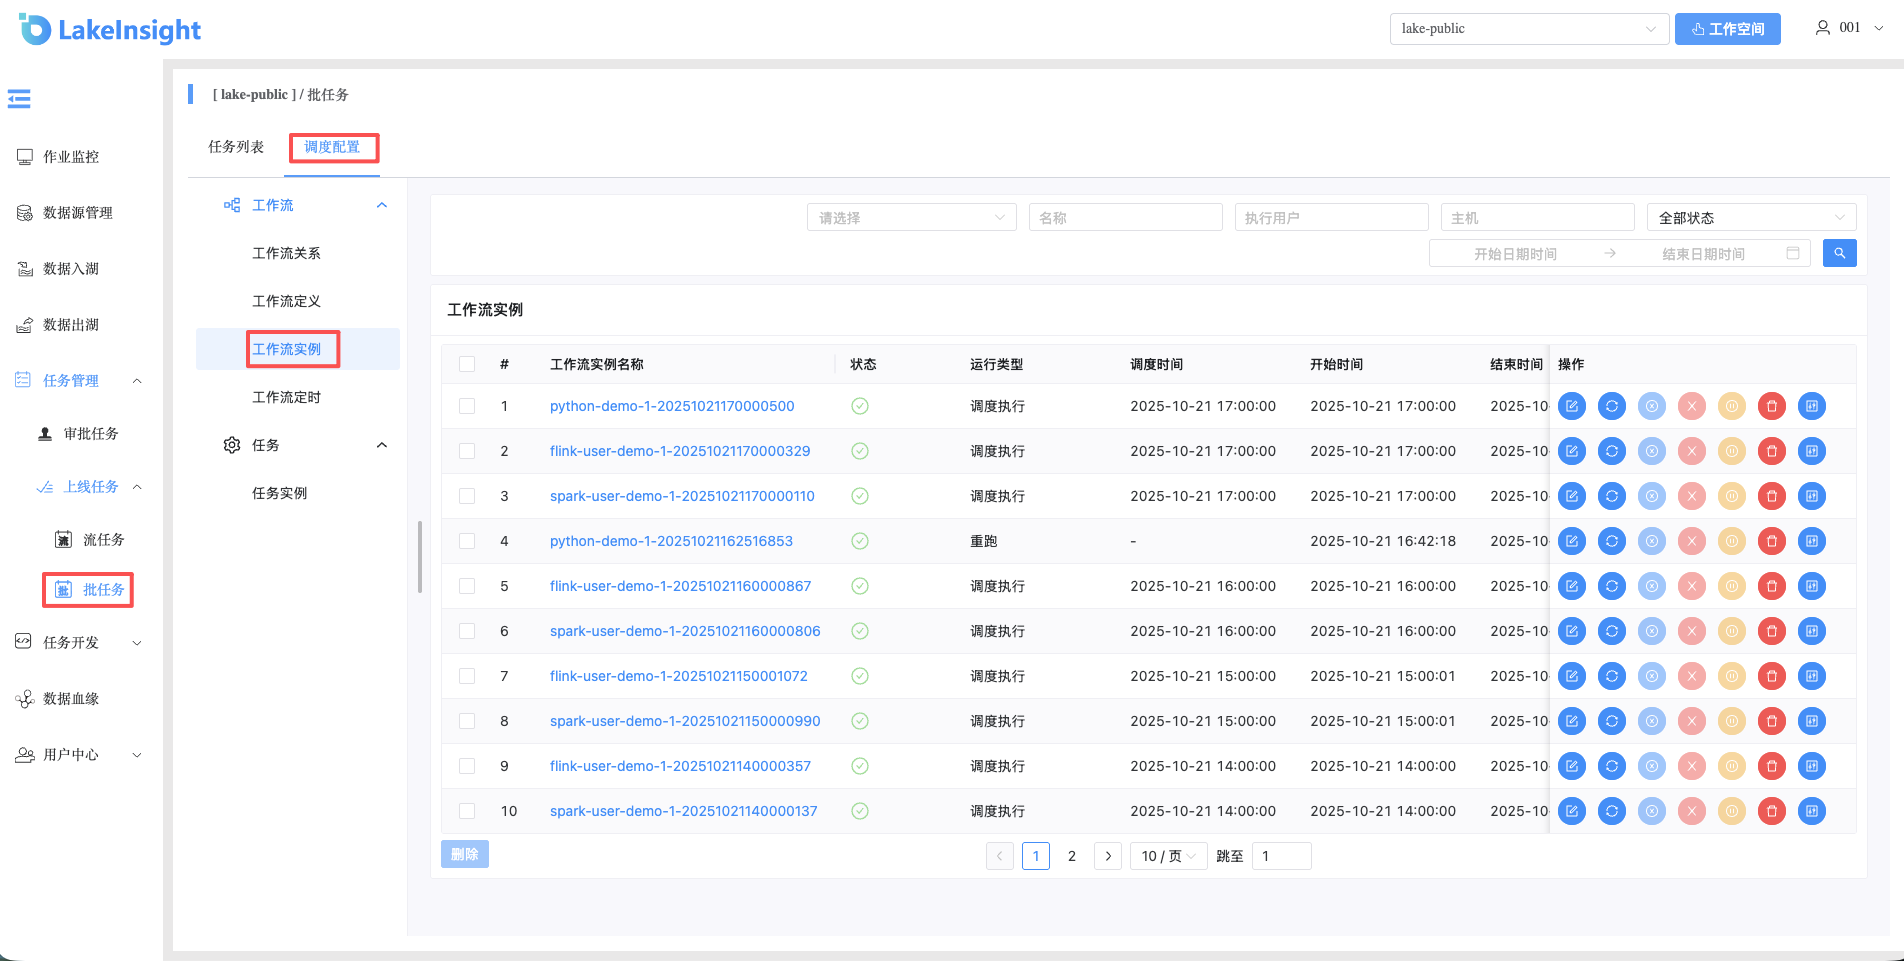
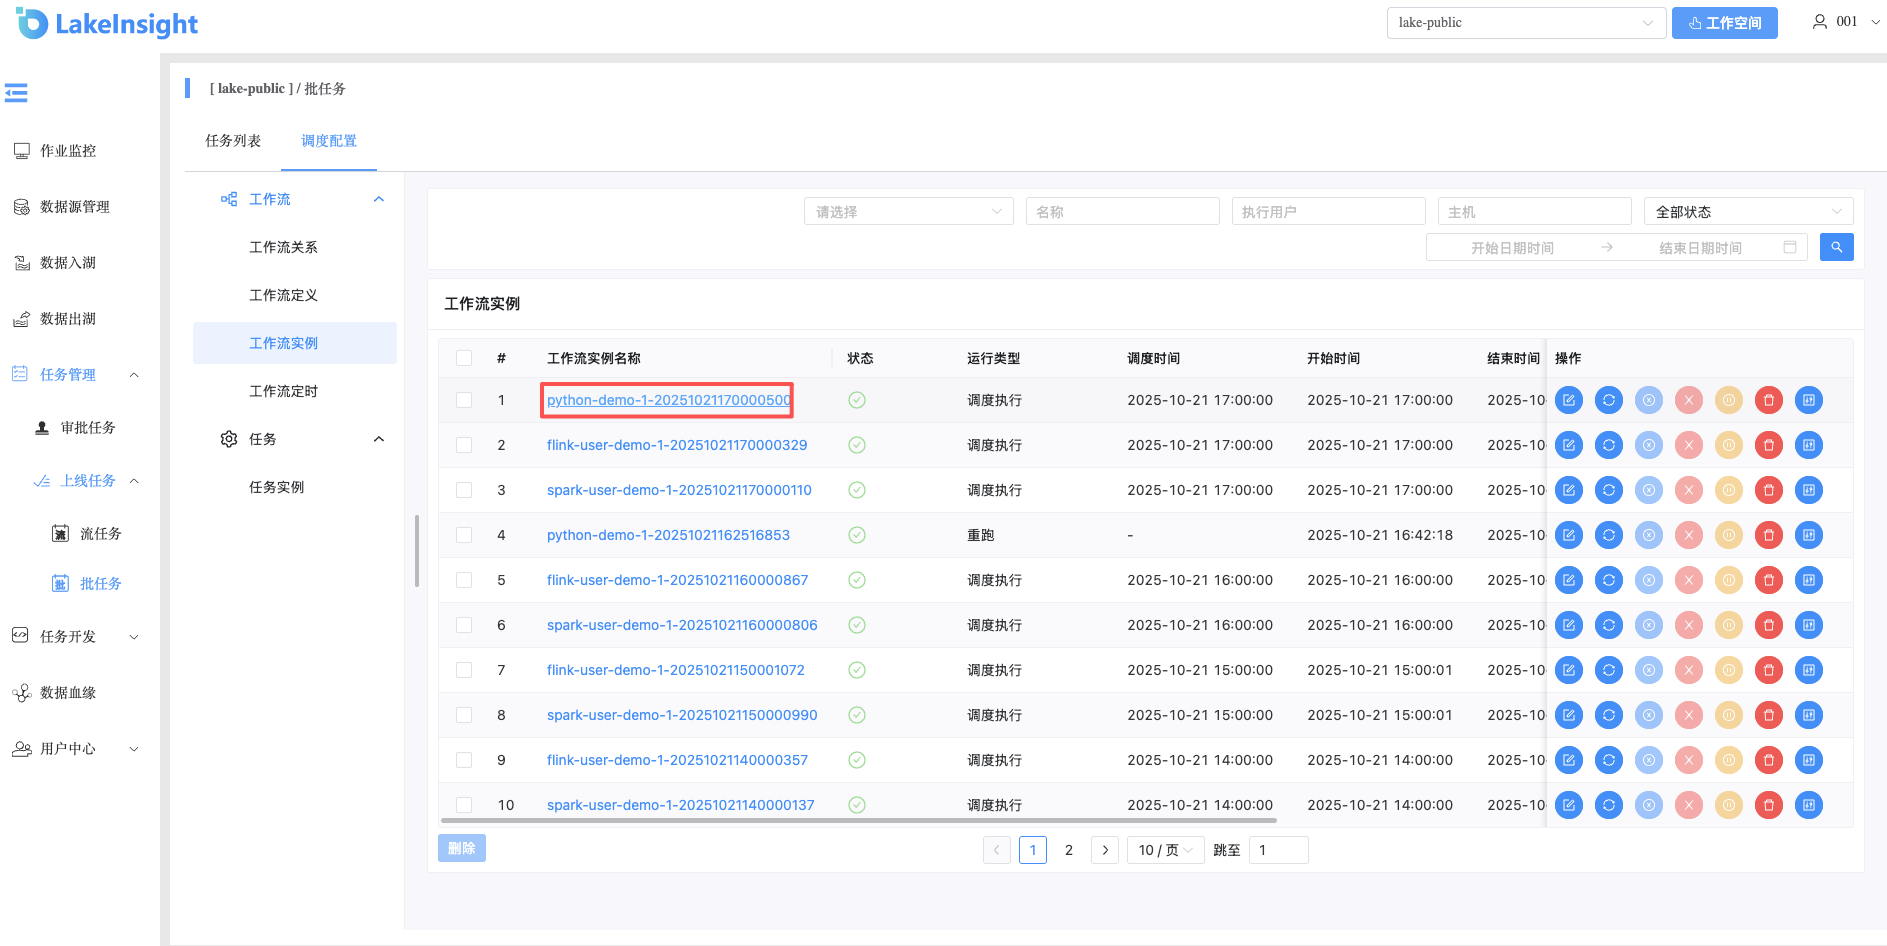
Click Workflow Instance to enter the workflow instance page and view workflow instances:
Click the Workflow Name to enter the DAG view page and view task execution status:
Workflow Instance Operations: Click Workflow Instance to enter the workflow instance page:
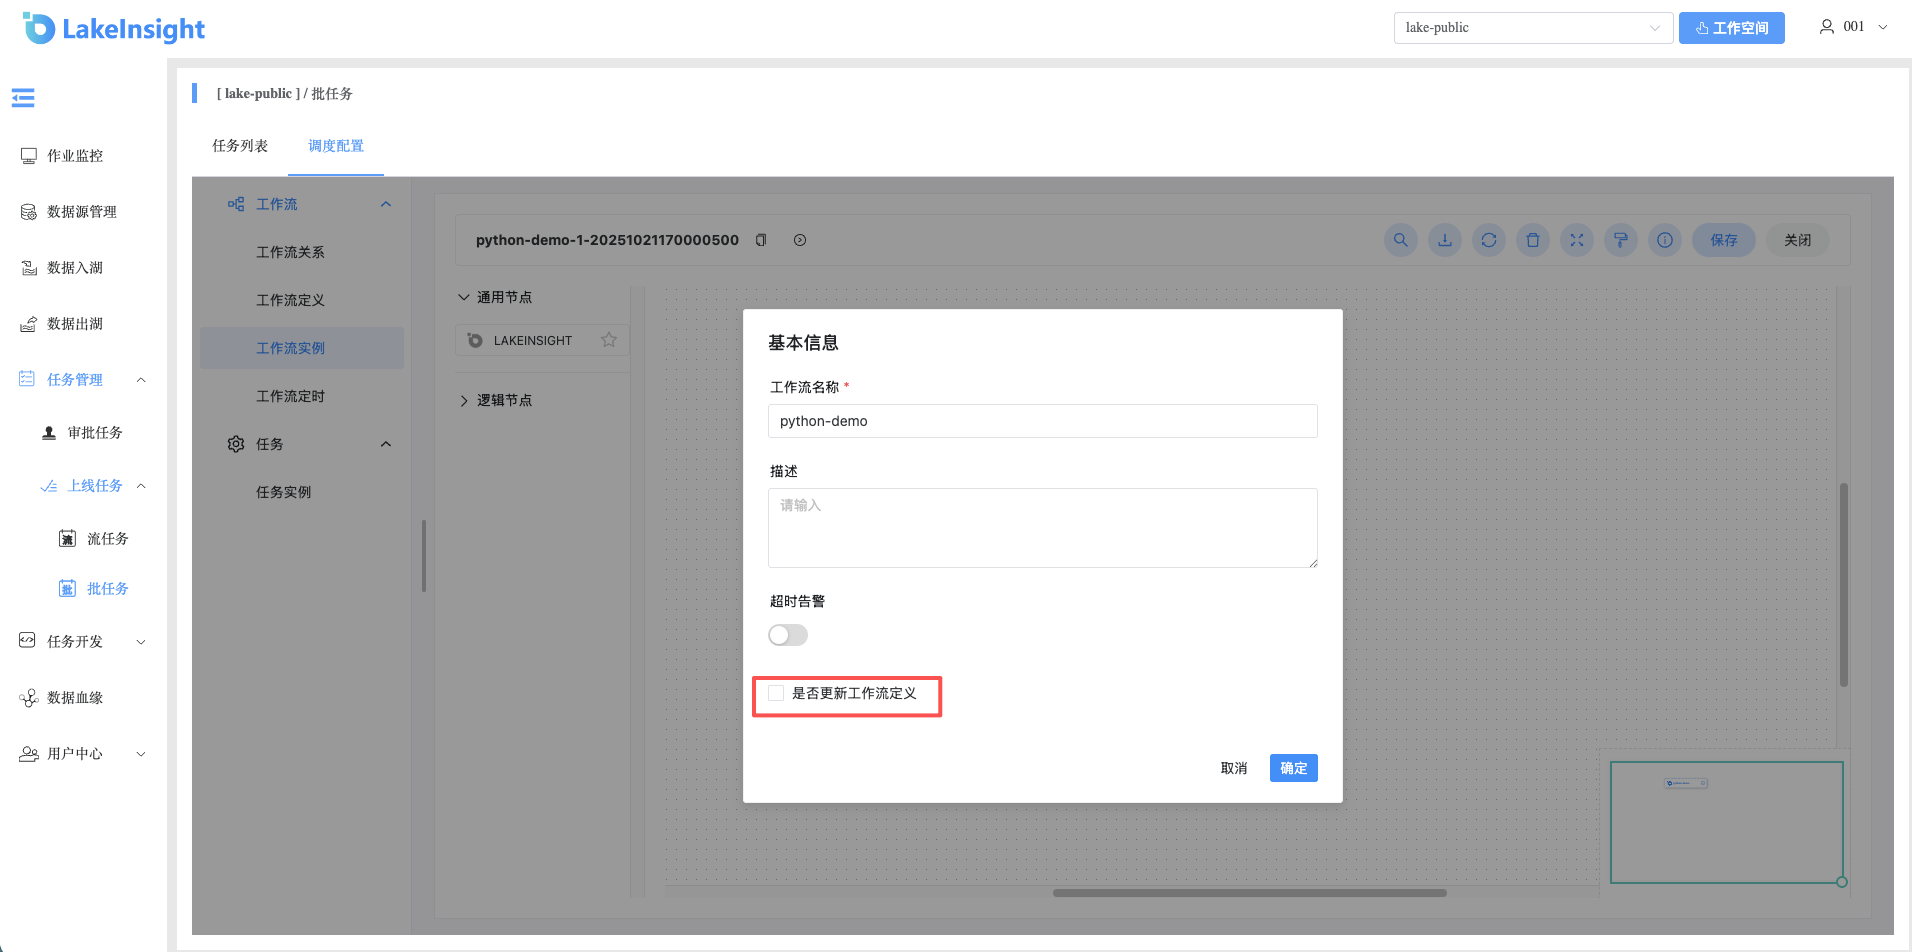
Edit: Only processes in Success/Failure/Stopped status can be edited. Click Edit or the Workflow Instance Name to enter the DAG editing page. After editing, click Save to open the Save DAG dialog. Check "Update Workflow Definition" to also update the workflow definition with the instance changes; leave it unchecked to keep the workflow definition unchanged.
Rerun: Re-execute a terminated process.
Recover from Failure: For failed processes, recover from the failed node onward.
Stop: Stop a running process. The backend first sends
killto the worker process, thenkill -9.Pause: Pause a running process. The system status changes to "Waiting for Execution", waiting for the current task to finish before pausing the next task.
Resume from Pause: Resume a paused process, continuing directly from the paused node.
Delete: Delete the workflow instance and all task instances under it.
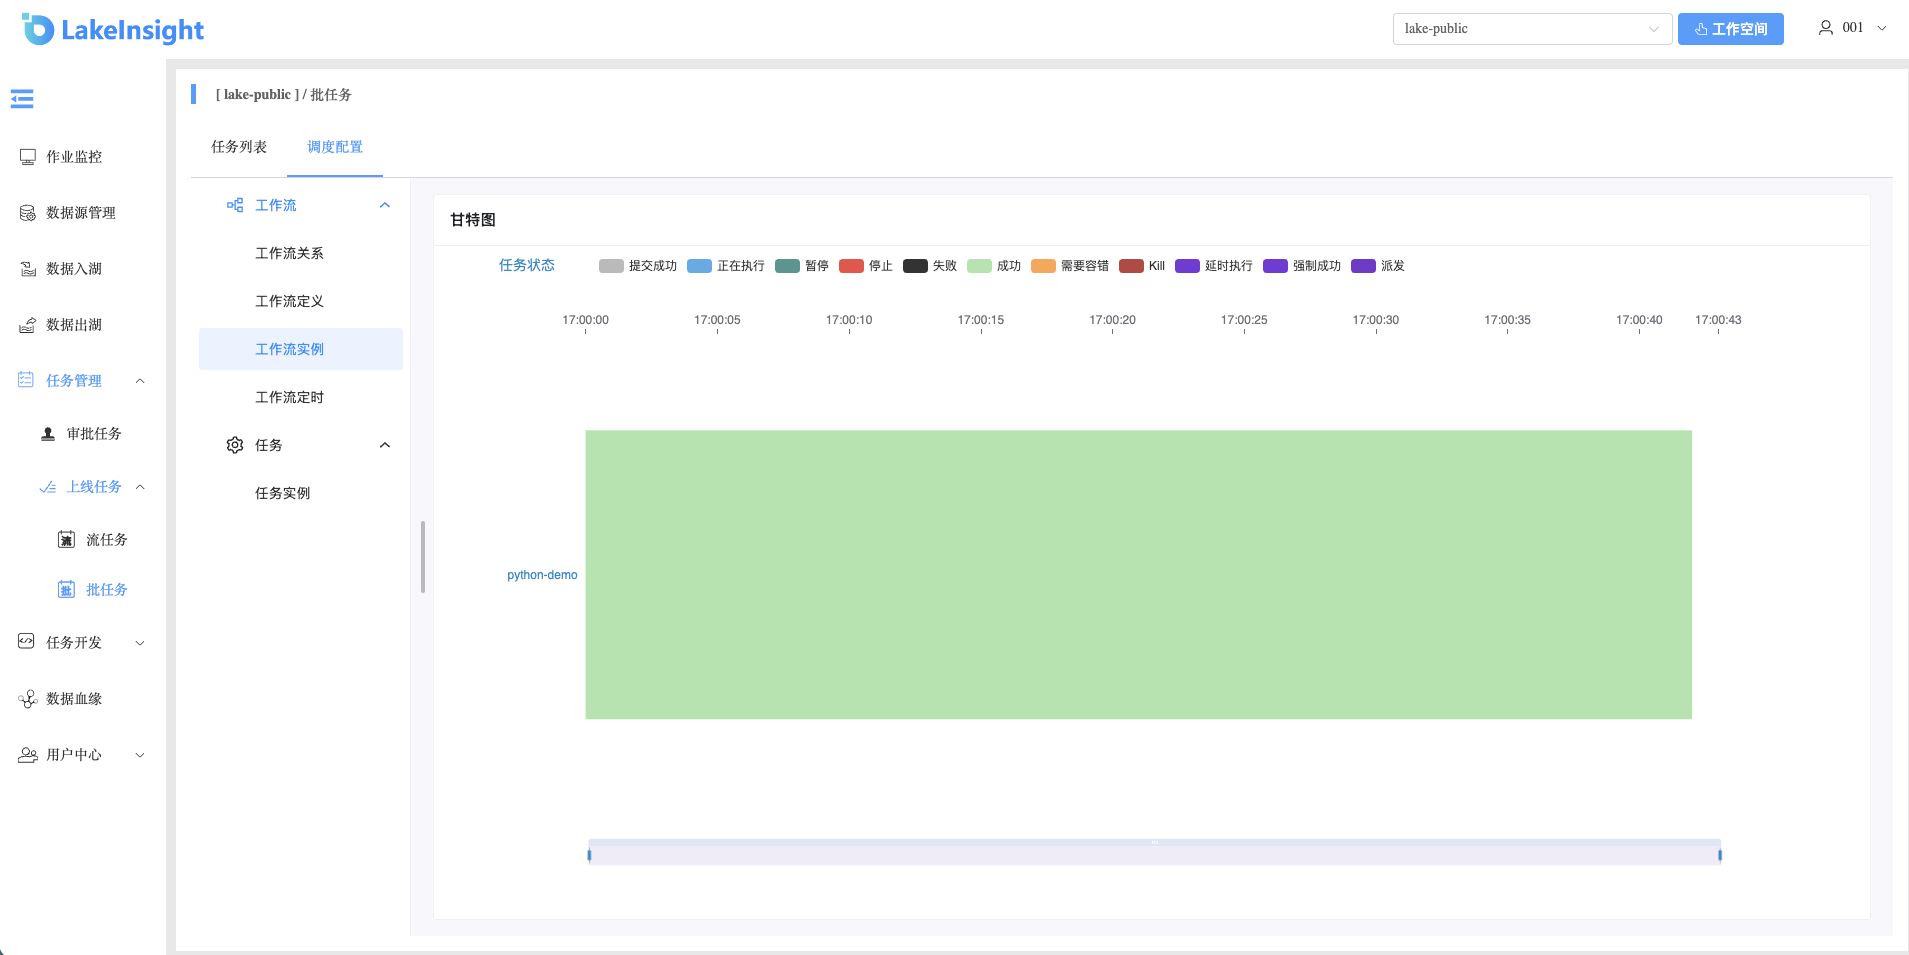
Gantt Chart: The Gantt chart shows the topological order of task instances within a workflow instance on the vertical axis and task instance runtime on the horizontal axis.
Task Instance
Click Task Instance to enter the task instance page:
Click the Workflow Instance Name to jump to the workflow instance DAG and view task status:
- View Logs: Click View Logs in the action column to view task execution logs:
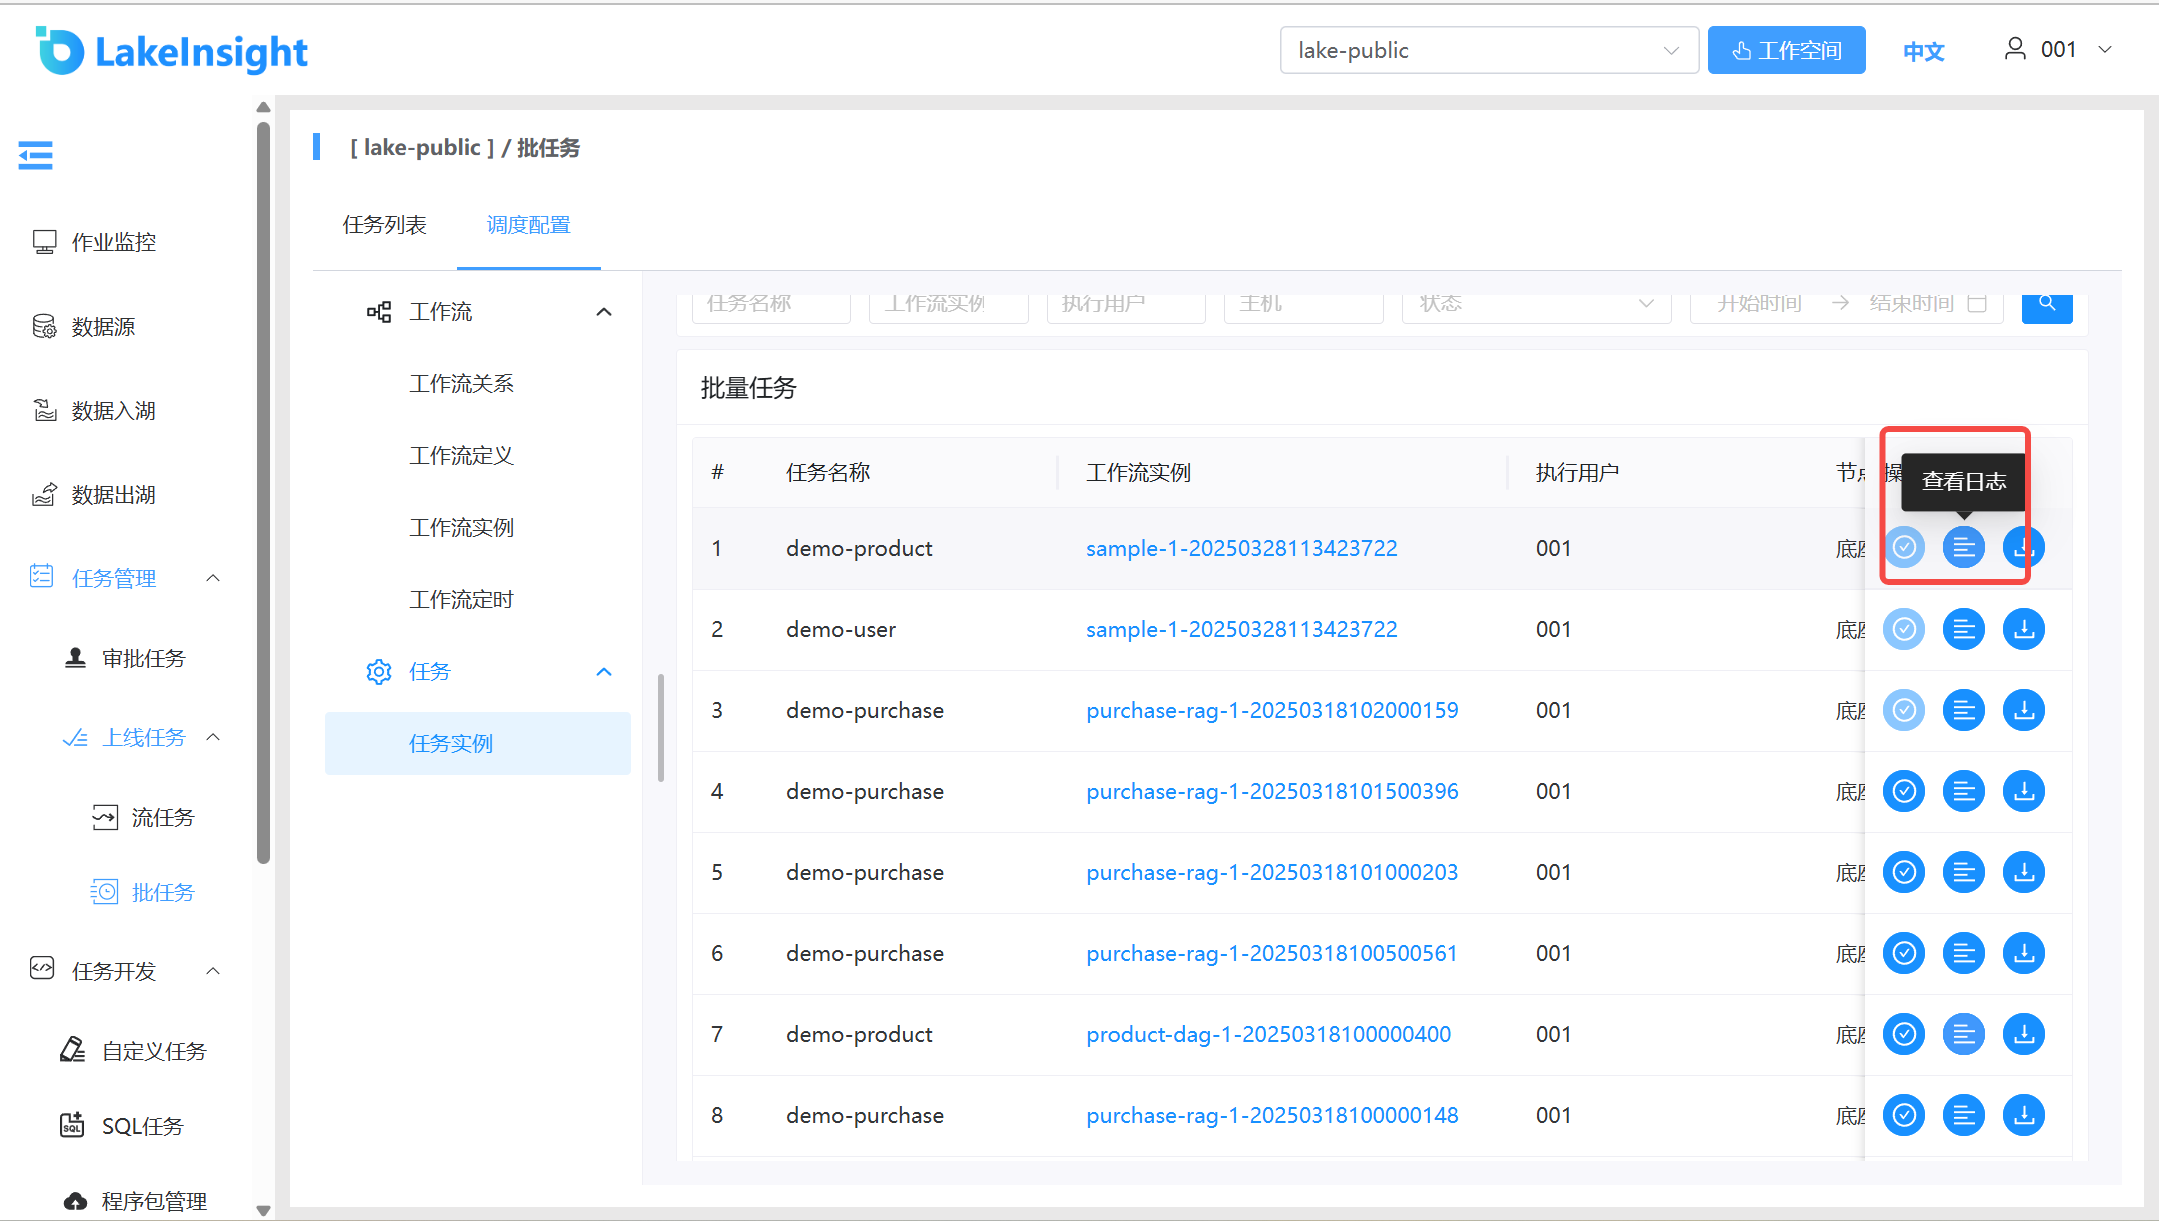
- View Logs: Click View Logs in the action column to view task execution logs:
Task Node Types
Task Node
Overview: Task node type, used to select a task and form a new task node.
Create Task Node:
- Click Workflow Definition, then Create Workflow to enter the DAG editing page;
- Select Task Node from the common nodes in the left toolbar, drag it to the right canvas, configure it in the popup dialog, and click OK to create the node.
Example:
- Select a task.
DEPENDENT
Overview: A Dependent node is a dependency check node. For example, if workflow A depends on the successful execution of workflow B from yesterday, the dependent node checks whether B has a successful instance from yesterday.
Create DEPENDENT Node:
- Click Workflow Definition, then Create Workflow to enter the DAG editing page;
- Select DEPENDENT from the logic nodes in the left toolbar, drag it to the right canvas, configure it in the popup dialog, and click OK to create the node.
Parameter Description:
Parameter Description Add Dependency Configure upstream task dependencies Check Interval Interval for checking upstream task status, default 10s Dependency Failure Strategy Fail: if upstream task fails, current task fails immediately; Wait: if upstream task fails, current task continues waiting Dependency Failure Wait Time When strategy is Wait, the duration the current task waits Example:
Dependent nodes provide logical judgment capabilities, checking the execution status of dependent nodes according to defined logic.
Two dependency modes are supported: Workflow Dependency and Task Dependency. Task Dependency mode is further divided into All Tasks in Workflow and Single Task. The Workflow Dependency mode checks the status of the dependent workflow; the All Tasks mode checks all task statuses in the workflow; the Single Task mode checks the status of the specified dependent task.
Node
dependent_Adepends on the successful execution of workflowpurchase-ragfrom last Wednesday. If the latest execution ofpurchase-raglast Wednesday failed,dependent_Afails and does not execute downstream tasks: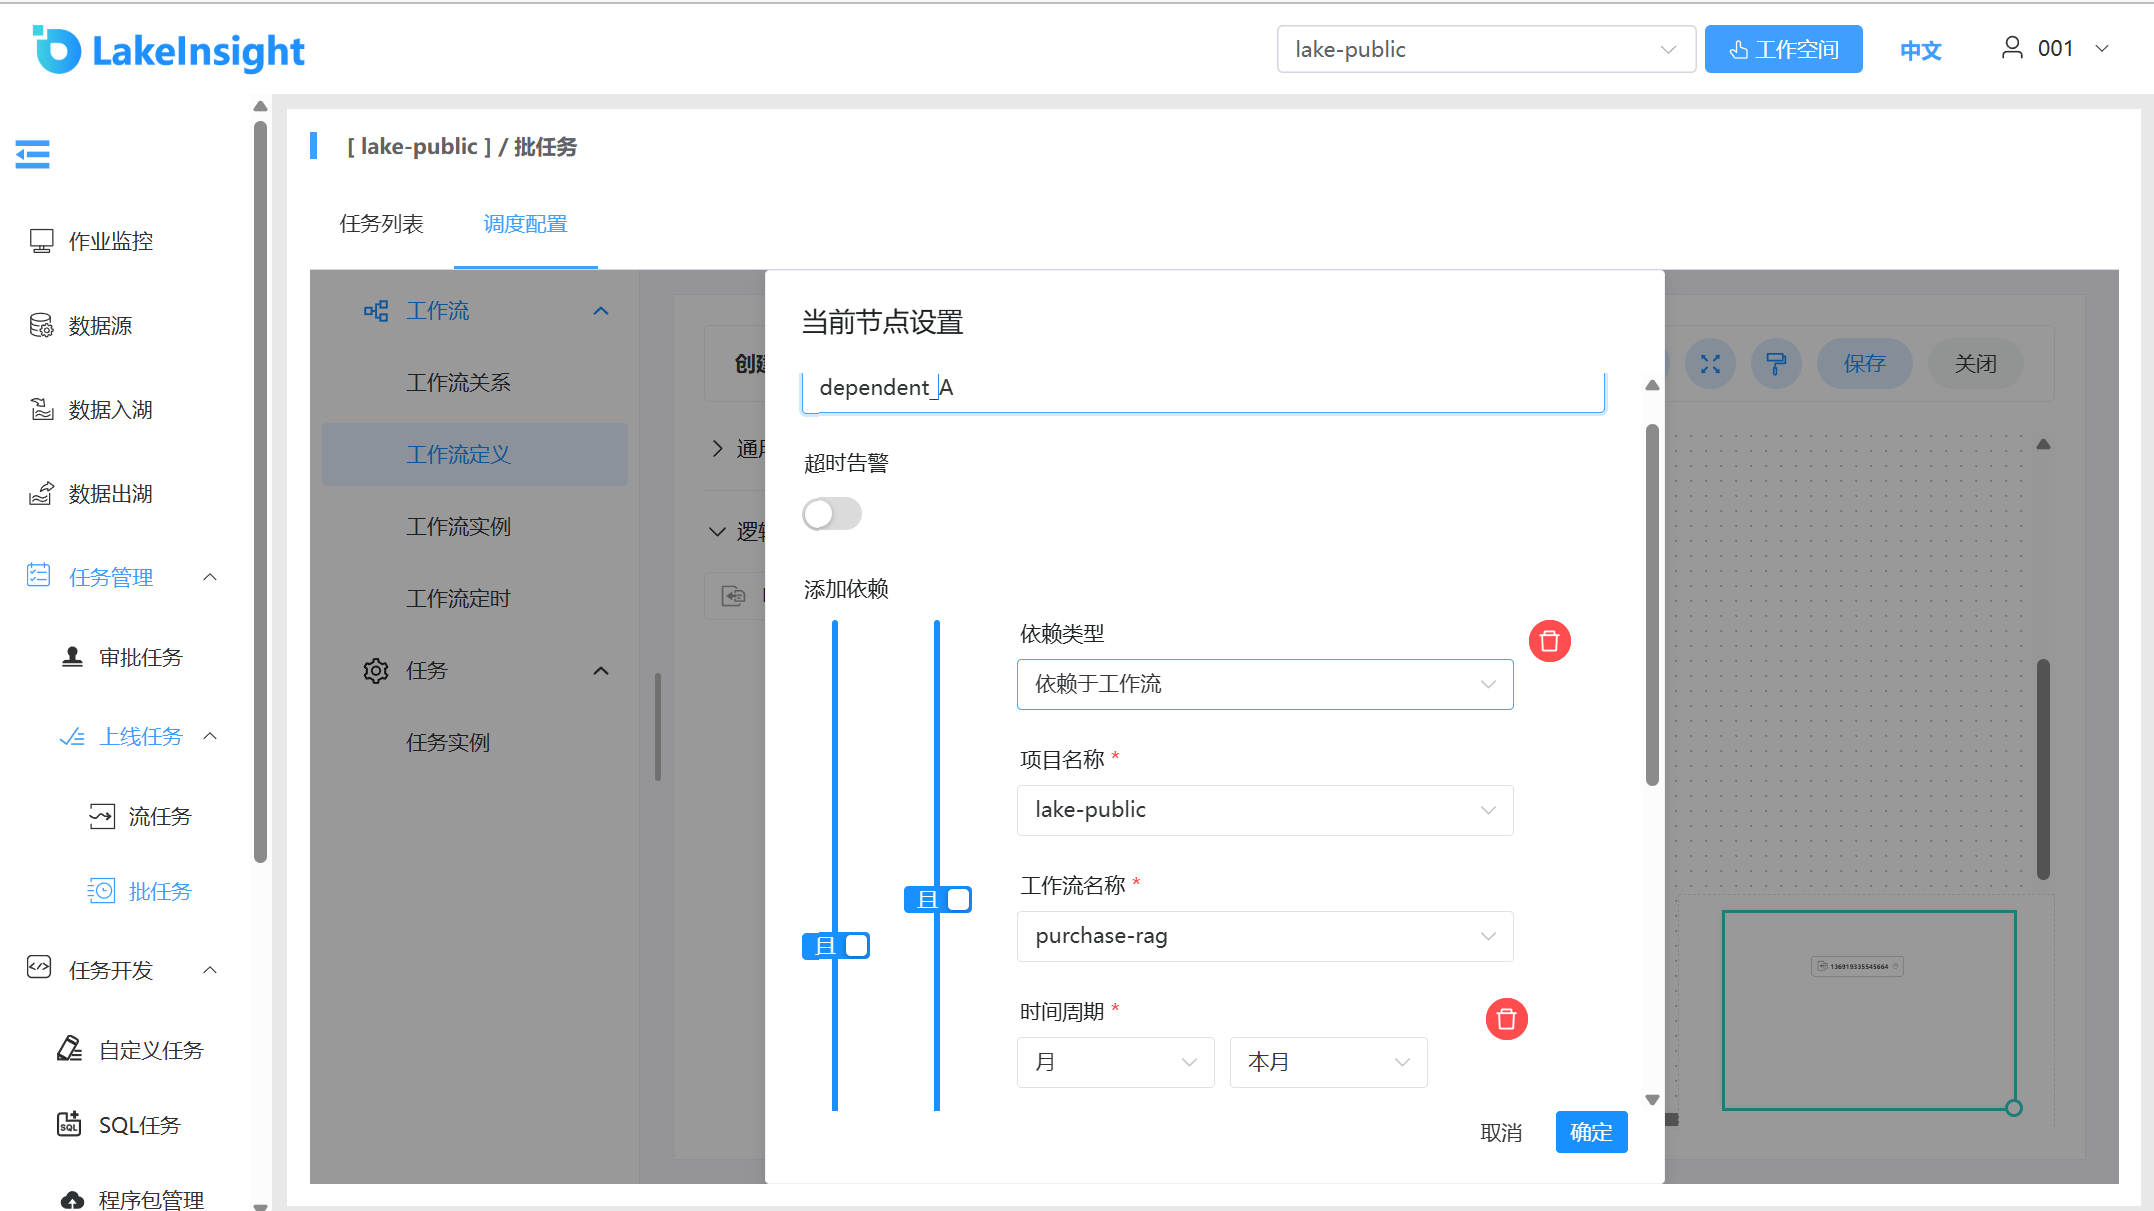
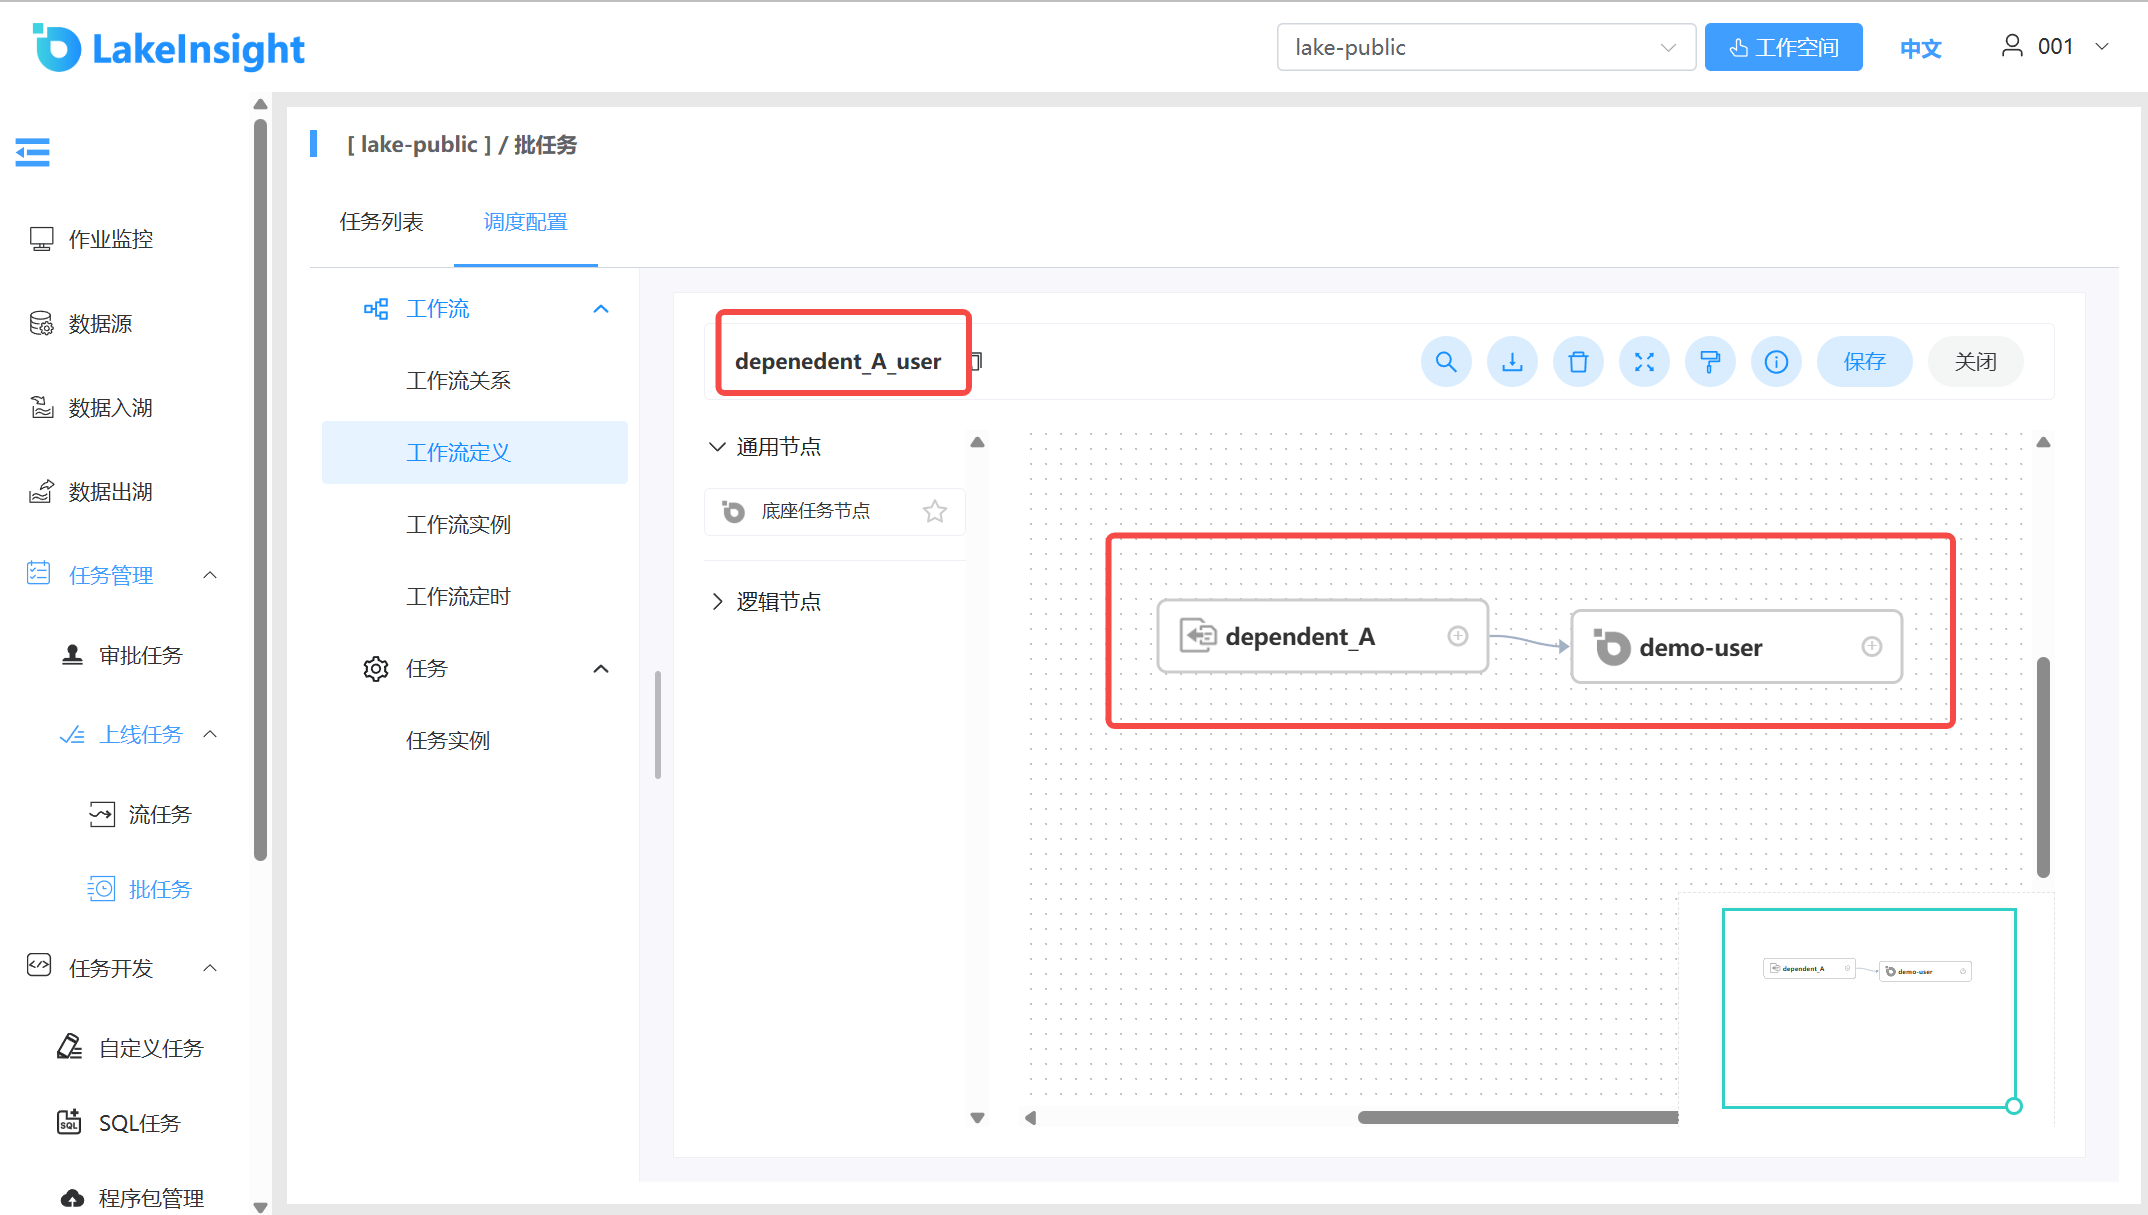
Create a DEPENDENT node named
dependent_A:dependent_Aestablishes a dependency relationship withdemo-userand is saved as workflowdependent_A_user.