Development Environment
Click Data Intelligence Development > Development Environment in the left navigation to enter the development environment management interface, where you can view the list of development tasks under the current workspace. From this page, you can create, edit, start/stop development tasks, view logs, and enter the task IDE interface.
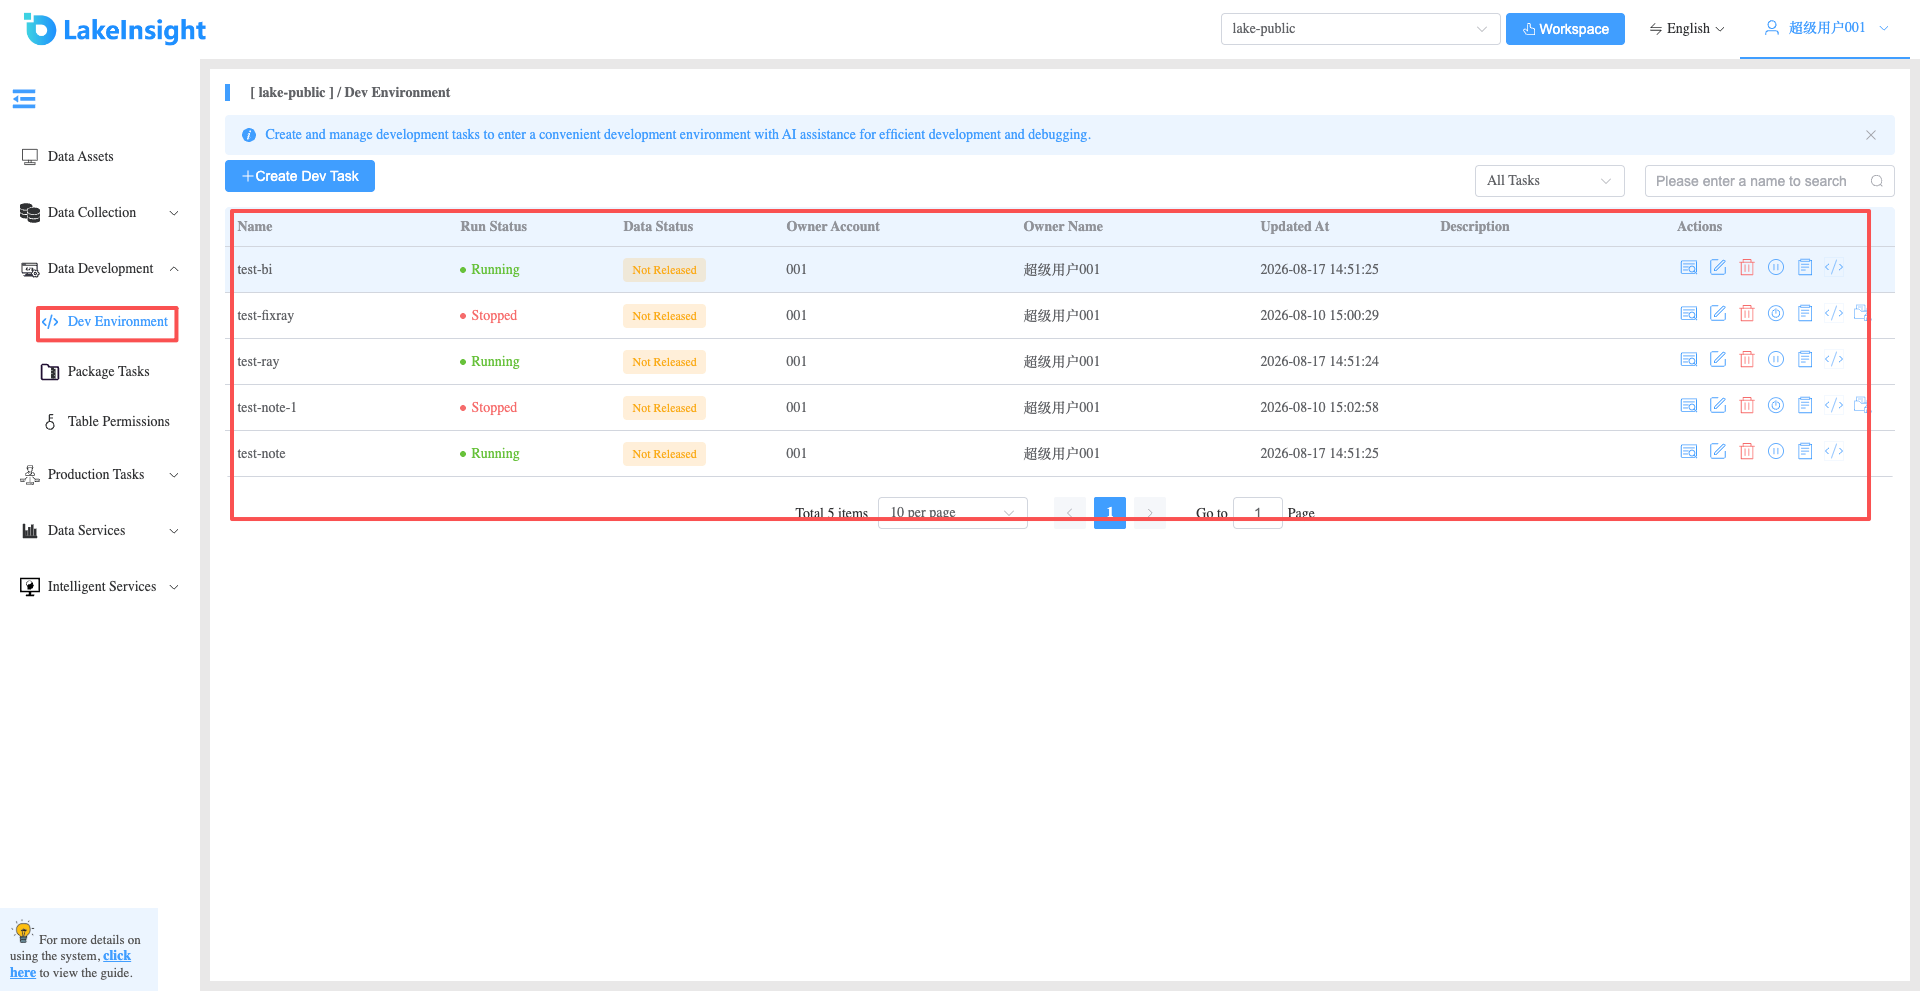
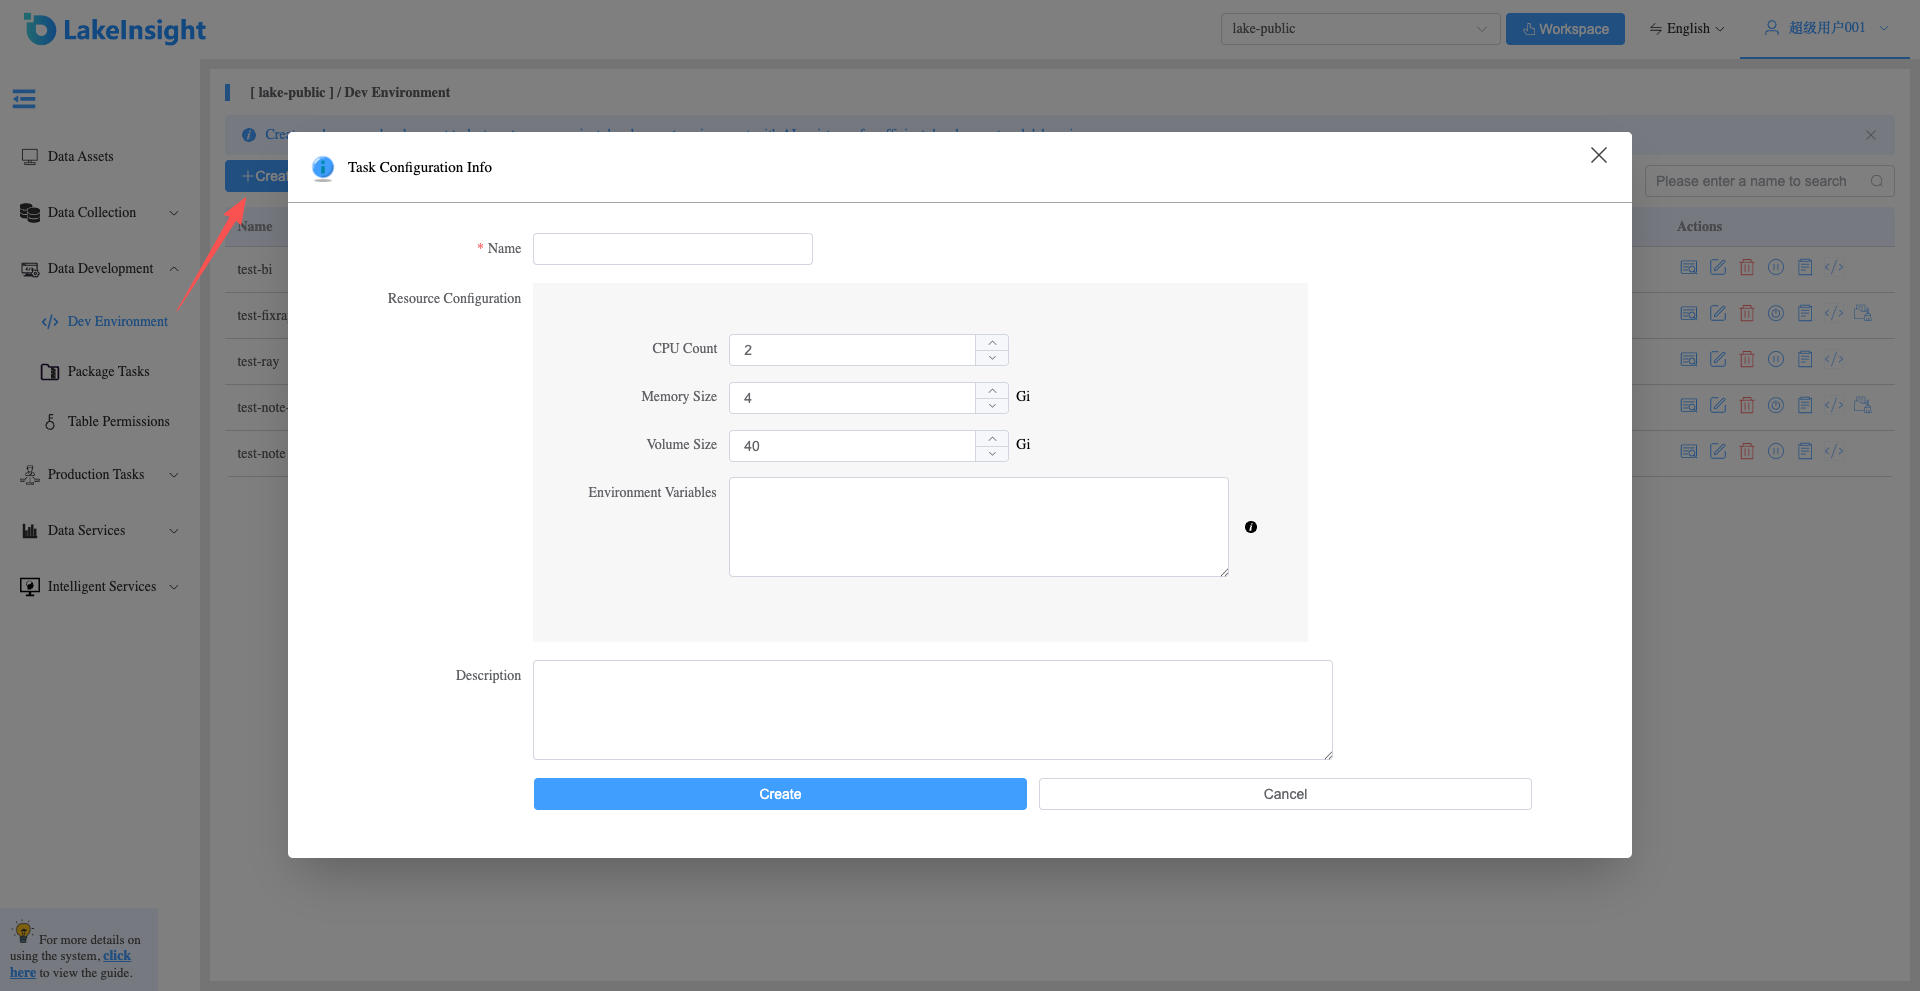
Create Development Task
Click the Create Development Task button to open the task configuration page. Fill in the required fields including name, resource configuration (CPU, memory, storage size), and description. Click Create to create a new development task.
View Details, Edit, Delete, Start/Stop, and Logs
Each development task record in the list includes View Details, Edit, Delete, Start/Stop, View Logs, and Enter IDE buttons on the right side for managing the current development task.
Enter the Task IDE Editor
For a running development task, click the Go to Develop button to enter the code development interface, where you can write Flink SQL, Spark SQL, and Python code, and publish completed code as approval tasks.
Upon entering the task IDE interface, select the /home/coder/work-dir directory for code editing.
Create Flink/Spark SQL and Publish for Approval
Right-click in the left tree panel to create a Flink/Spark SQL note named user-demo.sql. Once created, you can edit Flink/Spark SQL and execute the SQL statements.
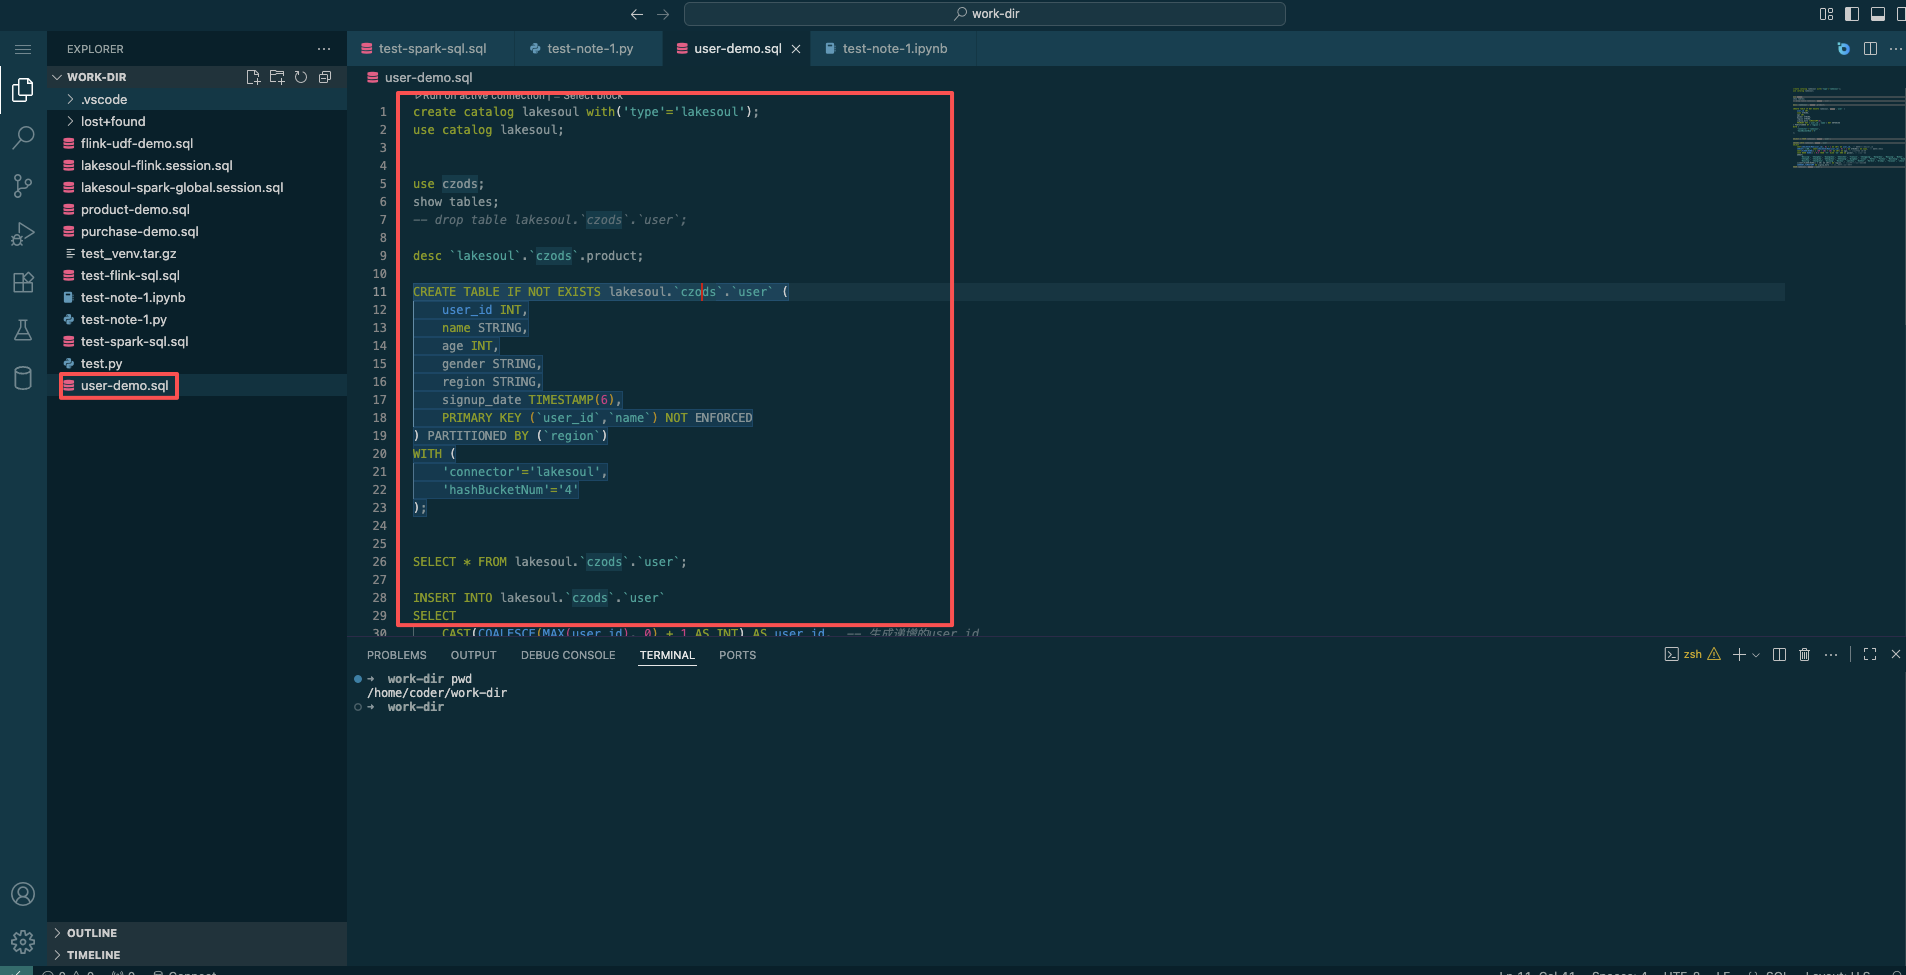
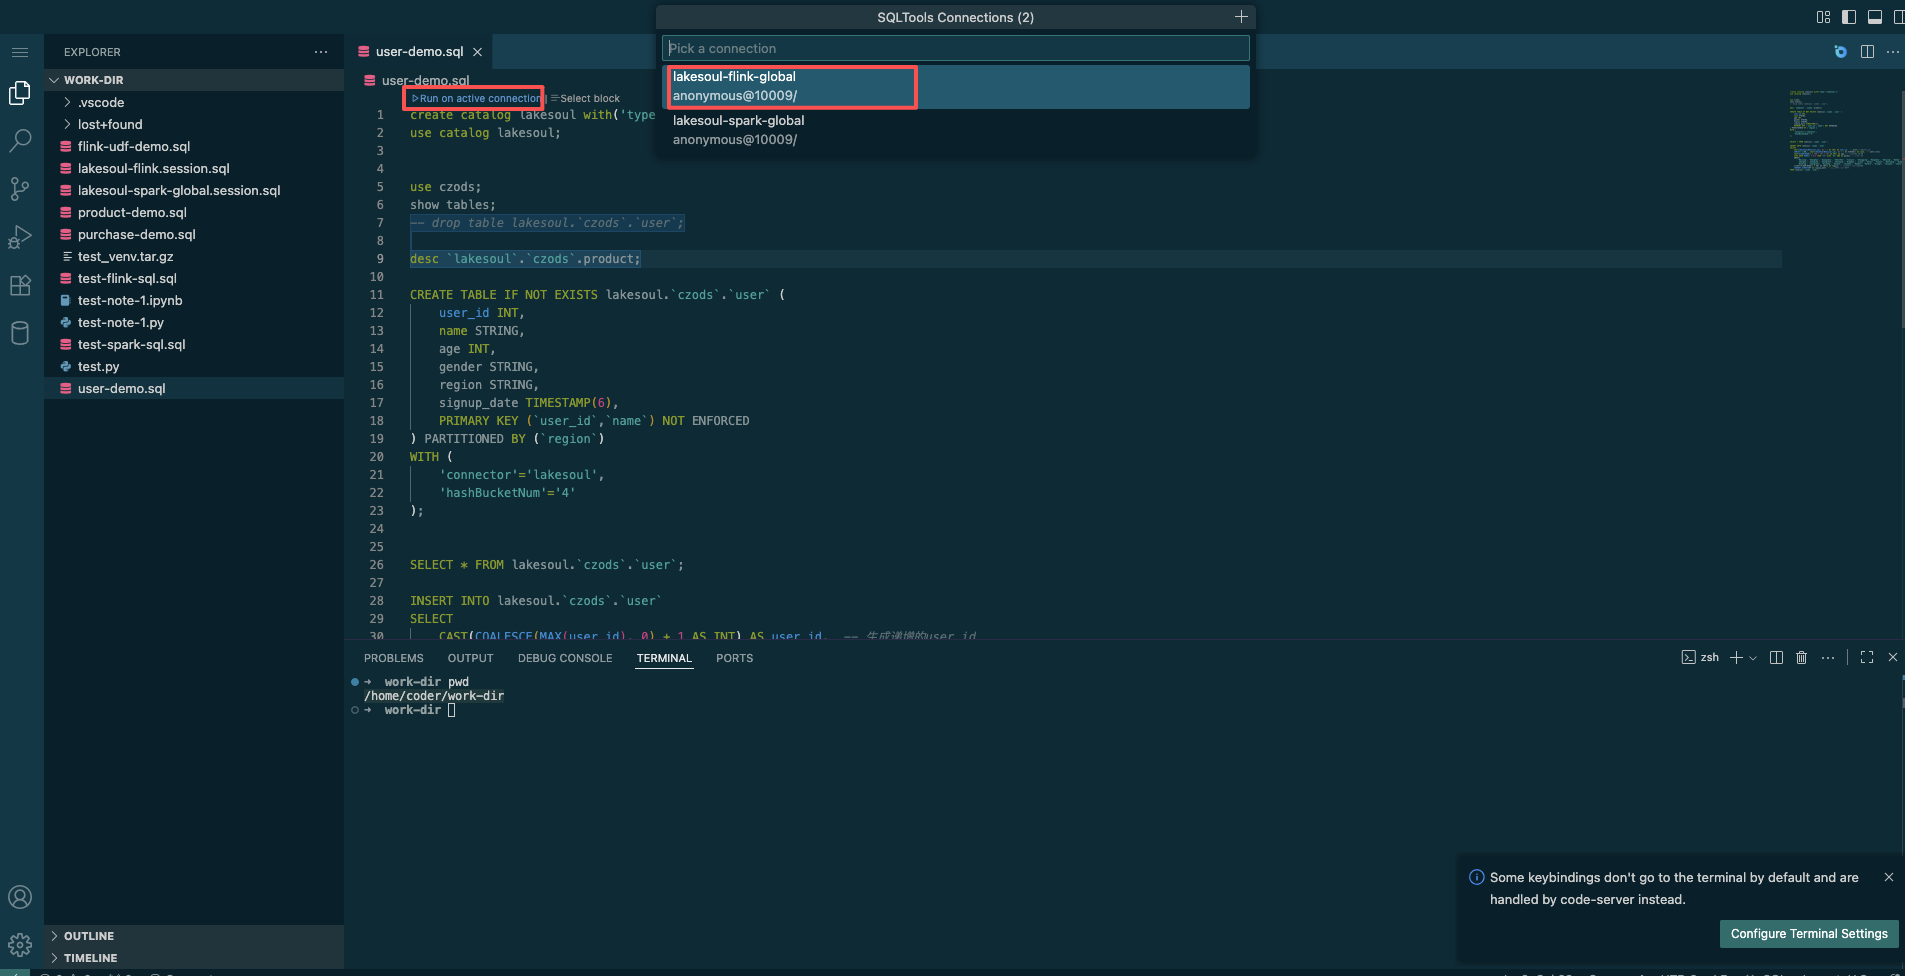
- Click
Run on activate connectionand select thelakesoul-flink-globalorlakesoul-spark-globalconnection in the SQL Tool Connection dialog to execute the current SQL.
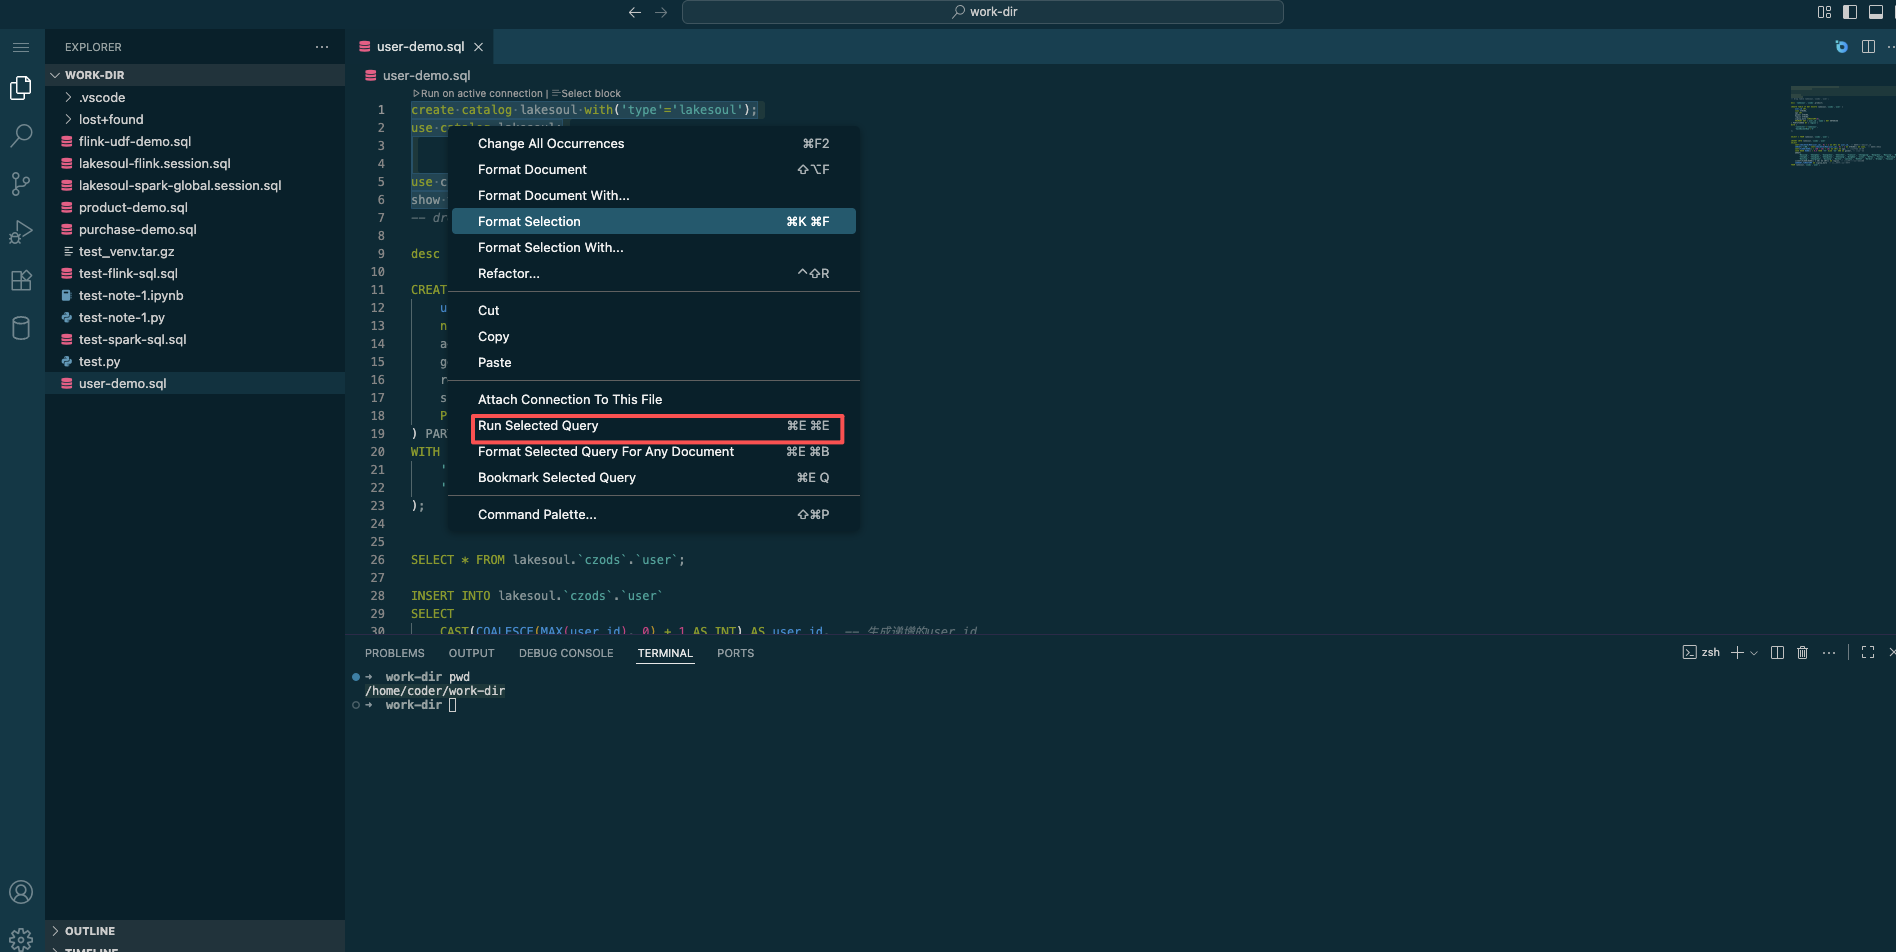
- Select the code to execute, right-click, and choose
Run Selected Query, then select thelakesoul-flink-globalorlakesoul-spark-globalconnection to execute the selected SQL.
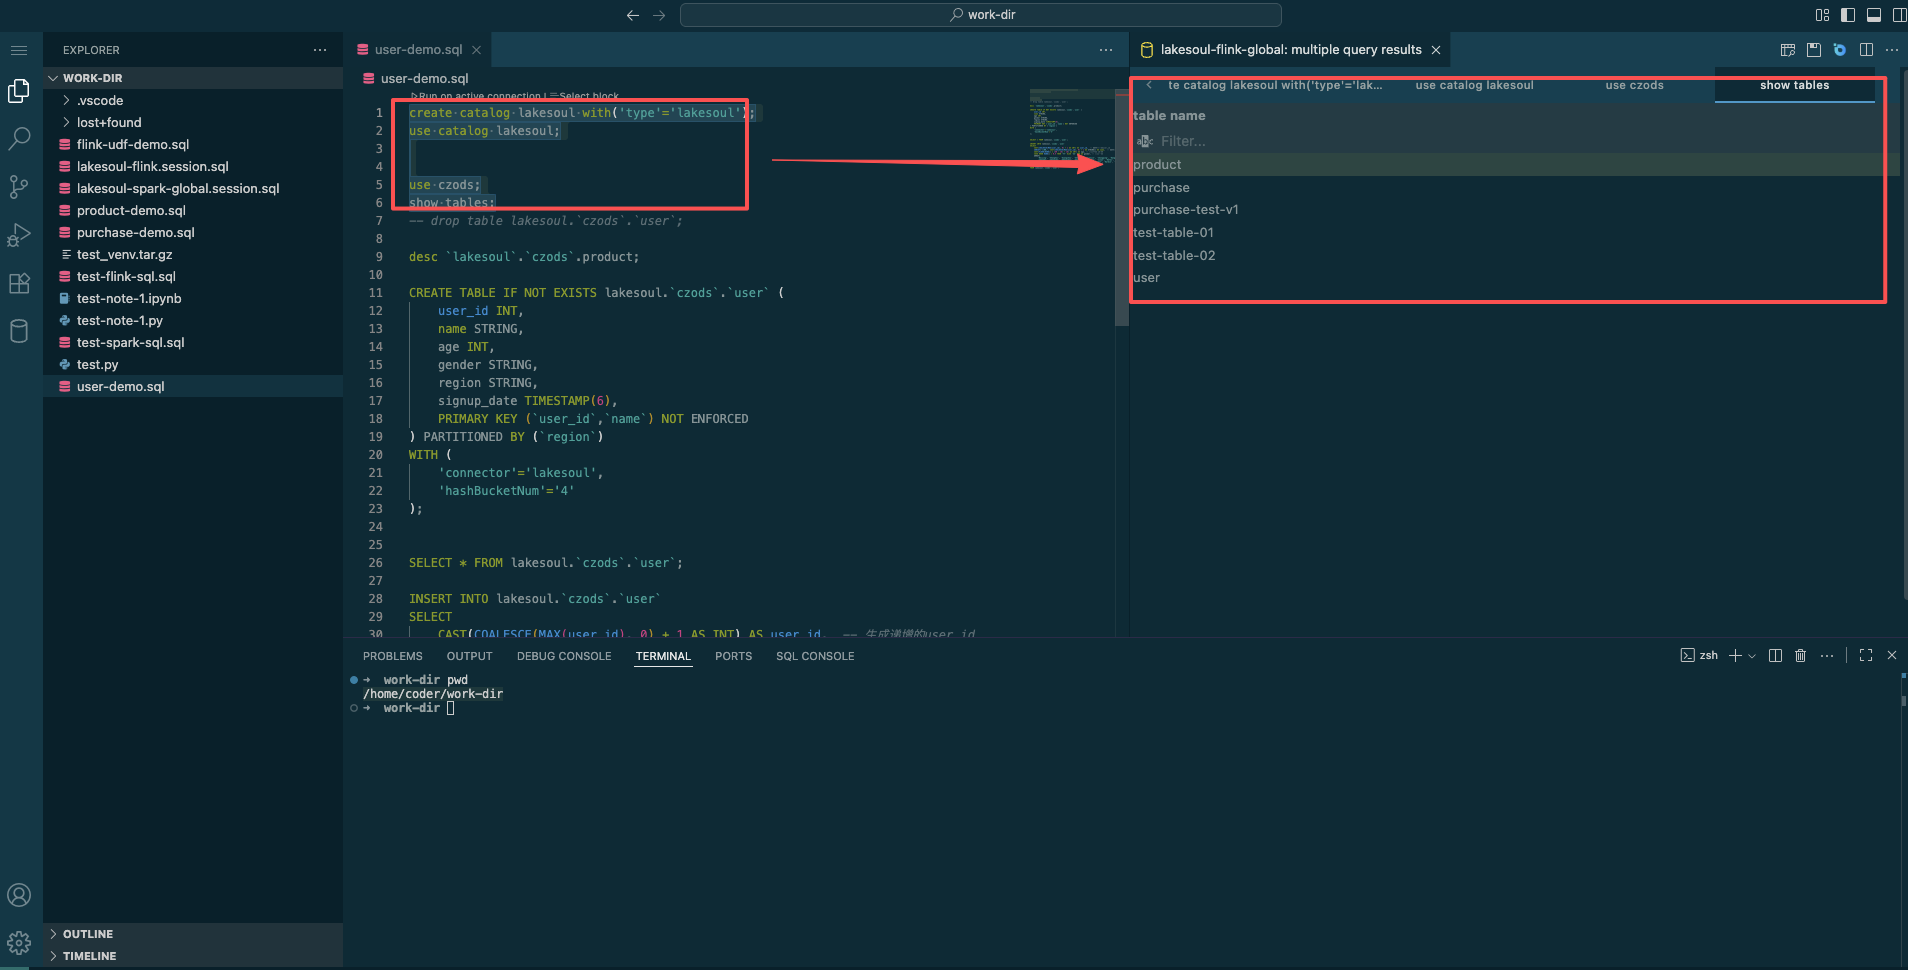
- After execution, the results of the current SQL or selected SQL are displayed in the right-side output panel.
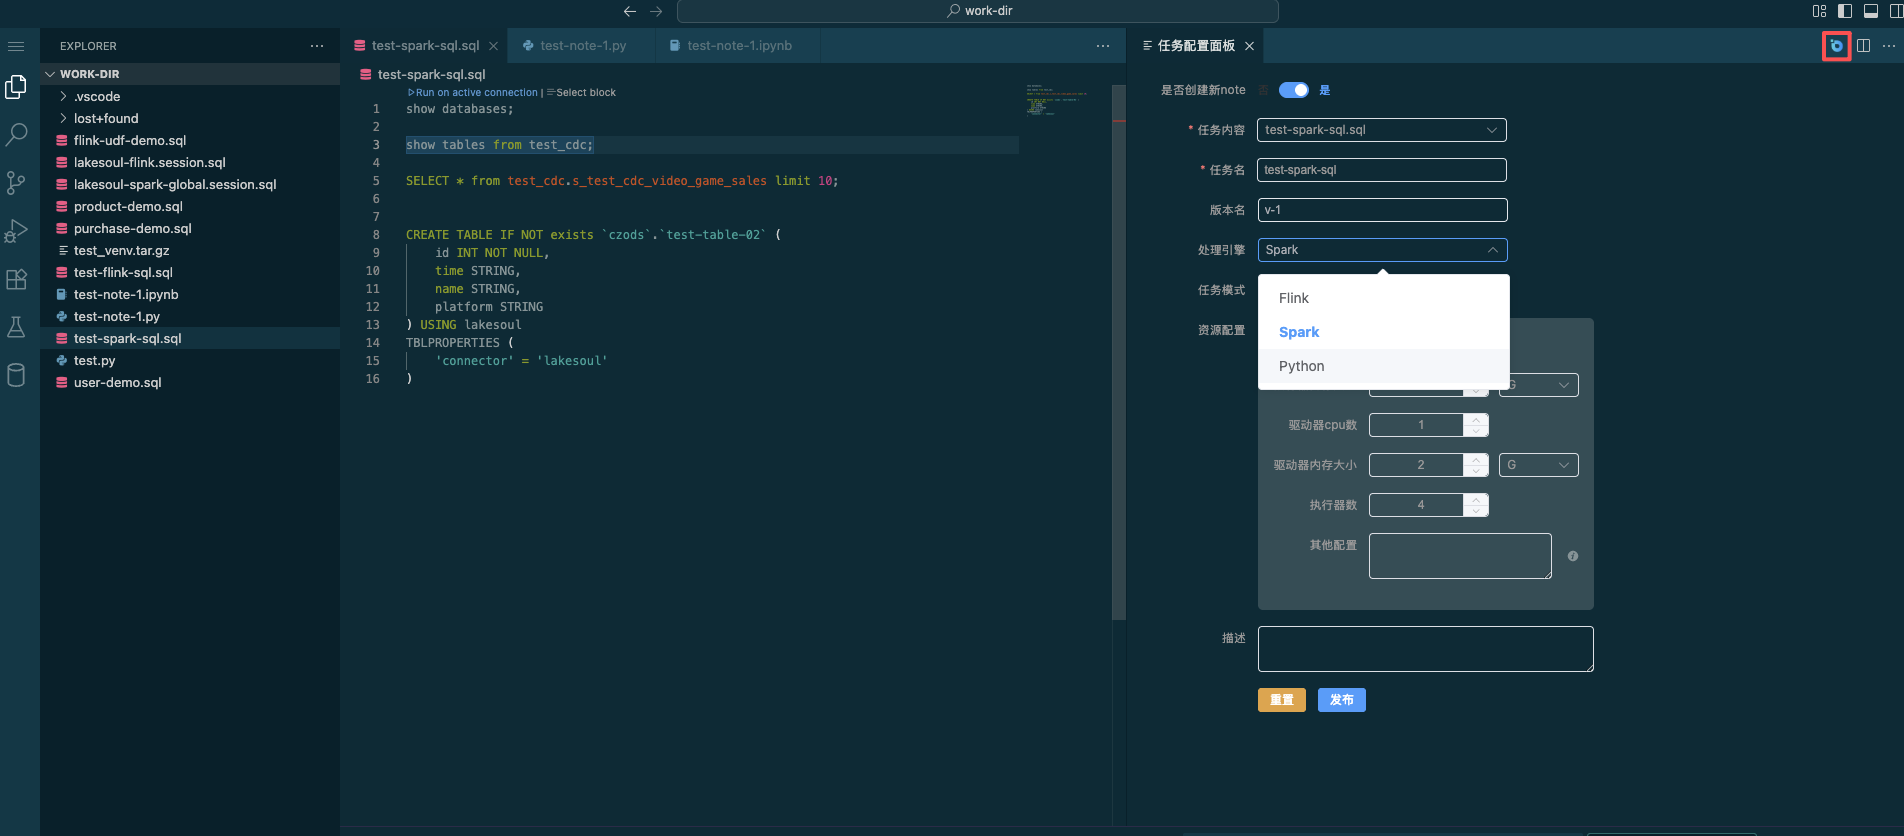
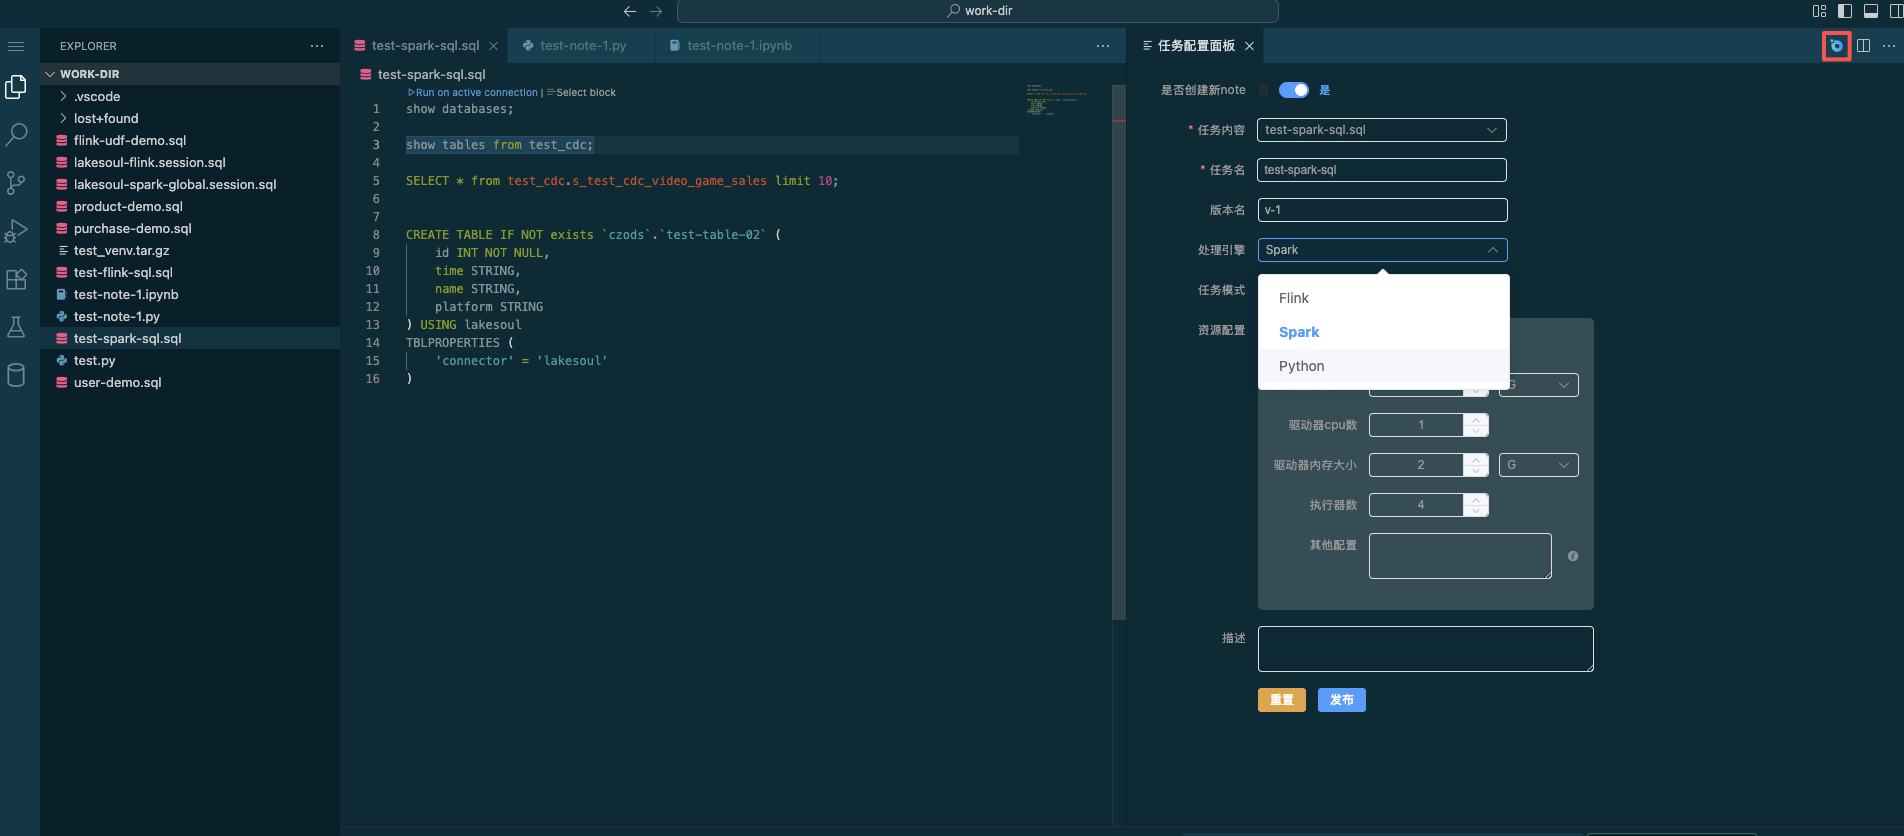
- Click the Task Configuration button in the top right corner to publish Flink streaming/batch or Spark batch SQL for approval. After publishing, it can run in streaming or batch mode with scheduled execution.
In the task configuration panel, choose whether to create a new task or update an existing launched task, select the corresponding Flink/Spark SQL file for SQL content, choose the Flink or Spark processing engine (and for Flink, set streaming or batch mode), configure resource settings, and click Publish to submit it to the approval task interface in Task Management.
When developing SQL statements, you can use ${scheduleTime} to obtain the current task's schedule time timestamp.
Usage: ${scheduleTime}
Example:
- Add
${scheduleTime}in SQL
insert into `lakesoul`.`test_cdc`.`test` values (8, FROM_UNIXTIME(${scheduleTime}/1000,'yyyy-MM-dd HH:mm:ss'), 'test-8', 'aa-8');
Create Python Tasks and Publish for Approval
Right-click in the left tree panel to create a Python task named user-note-1.py or user-note-1.ipynb. Once created, you can develop Python code within it.
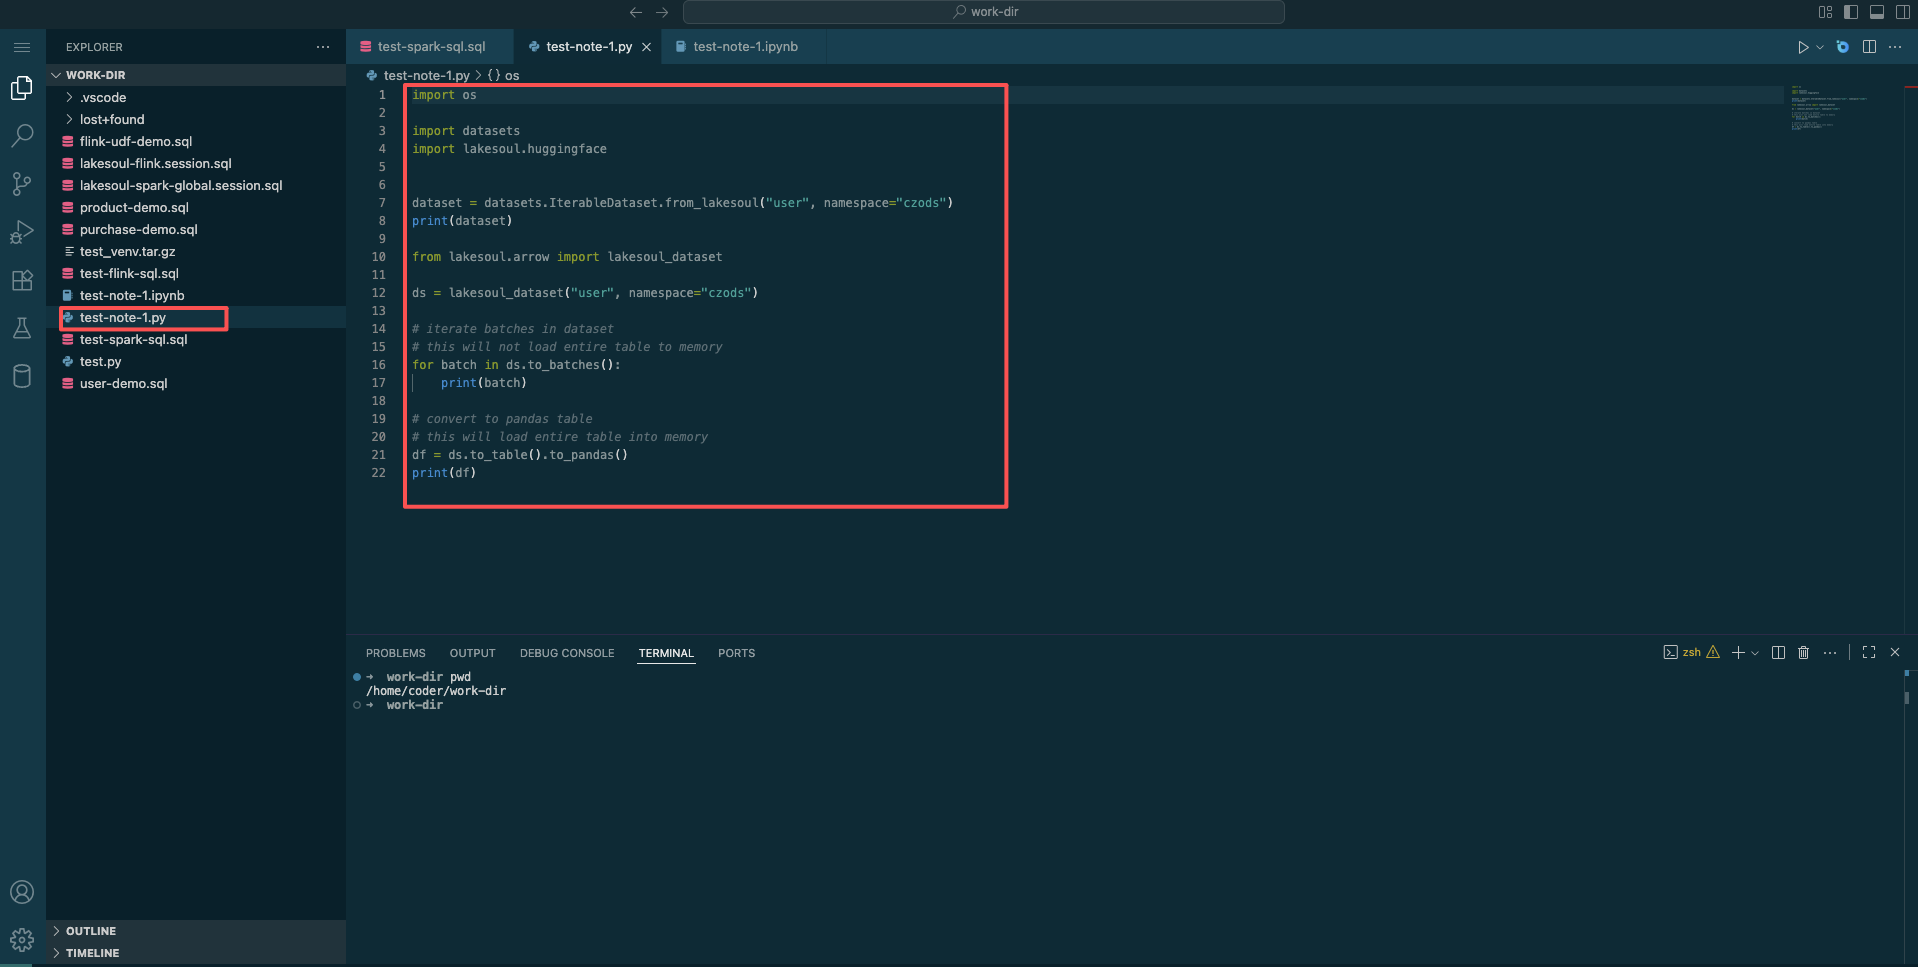
Run edited Python code
Create a Python runtime environment
The IDE has built-in conda support. Create an isolated Python virtual environment for dependency management:
conda create -n lakesoul_venv python=3.10

conda activate lakesoul_venv

conda install -y -n lakesoul_venv -c conda-forge conda-pack
After creating the environment, select the newly created runtime environment from the environment selector in the bottom right corner.
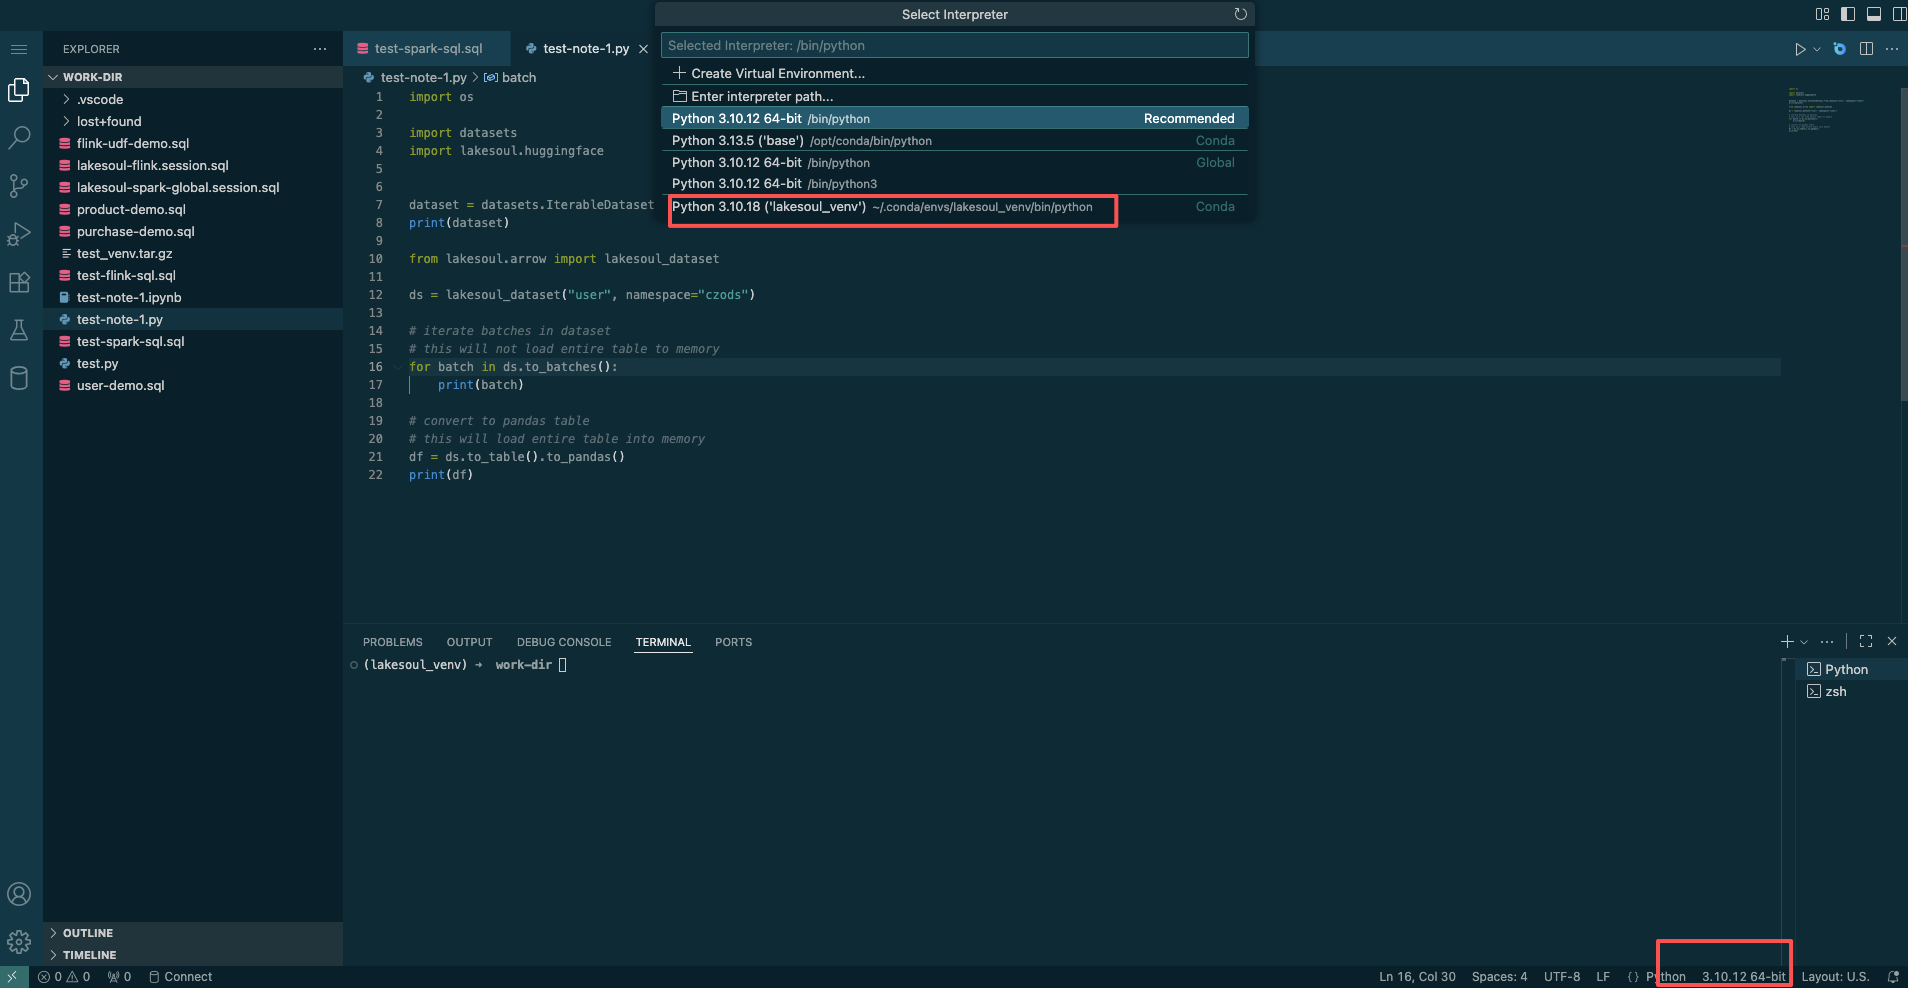
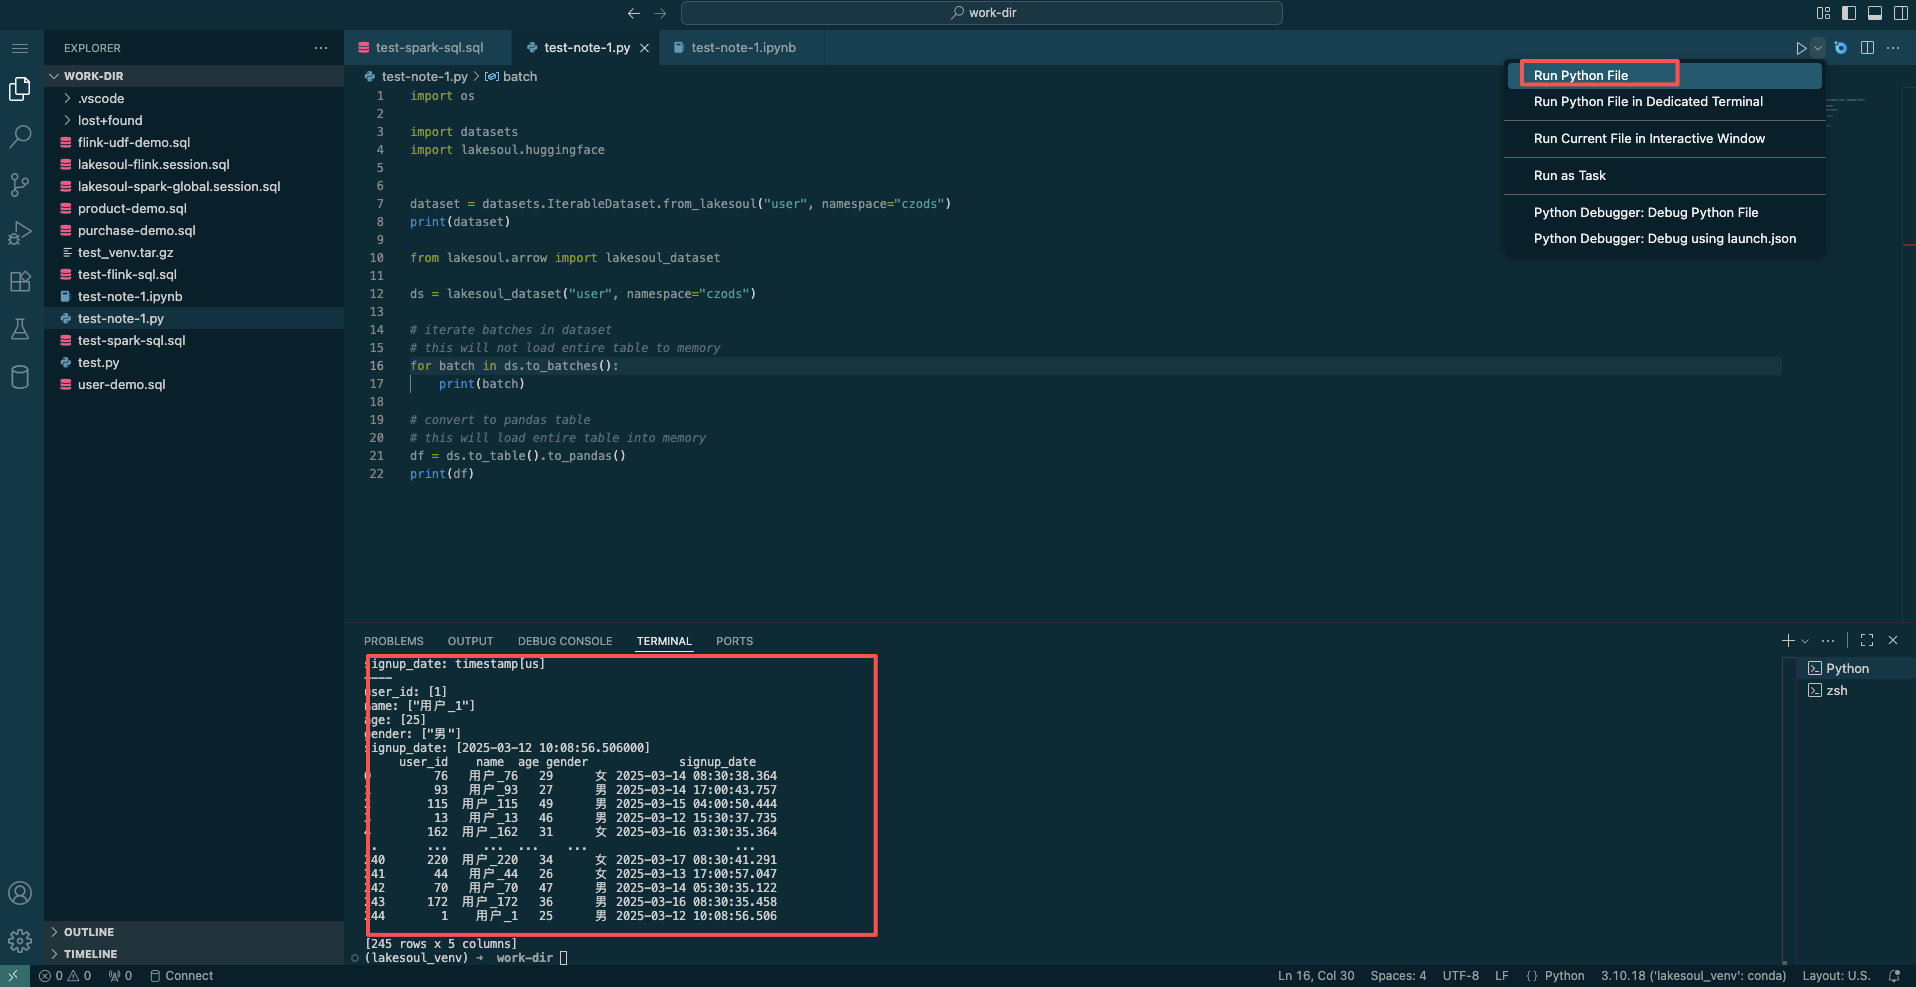
Select the runtime environment, then click the Run Python File button in the top right to execute the code and view the output.
- Run Python code in Jupyter mode

    Click Select Kernel in the top right and choose the corresponding Python environment from the selection list.
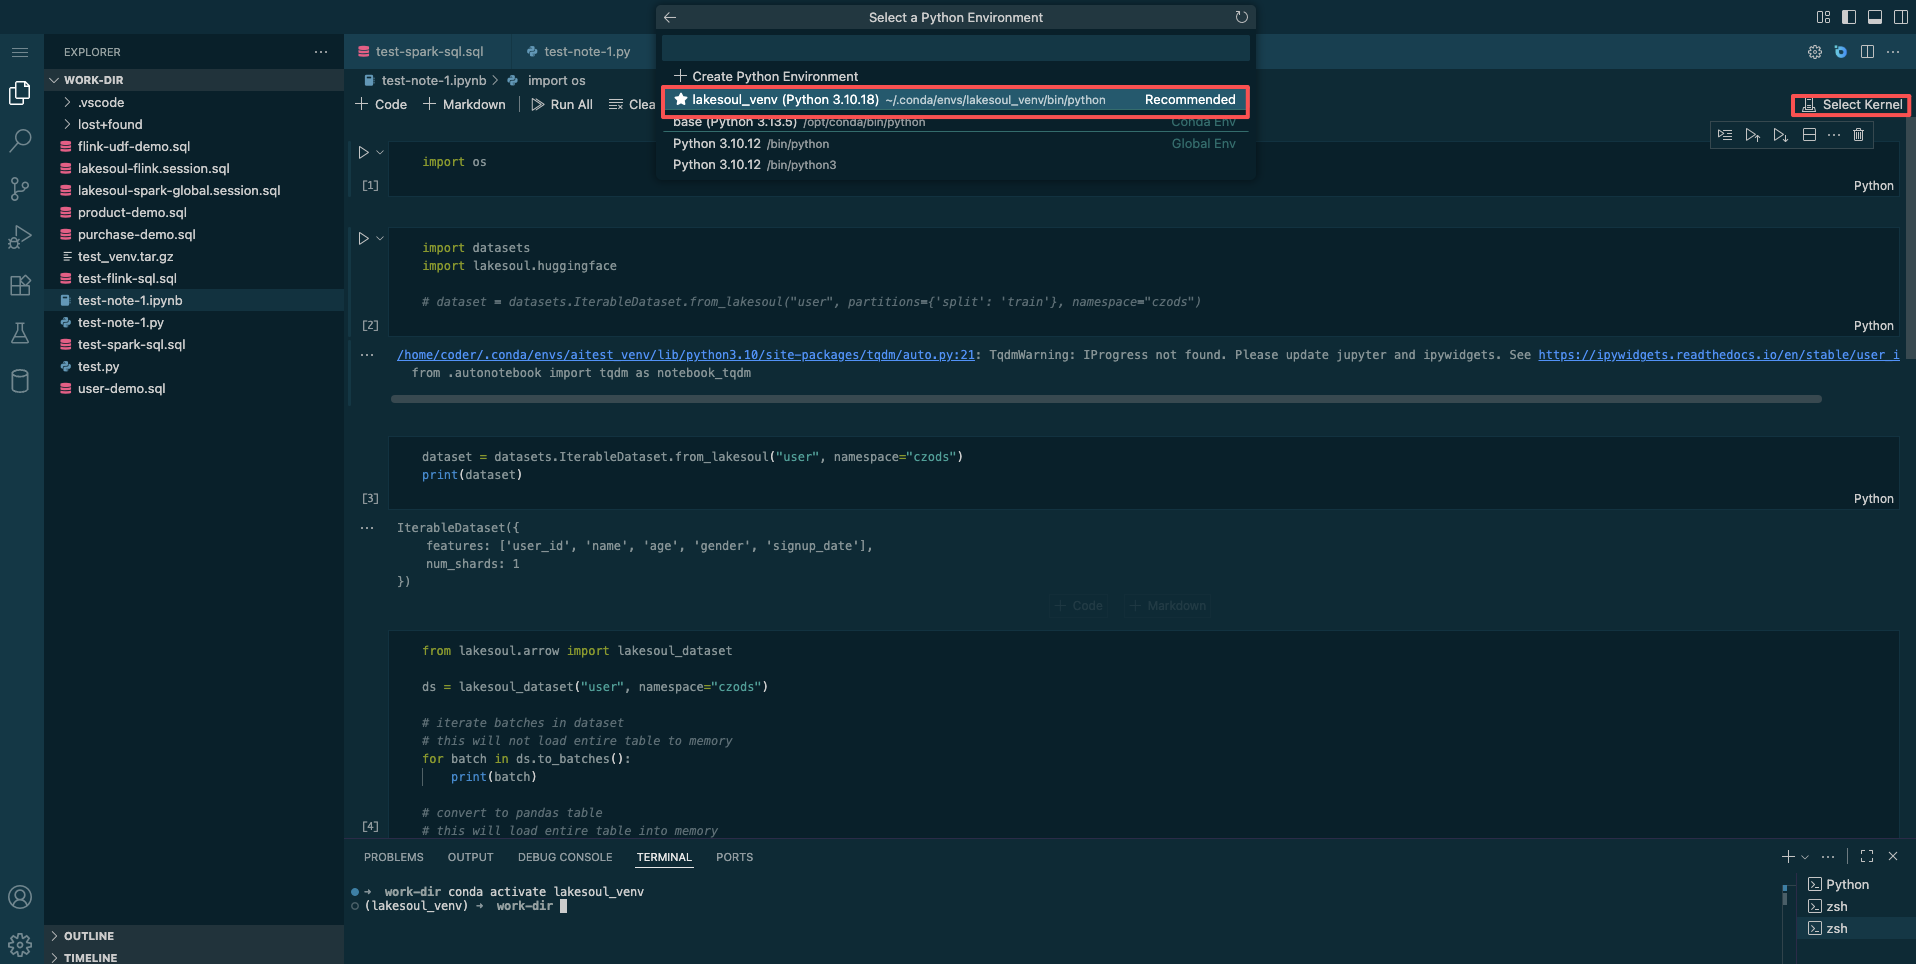
Click the Run ALL button or the Execute Cell button on individual cells to run the corresponding code.
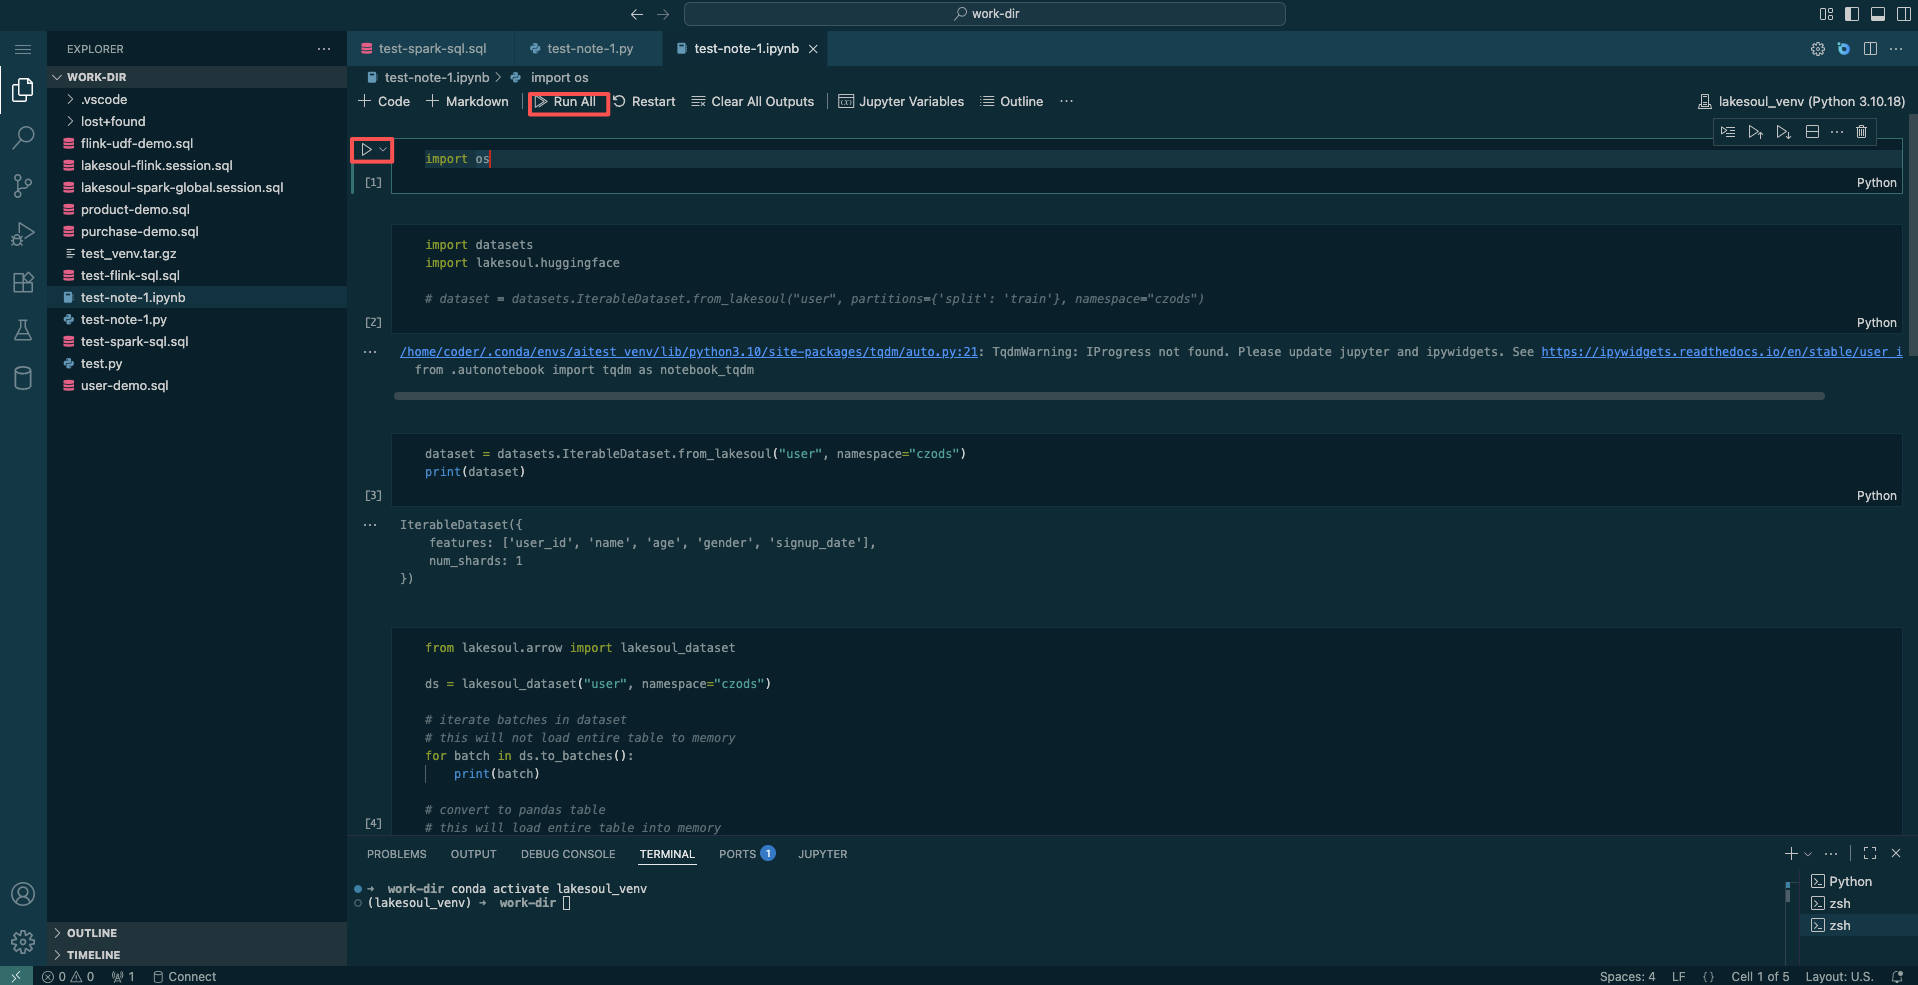
- Publish completed Python code as an approval task for scheduled execution after approval.

    1. When publishing for approval, package the current virtual environment using `conda pack -f -n lakesoul_venv -o lakesoul_venv.tar.gz` into a tar file, and upload it to the package file management via the upload package function. If the launched Python task encounters missing dependencies at runtime, use `conda install` to install the required libraries.
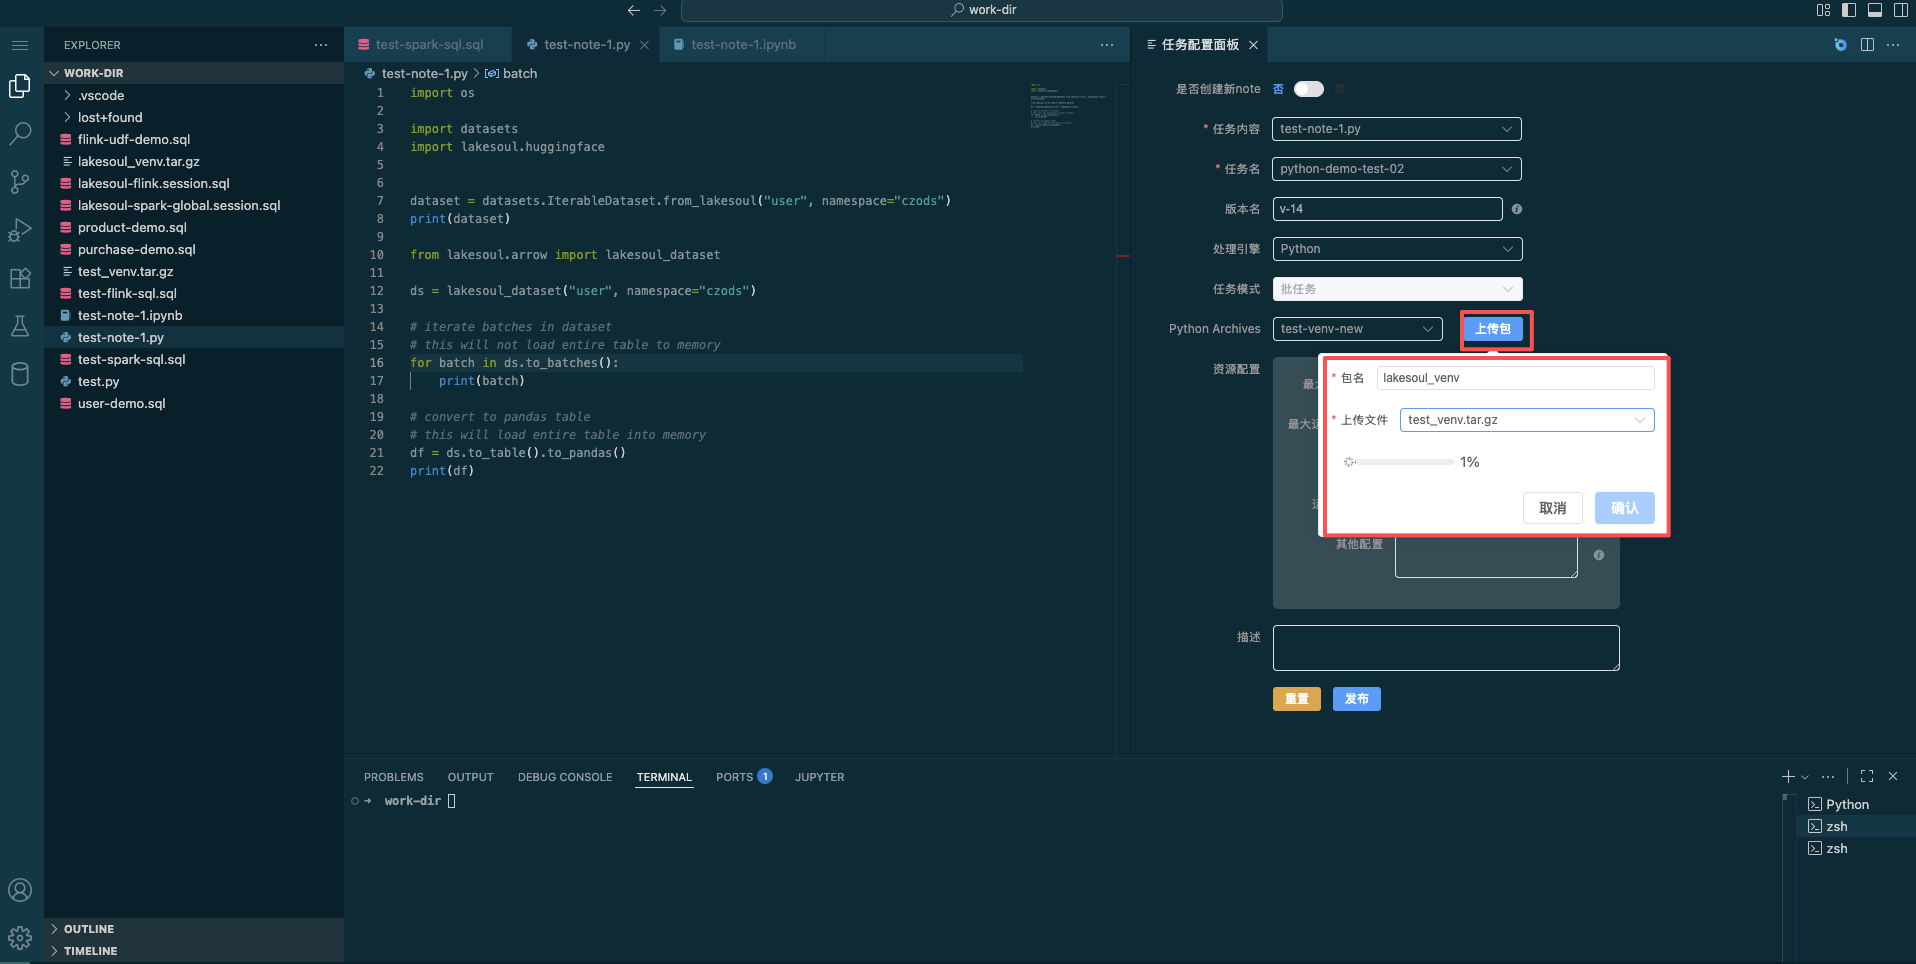
    2. Click the **Task Configuration** button in the top right to configure publishing for Python-type tasks.

    In the task configuration panel, choose whether to create a new task or update an existing launched task, select the Python file content, choose the Python processing engine, select the Python runtime dependency environment (you can choose an already uploaded dependency file or click Upload Package to upload a new packaged tar file), set resource settings, and click Publish to submit it to the approval task interface in Task Management.
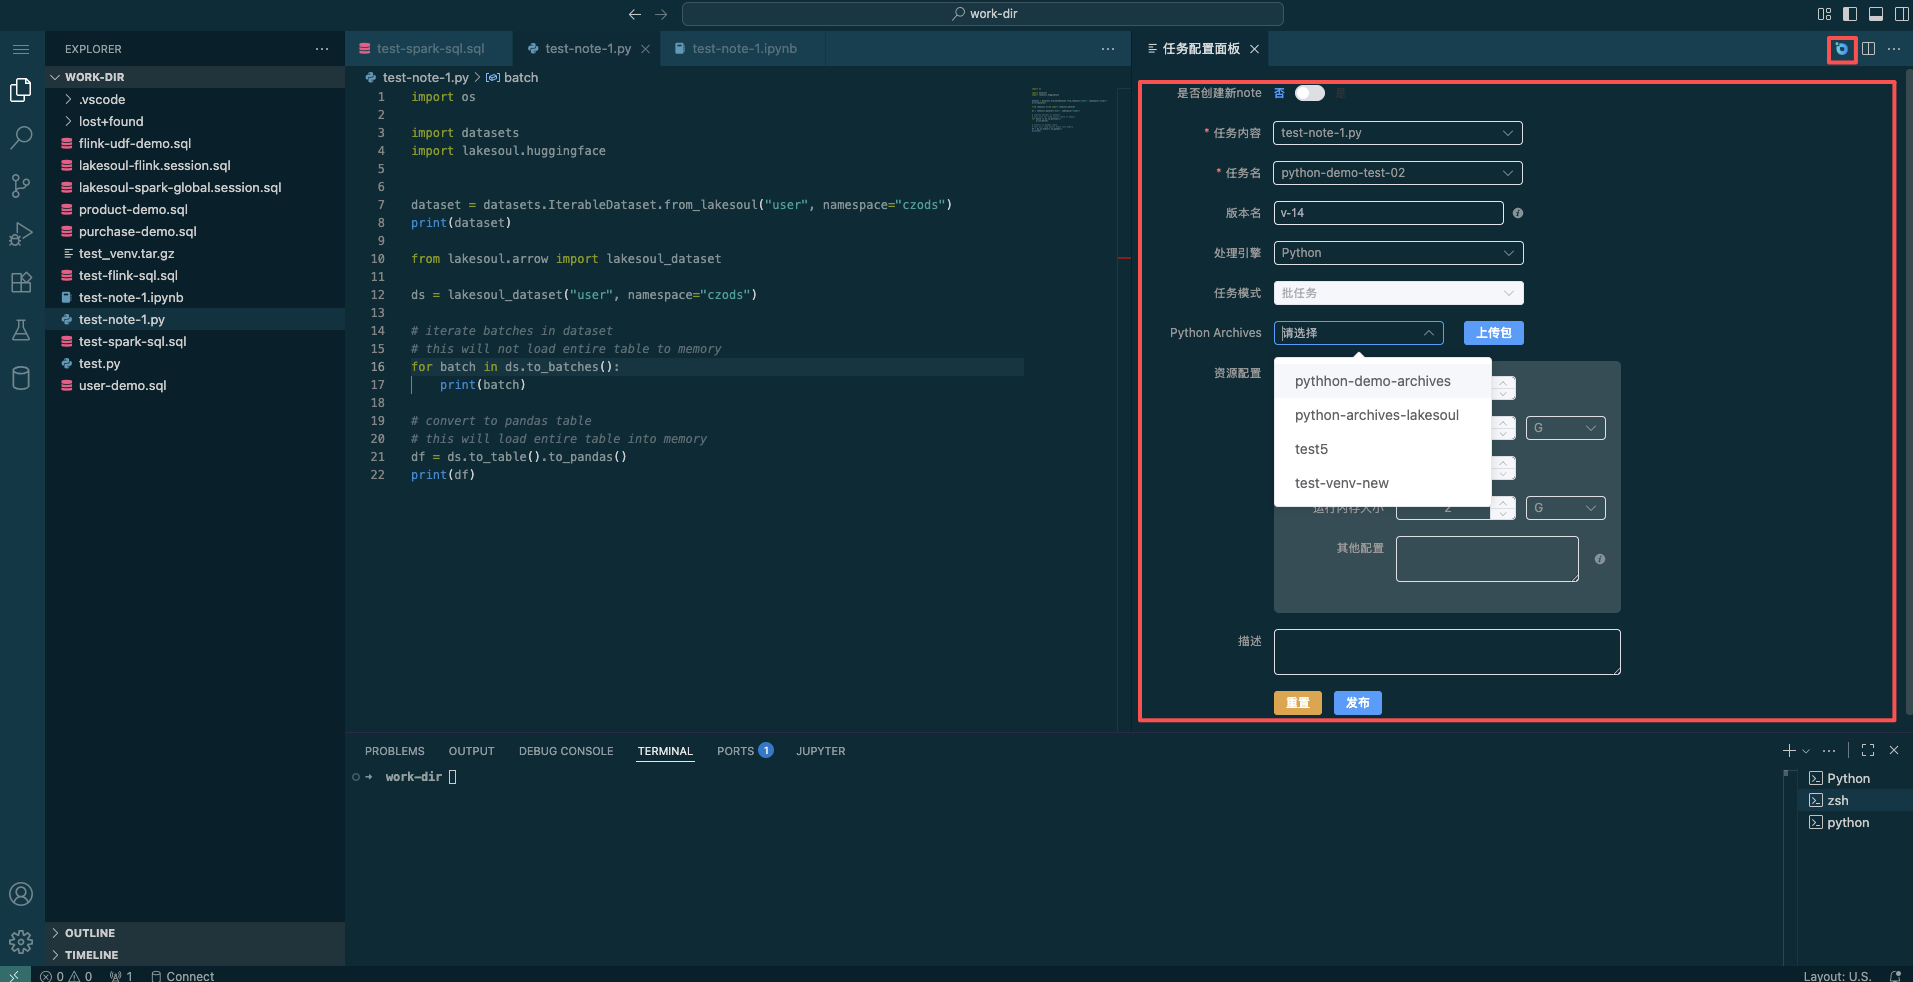
When developing Python batch scheduling tasks, use --scheduleTime to obtain the current task's schedule timestamp. Usage is as follows:
import argparse

if __name__ == "__main__":
    parser = argparse.ArgumentParser(description="PySpark Batch Task")
    parser.add_argument("--scheduleTime", type=str, required=True, help="Set scheduler Time")

    args = parser.parse_args()
    currentDate = int(args.scheduleTime)
    previousDate = datetime.fromtimestamp(currentDate / 1000, tz=pytz.timezone("Asia/Shanghai")) - timedelta(days=1)
    preDate = previousDate.strftime("%Y%m%d")
    print(preDate)
Create Ray Job Tasks and Publish for Approval
Create a Python file under /home/coder/work-dir in the left resource manager, and write Ray, Daft, and LakeSoul related code.
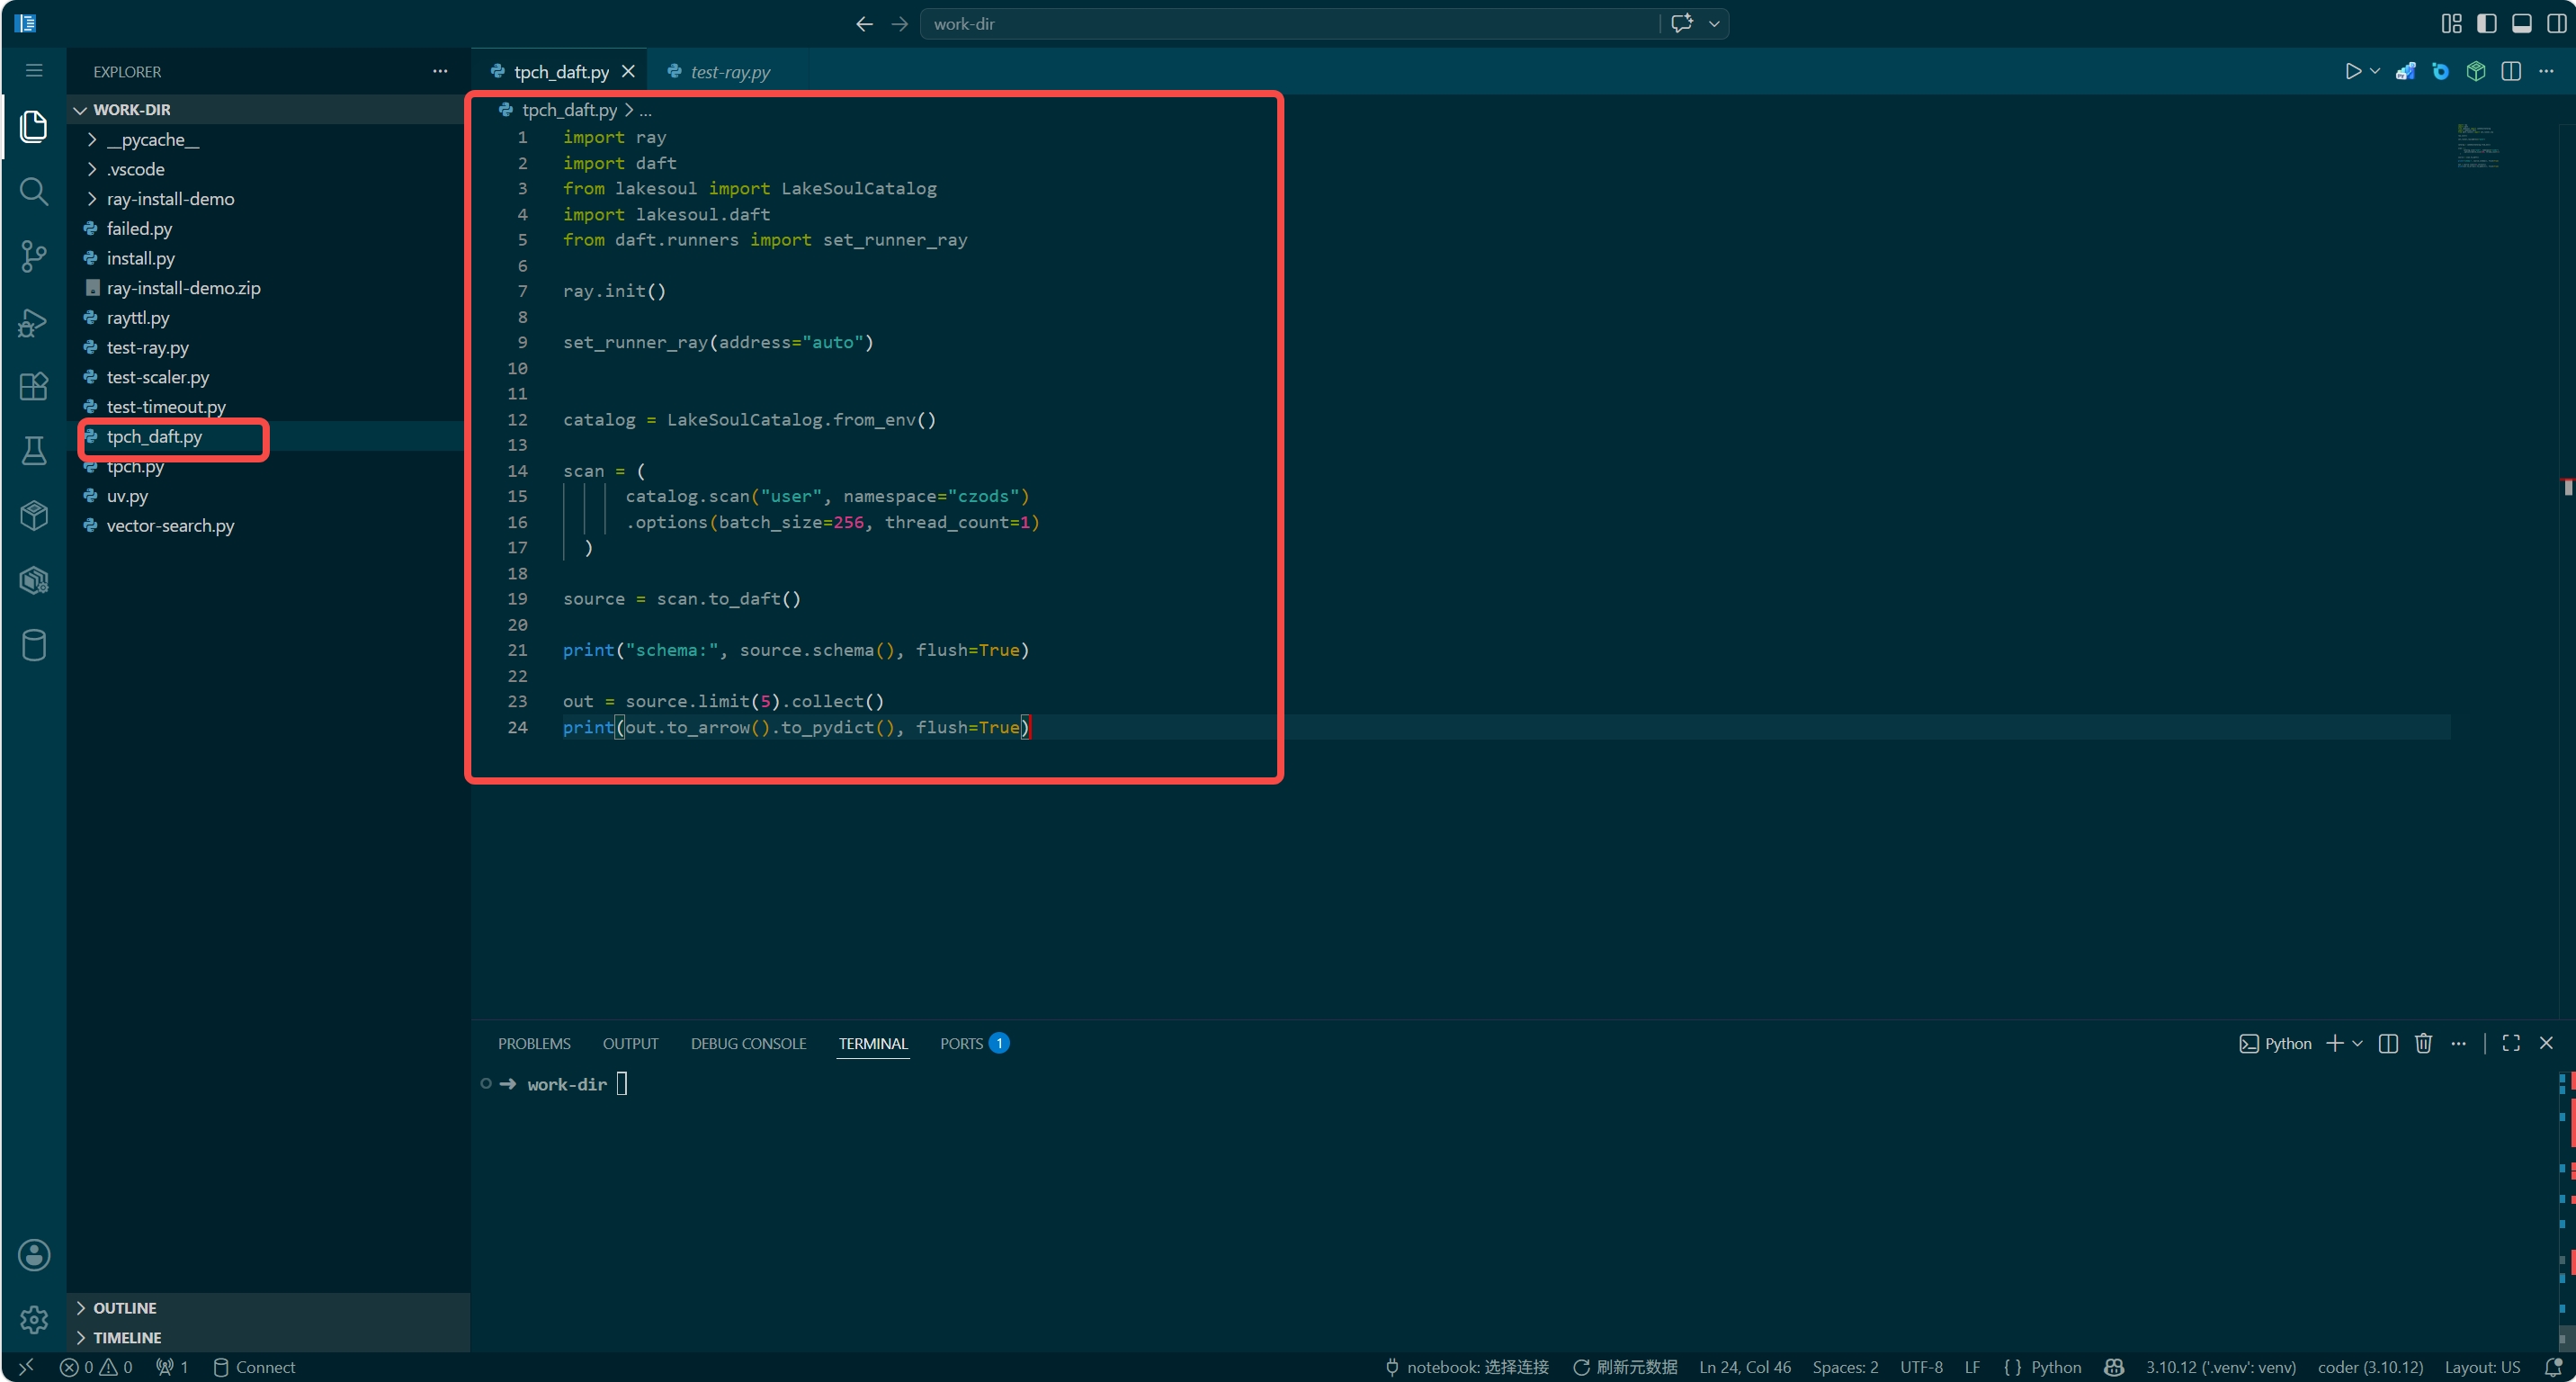
Click the Python runtime environment at the bottom right and select the default /home/coder/.venv/bin/python runtime environment.
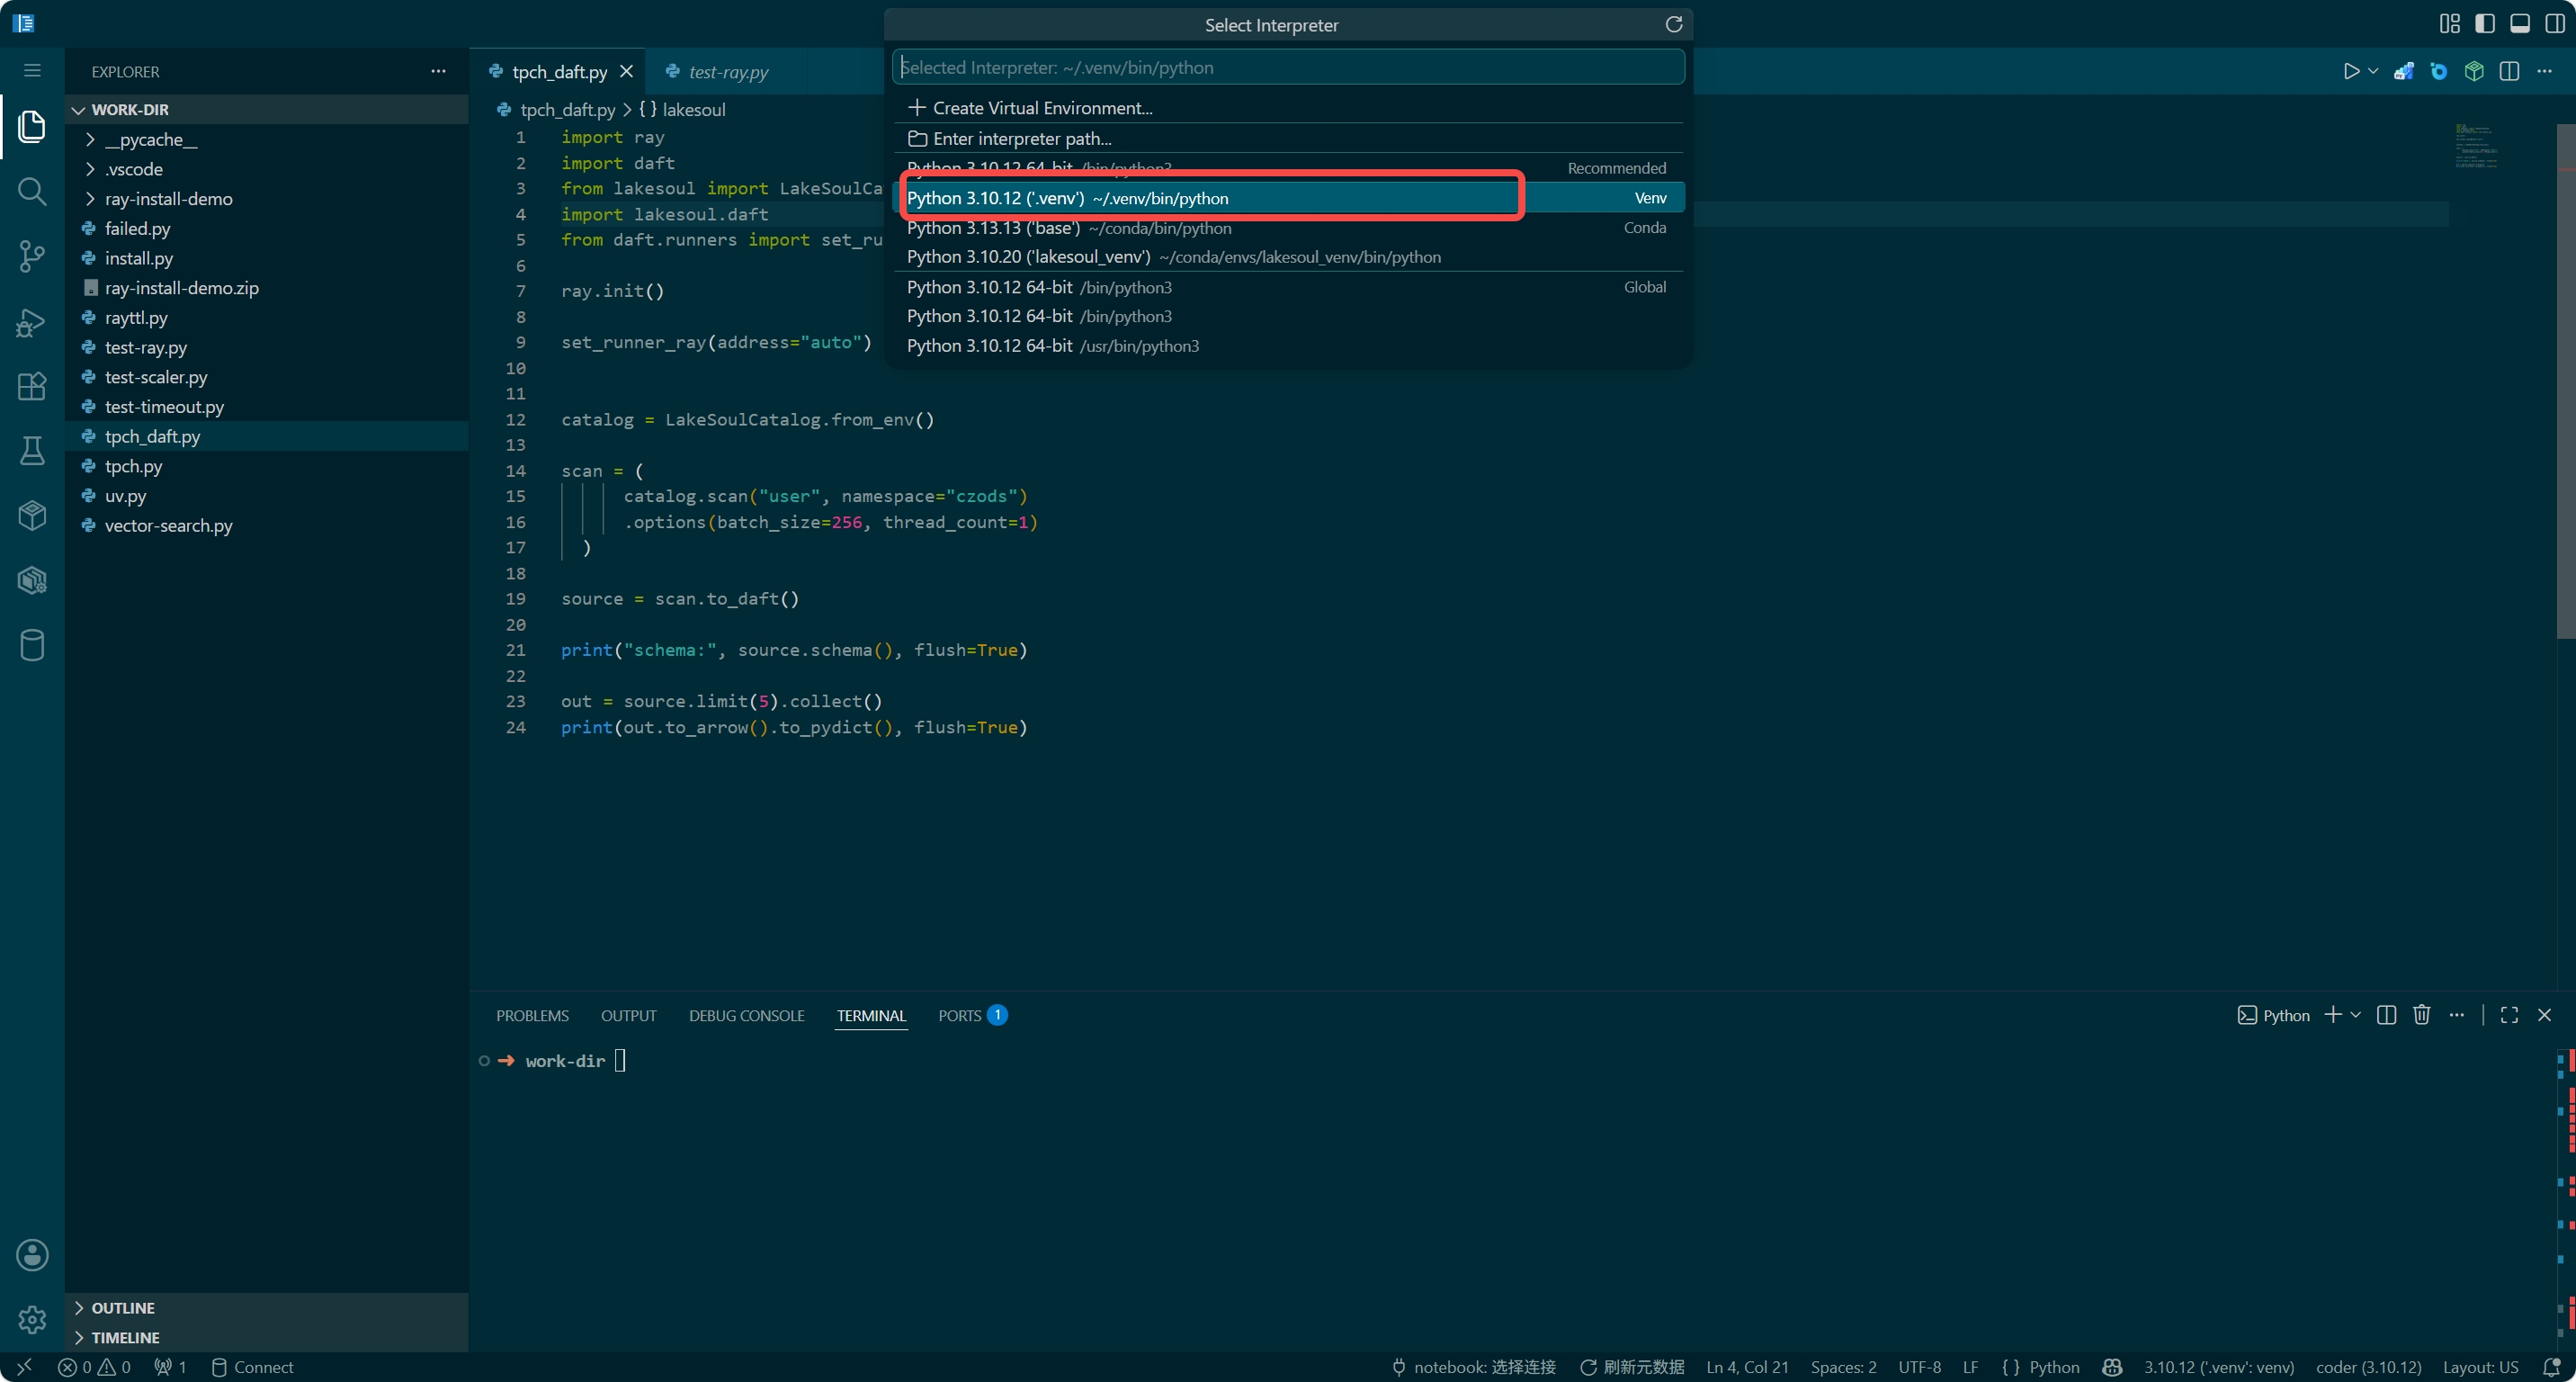
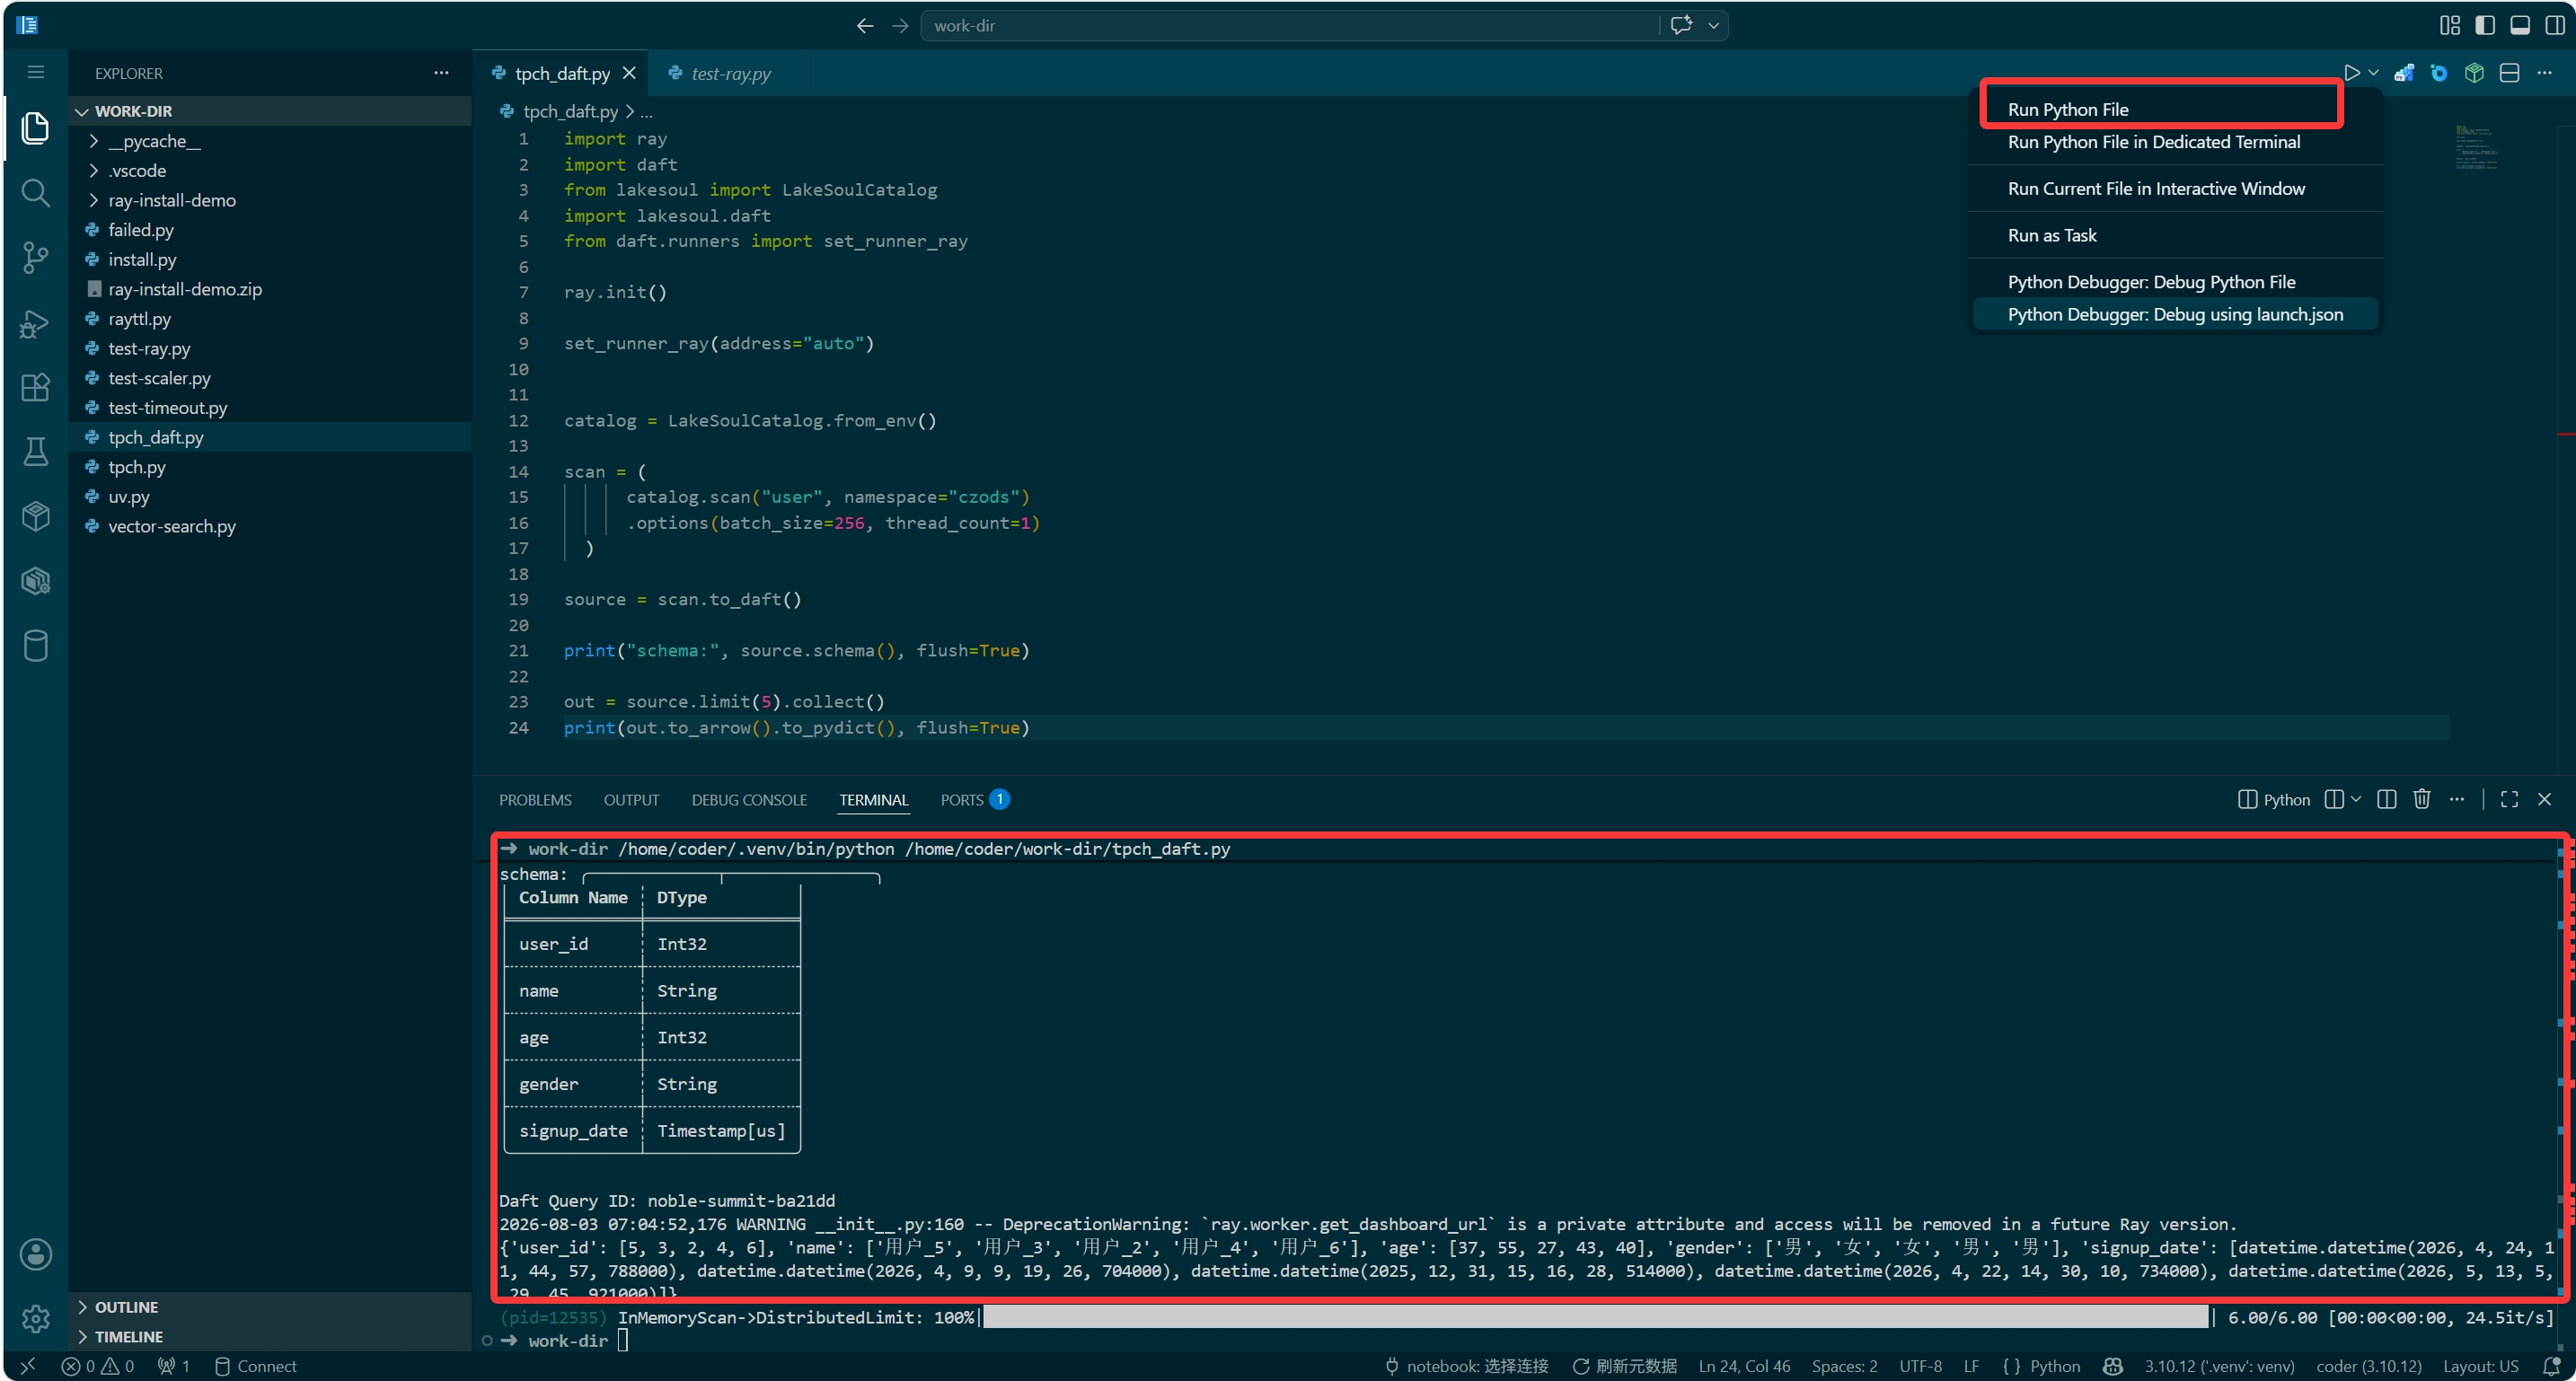
Click the Run button in the top right, select Run Python File to execute the current Python file and view the output in the terminal.
After code verification, click the Task Configuration button in the top right, select the Ray Job task type, and complete the configuration.
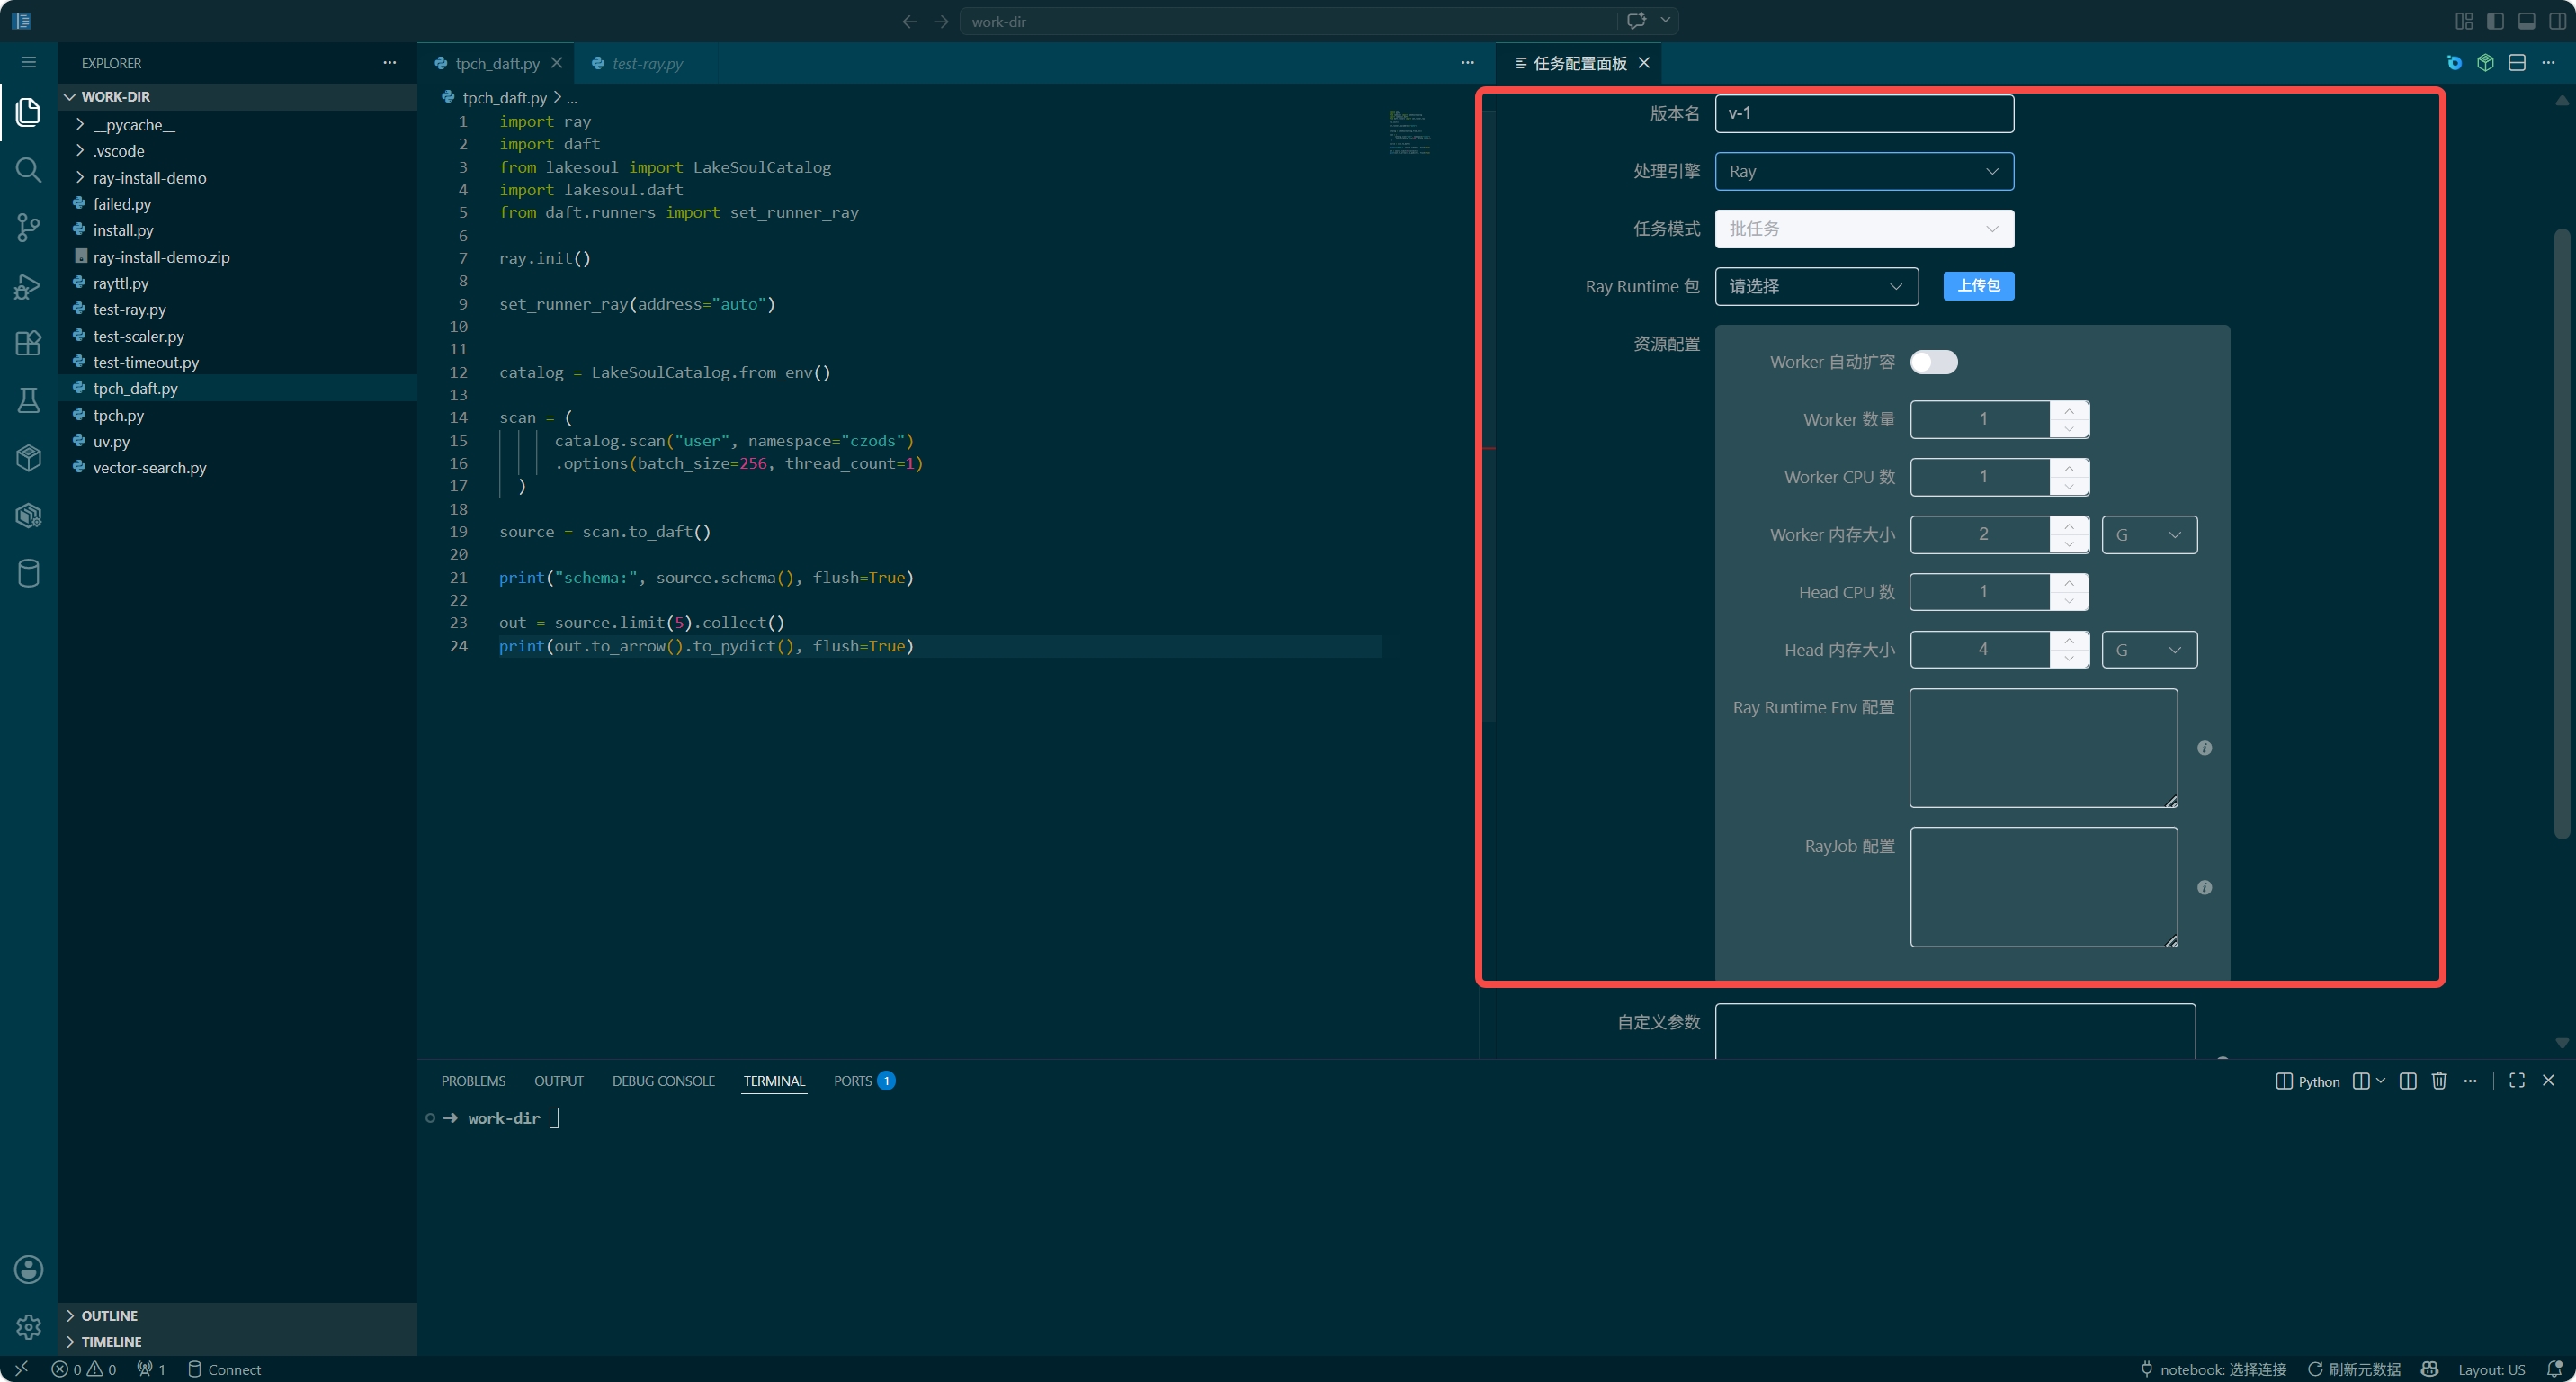
Ray Job task configuration notes:
- Ray Runtime Package: Optional. Used to upload project files or additional dependency packages required at runtime. The Ray Runtime image comes with Ray, Daft, and LakeSoul pre-installed, so there is no need to upload a Conda environment like Python tasks.
- Worker Autoscaling: When disabled, a fixed number of Workers is created based on the Worker count; when enabled, the cluster autoscales based on task load, with the maximum Worker count limiting the scale-up.
- Worker CPU / Worker Memory: CPU and memory resources for each Worker Pod.
- Head CPU / Head Memory: CPU and memory resources for the Ray Head Pod.
- Ray Runtime Env Configuration: Fill in the Ray Runtime Env YAML to configure additional Python dependencies and environment variables.
working_diris generated automatically by the platform and cannot be overridden;excludesis used to exclude files in the uploaded package.
For example:
pip:
  - pendulum==3.0.0
env_vars:
  MY_ENV: test
excludes:
  - .venv/
  - __pycache__/
  - "*.log"
- RayJob Configuration: Fill in the native RayJob YAML configuration. Currently supported fields include
activeDeadlineSeconds,preRunningDeadlineSeconds,ttlSecondsAfterFinished,shutdownAfterJobFinishes,backoffLimit, andsubmitterConfig.
Click Publish to submit the task to Production Tasks - Publish Approval. After approval, the task can go live.
When developing Ray Job batch scheduling tasks, use --scheduleTime to obtain the current task's schedule timestamp, same as Python tasks.